handyman
-
Posts
15 -
Joined
-
Last visited
Content Type
Profiles
Forums
Events
Store
Gallery
Community Map
Everything posted by handyman
-
Piston to bore clearance... seems tight...
handyman replied to handyman's topic in Old Motorbikes, Projects and Restorations
Thanks for the input guys. Did some more practicing with the Telescopic bore gauges and micrometer today. Turns out you need quite a light touch with the bore gauges to get a true reading, it's easy to measure short. I found it's best to hold it at a little angle, lightly nip the lock, find the widest point with a little side to side 'shimmy' and rotate until perfectly level. Nip the lock a tad more and lift out at an angle again. This gave me slight higher readings than I had before, and now I'm very happy with the clearance as it's gone up from 0.013mm to a better 0.023mm, bang in the middle of the specs. Ring gaps all good to go too. It's my birthday tomorrow and since I rarely work on by birthday, I can't think of a better way to get the birthday started than to have a go at getting the engine back together Cheers all. p.s here are the specs from the manual if anyone else is reading this to build a CB125F engine...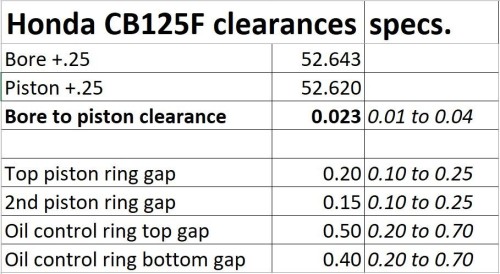
-
Piston to bore clearance... seems tight...
handyman replied to handyman's topic in Old Motorbikes, Projects and Restorations
Thanks for that. Locally I could only find the telescoping type bore gauges. They and the micrometer are new (bought specially for this job), it came with a 50mm setting bar and it looks spot on. I'm going to triple check it all again tomorrow, including measuring all the ring gaps. Hopefully then I can put this to bed, and just put the engine back together -
Piston to bore clearance... seems tight...
handyman replied to handyman's topic in Old Motorbikes, Projects and Restorations
Yes, that is mostly the reason for leaving it. They are about mid way, but I'll measure them all again later and write them down. One guy said that although it seems a little clearance (0.01mm), to not forget that it is not just the piston which expands in use, but the cylinder expands too, so the clearances can be tight as they will expand and contract somewhat together... Thanks for chipping in -
Piston to bore clearance... seems tight...
handyman replied to handyman's topic in Old Motorbikes, Projects and Restorations
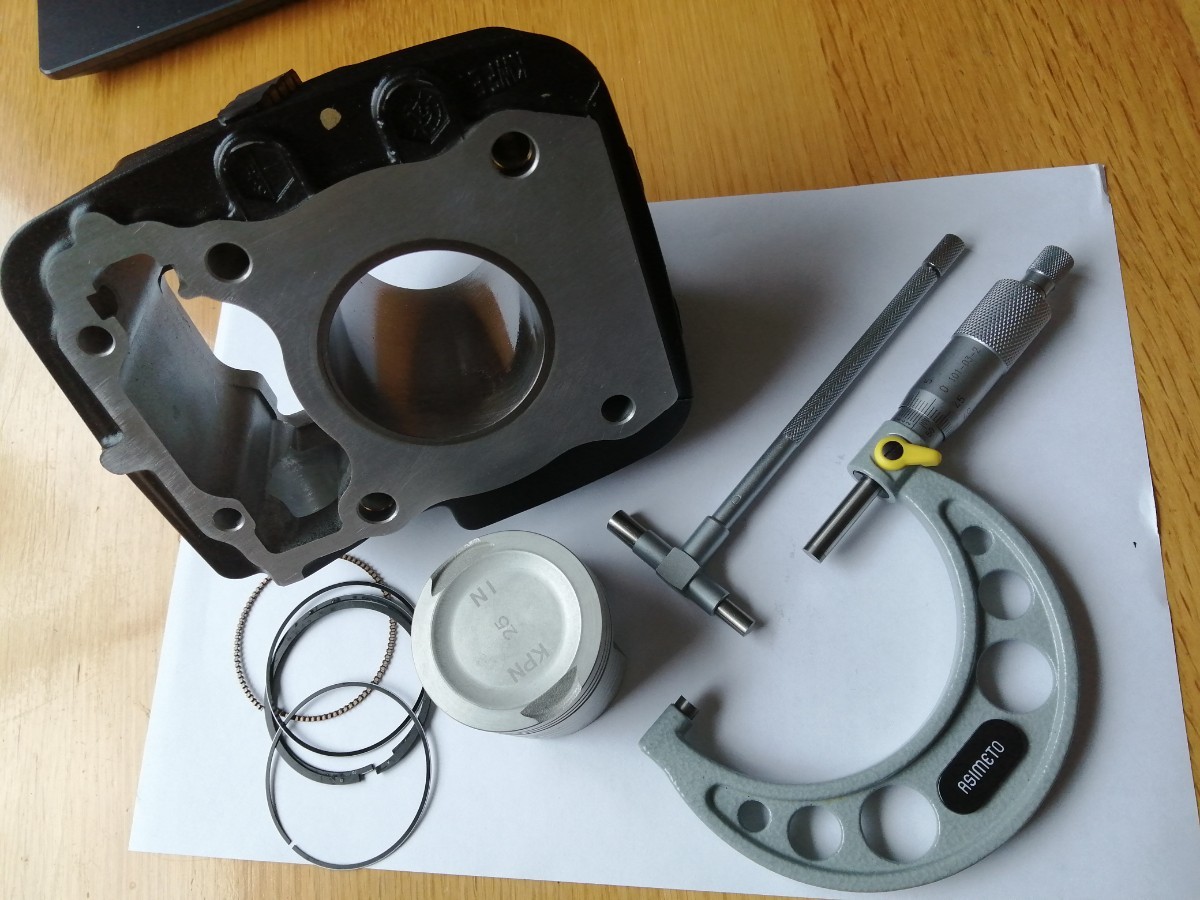
That's my thought also. Hence being a little nervous that the lower limit is 0.010mm and I have, to the best of my measuring capability, 0.013mm. The piston is tiny, only 52mm and some change across... I have the measuring tools I posted in the pic. so I'm quite confident in the numbers. It is just deciding whether I should use a cylinder hone to eke out a little more and head away from that bottom limit into the mid ground somewhere around 0.025... (0.010mm to 0.040mm is the 'standard range'). -
Piston to bore clearance... seems tight...
handyman replied to handyman's topic in Old Motorbikes, Projects and Restorations
Lol! That's definitely me then, I must have measured a hundred times I could not get the same reading each time, always different by a few thousandths of a mm. Especially on the tapered piston I wish I could have afforded a dial bore gauge, way better than measuring the T gauges with the micrometer... Hey ho, happy weekend all -
Piston to bore clearance... seems tight...
handyman replied to handyman's topic in Old Motorbikes, Projects and Restorations
Kind of. There are not many guys doing this kind of work around here and he wasn't the more clued up guy I don't think... I was just hoping to find out what an engineer would do when given a range to fall into. Do you aim for the lower, middle etc. I hate it when this happens, I get this in construction a lot too. Why not just give an exact figure with maybe a plus or minus tolerance either side? -
Hmm, just been trying to accurately measure the cylinder bore after machining and the size of the piston skirt. It's not as easy as it looks on YouTube! Since the piston is slightly tapered and the book says measure 5mm up from the bottom of the skirt I was getting slightly different readings every time. Same in the bore, the T bore gauges are tricky to get exactly right, but I managed in the end (with a little tilt and side to side wiggle to find the exact centre before levelling up) and I now get consistent readings (within 3 or 4 thousands of a mm). So, now I've got some good-ish readings I've taken one from the other and I'm left with 0.013 (or about half a thou' in old money). Specs in the book say "standard is 0.010mm to 0.040mm with a service limit of 0.10mm" (0.4 to about 4 thou'). So, my question for any engineers out there is, I'm very close to the lower/tighter limit, would you hone a tad more out to bring the measurements closer to the mid point in the specs, or leave it as it is? Ta muchly, and incidentally, the ring gaps are pretty much in the middle of the specs as it is... Cheers Ian p.s. the lubed piston slides to the bottom of the cylinder a treat if that means anything lol!

-
I recon the vehicles own technology will be used in the not so distant future. Lets face it, a modern vehicle knows exactly where it is via GPS and what speed it's doing (measuring time over distance in addition to the speedo). It's not much of a stretch to imagine the ECU implementing a restriction when it senses you're near a school for example. In Sweden they had a pilot where the throttle vibrated under your foot if you were speeding in a car.
-
Yes, a pair of circlips. It pushes in manually with my thumb in the cold garage, so I think it's okay... I've seen Allen Millyard do that, heating up the pistons in his trusty BBQ before fitting the cold pins lol!
-
Well, I just did a bit more reading around and it seems that the gudgeon pin or wrist pin as some call it, should be "thumb tight". Obviously a very technical term lol! Reminds me of my dad, he used to say it was a 'feel', you just knew when it was right, as an engineer. So I'll have another look tomorrow, but this has set my mind at rest as I'm fairly confident it is okay. Also read that the clearance will increase as the piston gets hot, which is something I hadn't thought about. Cheers guys, was good to write about this to get the grey matter working Have a great weekend
-
Supercubs are an icon! I know I'm getting older, but I reached a point where I just wanted a little bike to run around on, errands and the like. Something light, and very easy to ride. This 125 came up cheap and I thought why not? I was looking for a 250, sadly not many around these days since nearly everyone went horsepower crazy. I don't know about the roads where you are but here, speeding is getting pretty close to drink driving in the "public enemy No. 1" stakes around here...
-
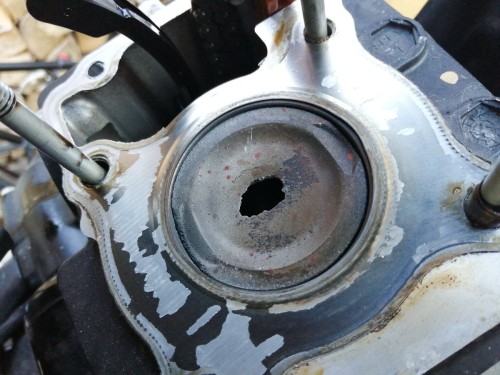
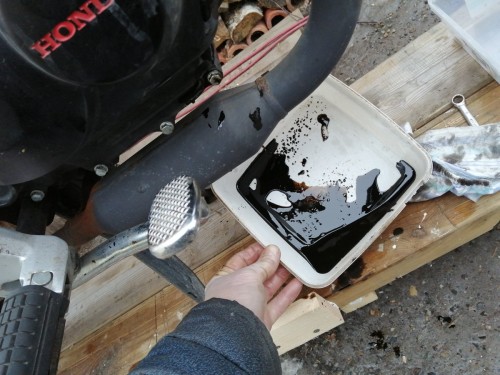
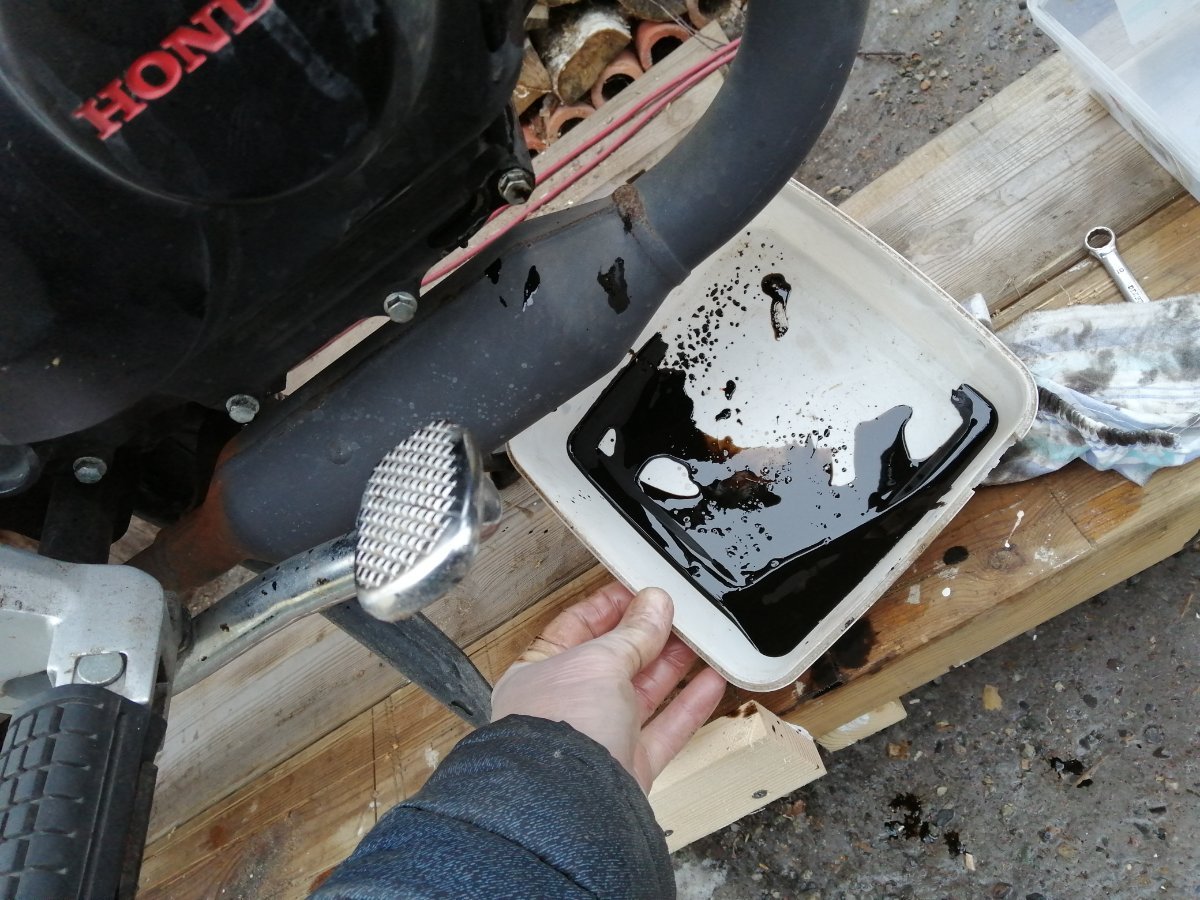
Gosh yes, especially the CB125F which have legendary reliability status if kept full of oil. I'm still gobsmacked when I look at A, how bad the oil looked and B, how very little of it there was and C, just how good it was inside considering A+B lol! Worst of all, this 17 year old kid had blown up this bike and his parents just bought him a new Yamaha MT125 to replace it... shocking. I know what I'd have got if I'd blown up anything as a kid, let alone a brand new bike...
-
Yes, I think it is okay, definitely no play. I think I was just confused for a minute, thinking it doesn't rotate very easily. But it doesn't have to, it pushes in quite easily by hand so...
-
I guess that's what I need to find out. I'm thinking yes, and now I've had time to think about it, the pin doesn't need to rotate 'easily' does it? It will only be going through a few degrees as the piston goes up and down. Totally different to the big end which rotates fully.
-
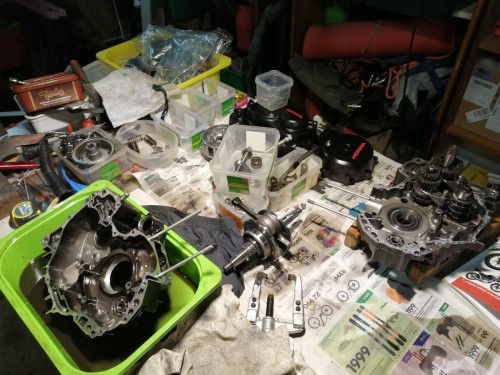
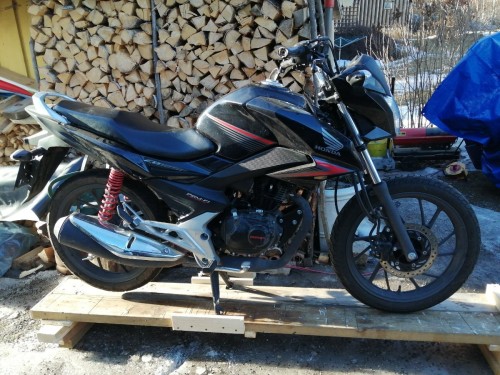
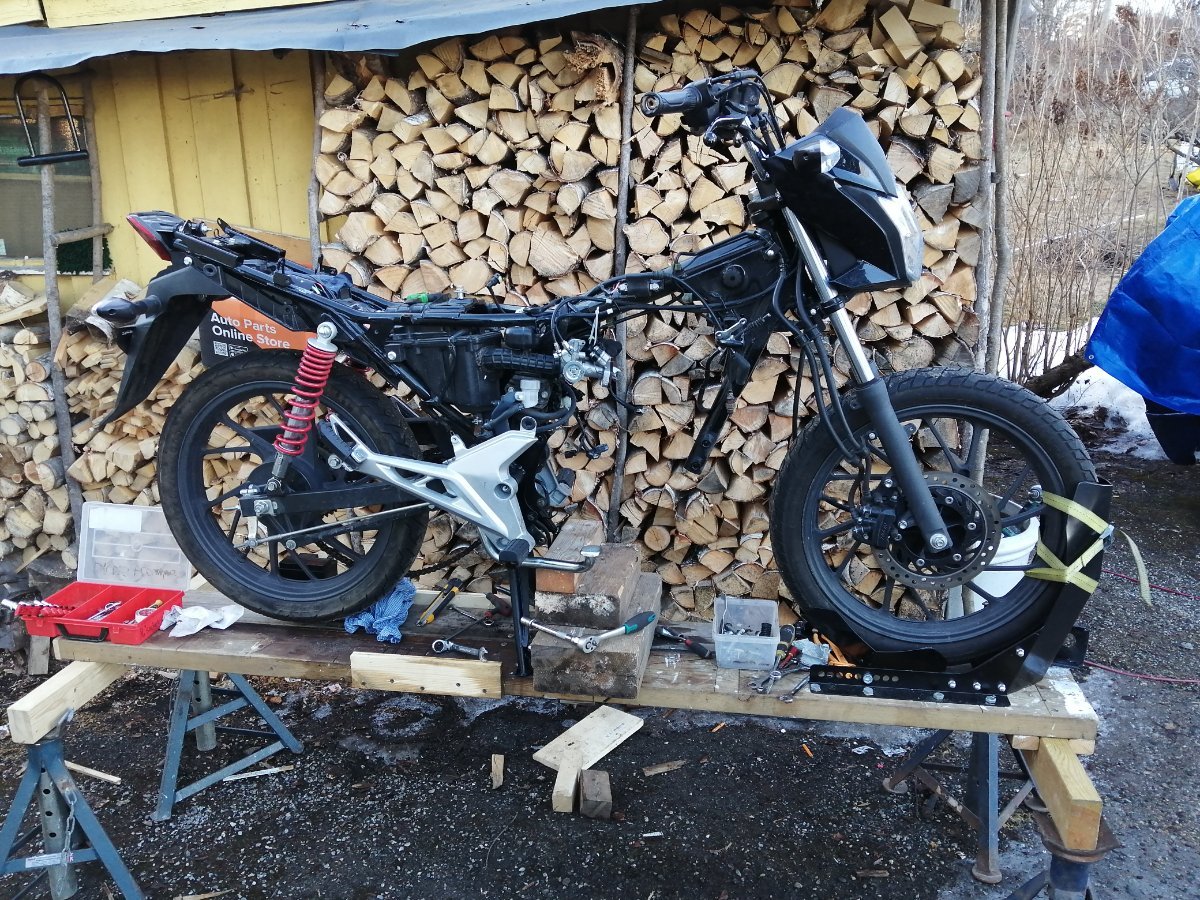
Hiya, Current project is a little 2020 Honda CB125F, after the previous owner slid it into a ditch and then ran it till it would run no more... (i.e. 'Oh, I didn't know you had to put oil in it' kind of deal) Picked it up super cheap after the local bike shop quoted 1500GBP to fix it... The engine is currently in about a hundred bits on the bench, the cylinder is away to be over bored +0.25mm and whilst I'm waiting I've de-plasticed the bike and removed all the 'old' clunky lookin' lights etc. My aim is to make a little retro-ish looking street/scrambler-esc bike, for local pootling around, down to the harbour and back, or picking up parts kind of thing. Now it's a testimony to Honda that all the bearings are okay, big end is okay, all gears etc. are good. All were full of tiny fragments of piston and I flushed gallons (well, one gallon, repeatedly filtered back into the sprayer!) of diesel and compressed air through them till they sang as free as a bird. Oil pump back plate was scored but rotors survived. Tried flushing without splitting the crankcase but I was uncomfortable with that and I was very glad I decided to do it properly. On disassembly, I found lots of little chunks of piston in several places as well as 'gritty' bearings and oilways. My big worry was the little end as the old pin was damaged. The new pin came today and after carefully cleaning out the little end with 2000g wet and dry and oil, the new pin goes in and rotates as solid as you like, zero detectable play. BUT, that's my question (eventually!), how tight should it be? I was expecting it to be a tad easier to turn than it is. And if it does need to be 'free', what's the best way to remove said miniscule amount of metal inside the little end? I don't have access to a lathe etc. Should I just continue with the 2000g W&D wrapped around a 12mm drill bit or is that too crude? I really need to not screw the little end up, as the conrods are not available, you have to buy the whole crank assy. at 350GBP Cheers and ta muchly...