Hairsy
-
Posts
411 -
Joined
-
Last visited
-
Days Won
7
Content Type
Profiles
Forums
Events
Store
Gallery
Community Map
Everything posted by Hairsy
-

CBR600 F3 1998 - amateur restoration
Hairsy replied to Hairsy's topic in Old Motorbikes, Projects and Restorations
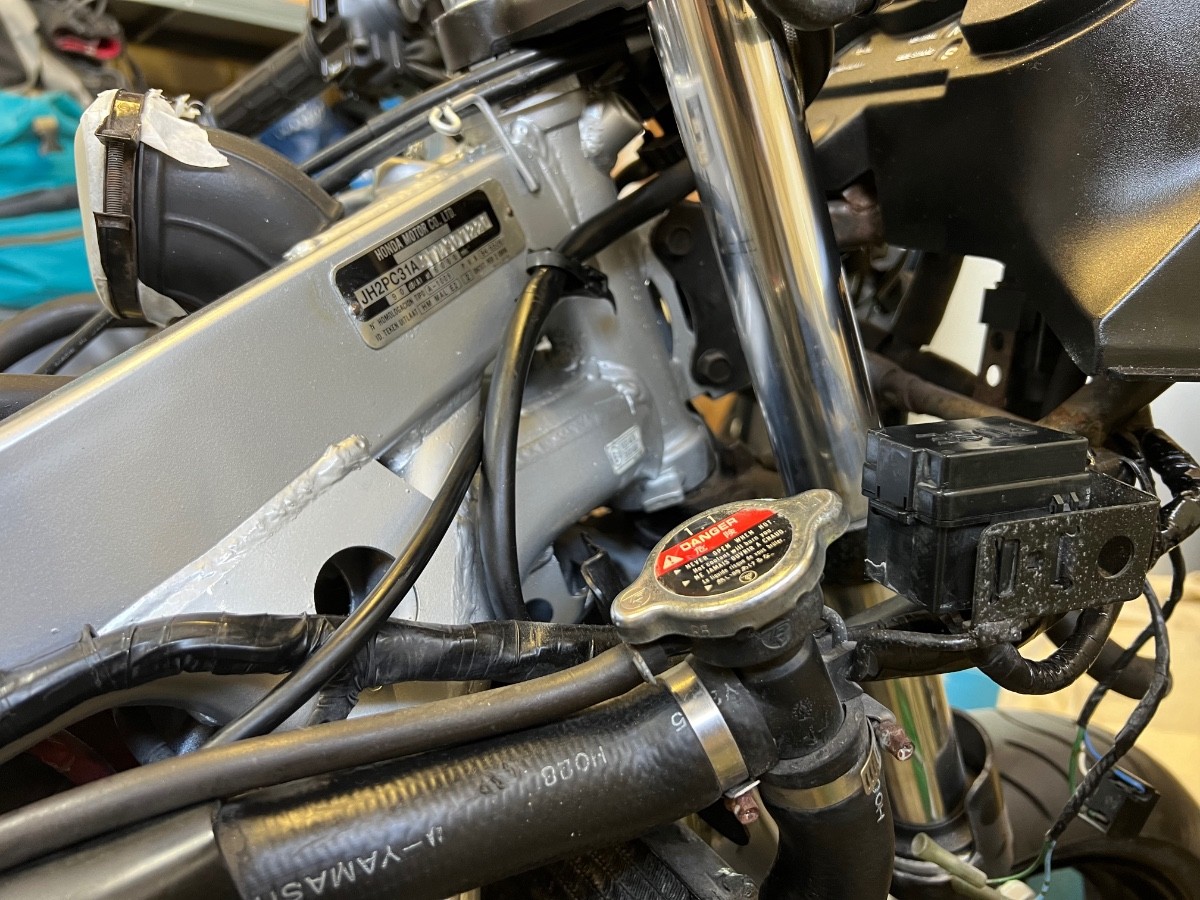
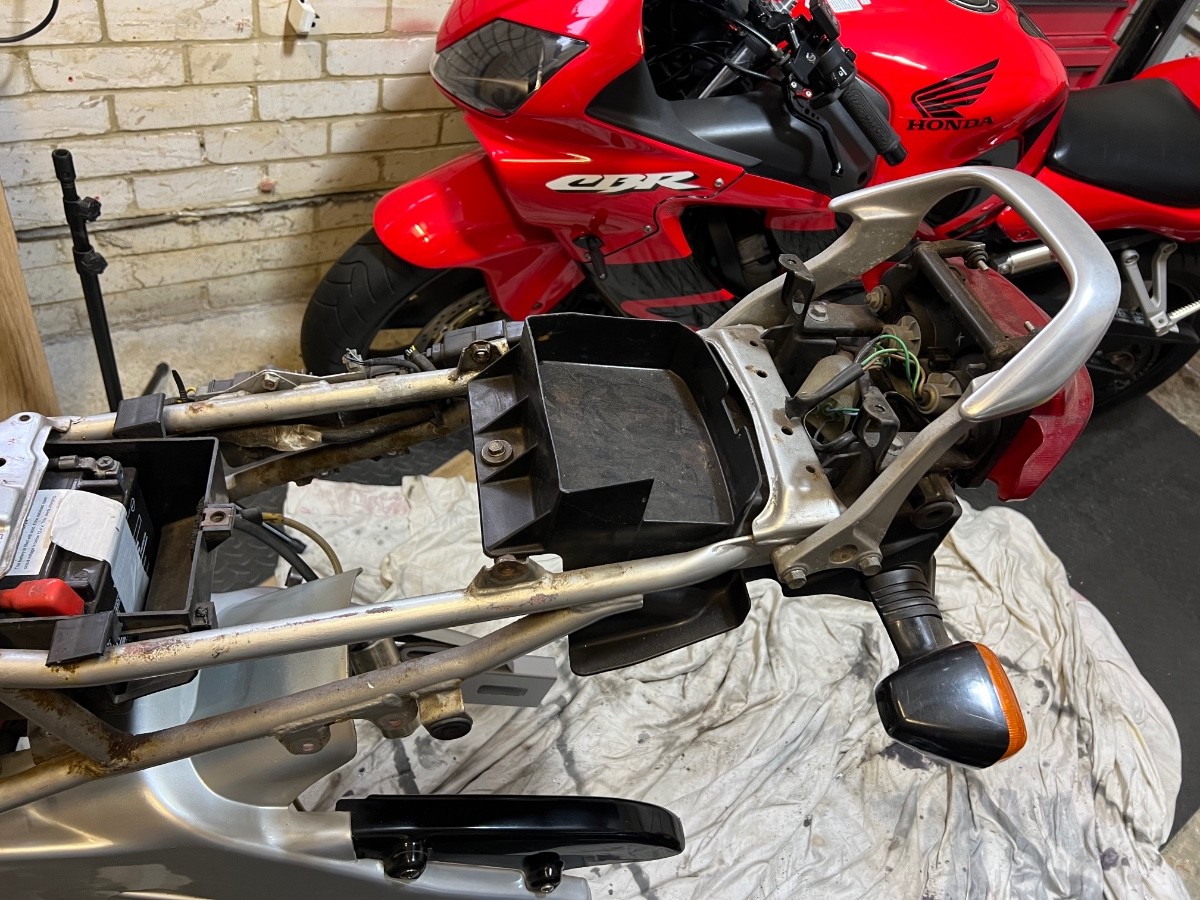
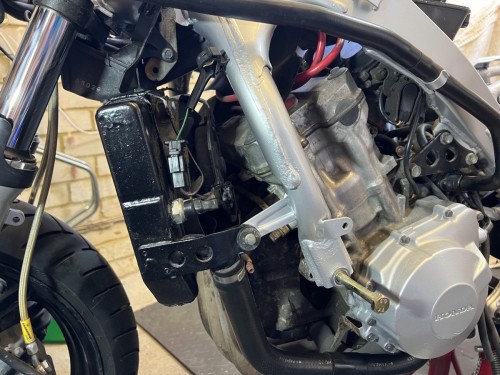
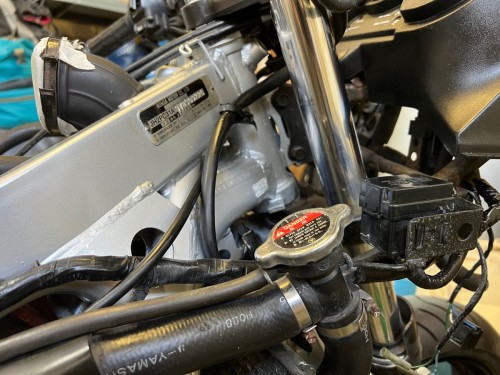
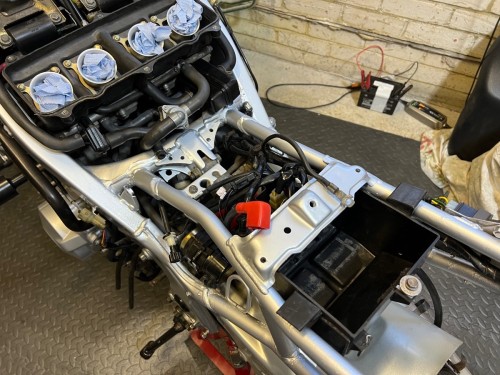
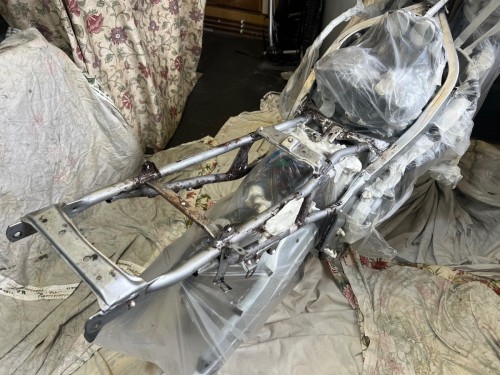
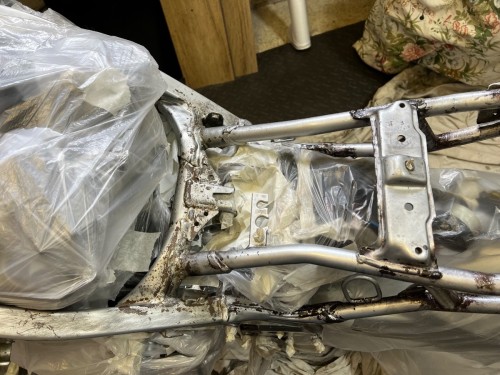
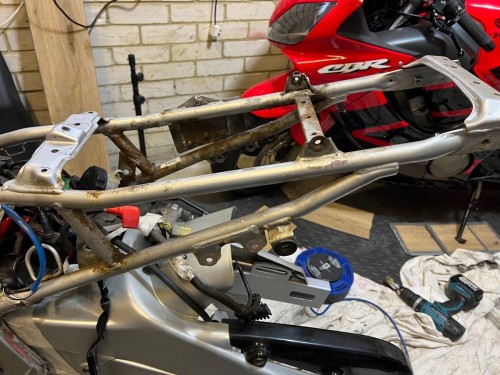
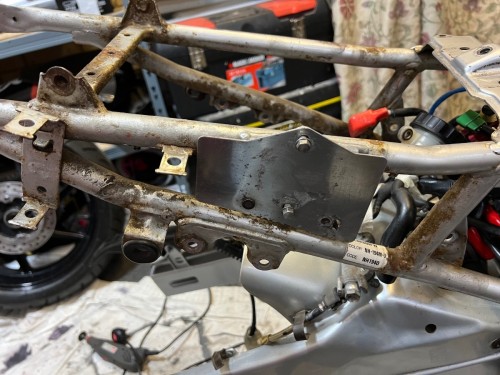
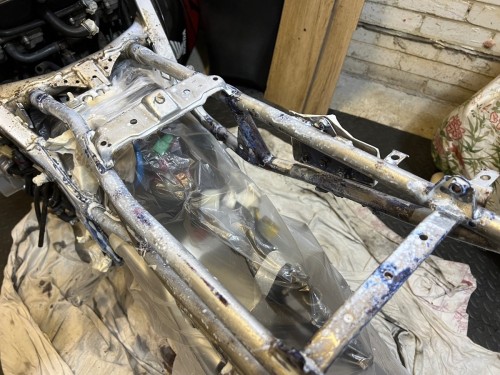
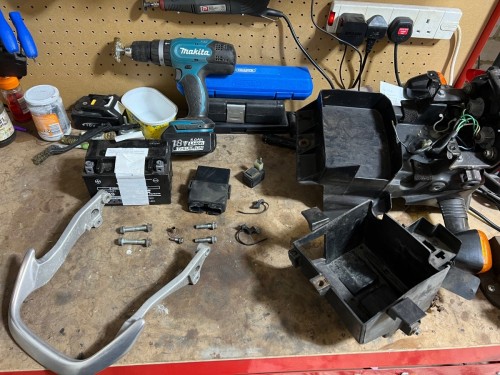
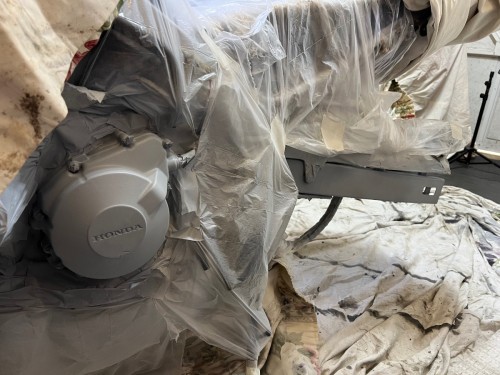
A great day today. Pulled off the masking tape and plastic and was fairly pleased that I appear to have done a reasonable job at avoiding overspray. A couple of hoses had hints of some spray but with a little bit of polish this came off. So it was straight on with starting to put the bike back together. As I fit each part, I'm checking the area for any bits of additional cleaning. With the frame looking so nice and the newly fitted parts all cleaned, any dirty bits still on the bike will stand out. So far, all this has needed is some Autoglym Trim & Bumper Gel on the hoses to bring them up nice and black plus giving the wiring loom a good clean. For the wiring, normally a damp cloth is enough but I'm using a bit of alcohol or brake cleaner if it needs something a little stronger. Every electrical connection is being sprayed with contact cleaner before it's put back together. Although there were no electrical problems, it's a 25 year old bike so some prevention is a good idea while I have the connectors apart anyway. Bolts are going back together so much more nicely than when they came apart. If I end up finding I've forgotten to connect something and have to take things apart again, it's going to be a total pleasure to disassemble again! The air feed hoses around the engine went back together nicely and I think they'd been fitted incorrectly before. They now look neater than they. The wiring loom is all back in place and I'm pleased to report that, with the photos I'd taken, I was able to remember how things should be fitted. The battery box is back in place, including the many loom connections that go through it. This wasn't difficult but was fiddly. I've fitted the tail with the rear lights and grab handle. Now that everything is so clean, little things really stand out. The heads of the tiny crosshead screws that hold the indicator lenses in place were rusty. So these were removed, cleaned up and treated with XCP before putting them back in place. It also gave me a chance to clean the inside of the indicator lenses - again, 25 years takes its toll and there was grime in there. They look great now. And a few pictures ... The next jobs will be fitting the rear wheel, adjusting and lubing the chain, fitting the rear brake caliper and the new pads. Then move on to refitting gear shift, foot rests and brake pedal - which will then allow me to bleed the rear brake and replace the fluid.

-
CBR600 F3 1998 - amateur restoration
Hairsy replied to Hairsy's topic in Old Motorbikes, Projects and Restorations
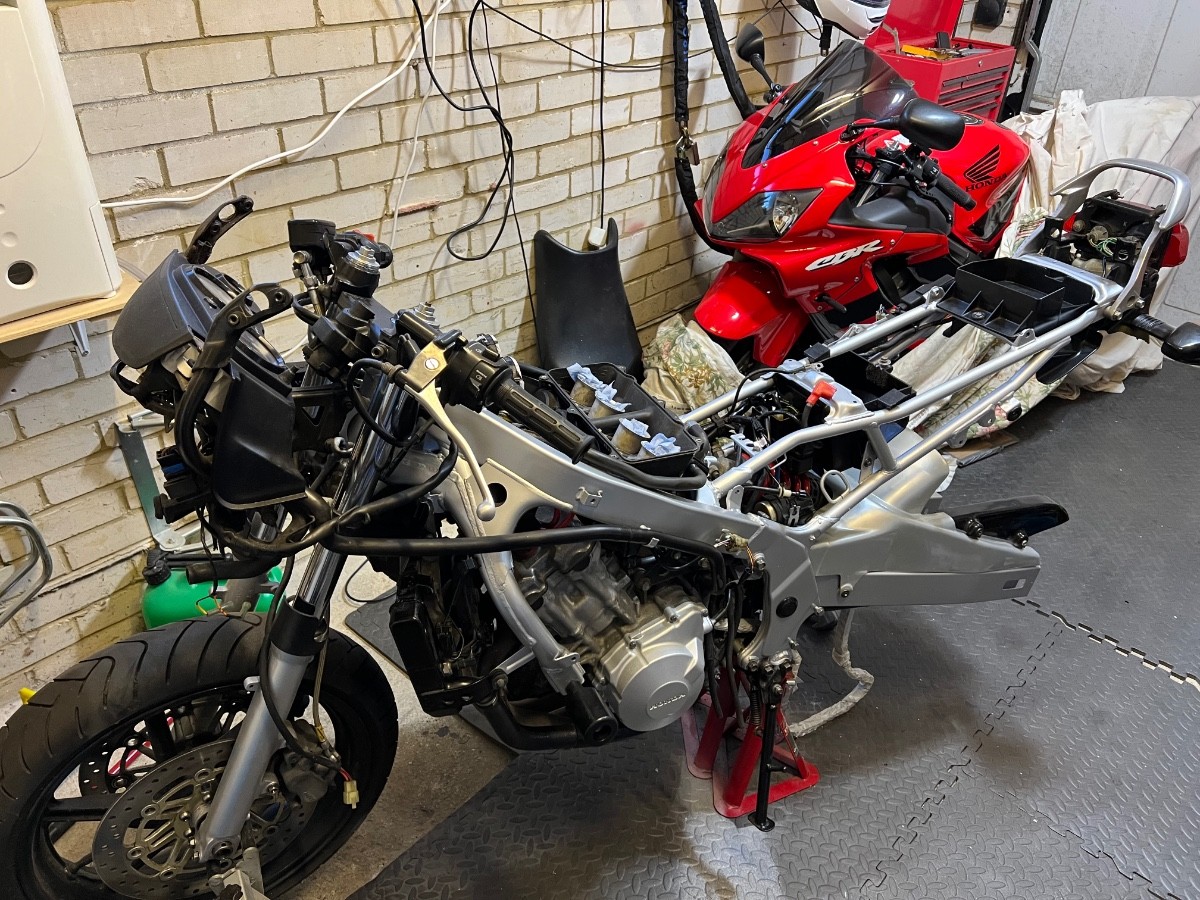
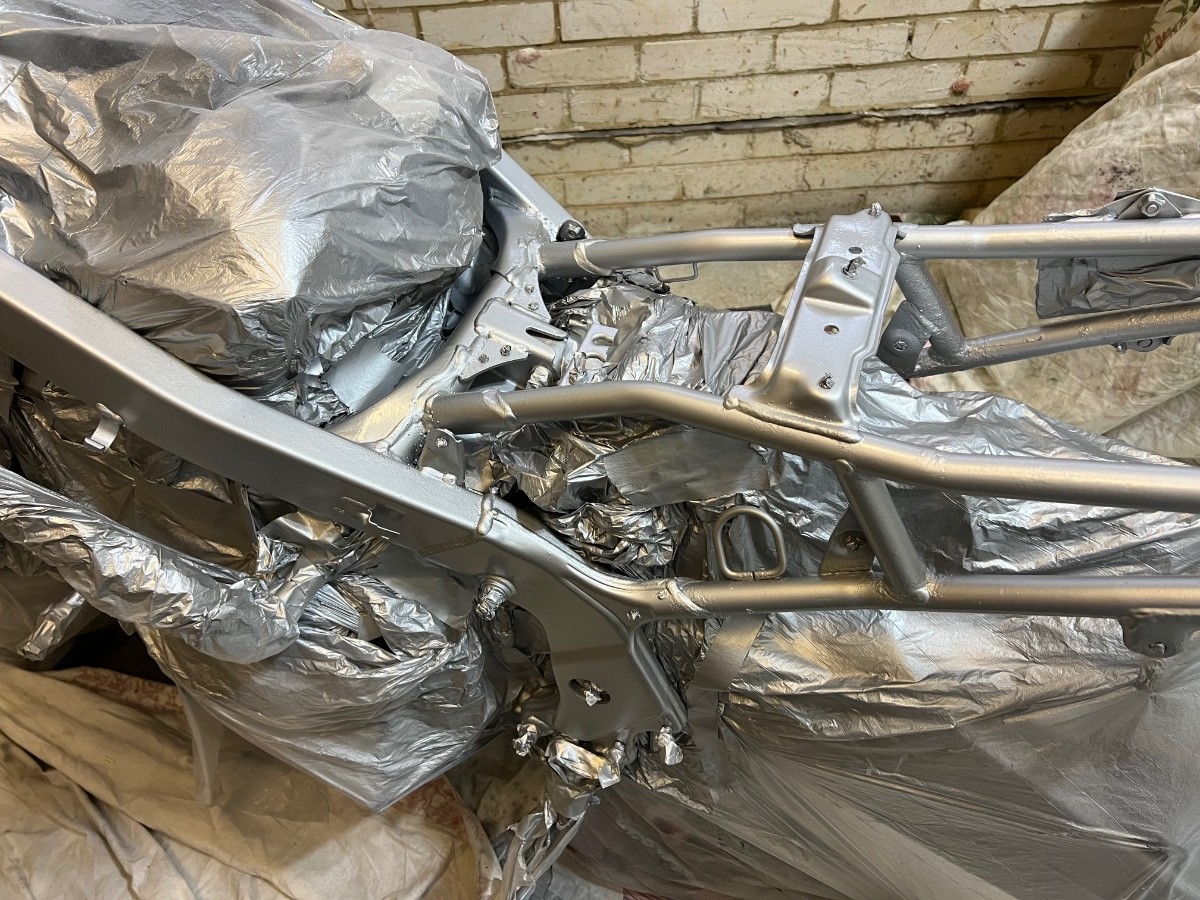
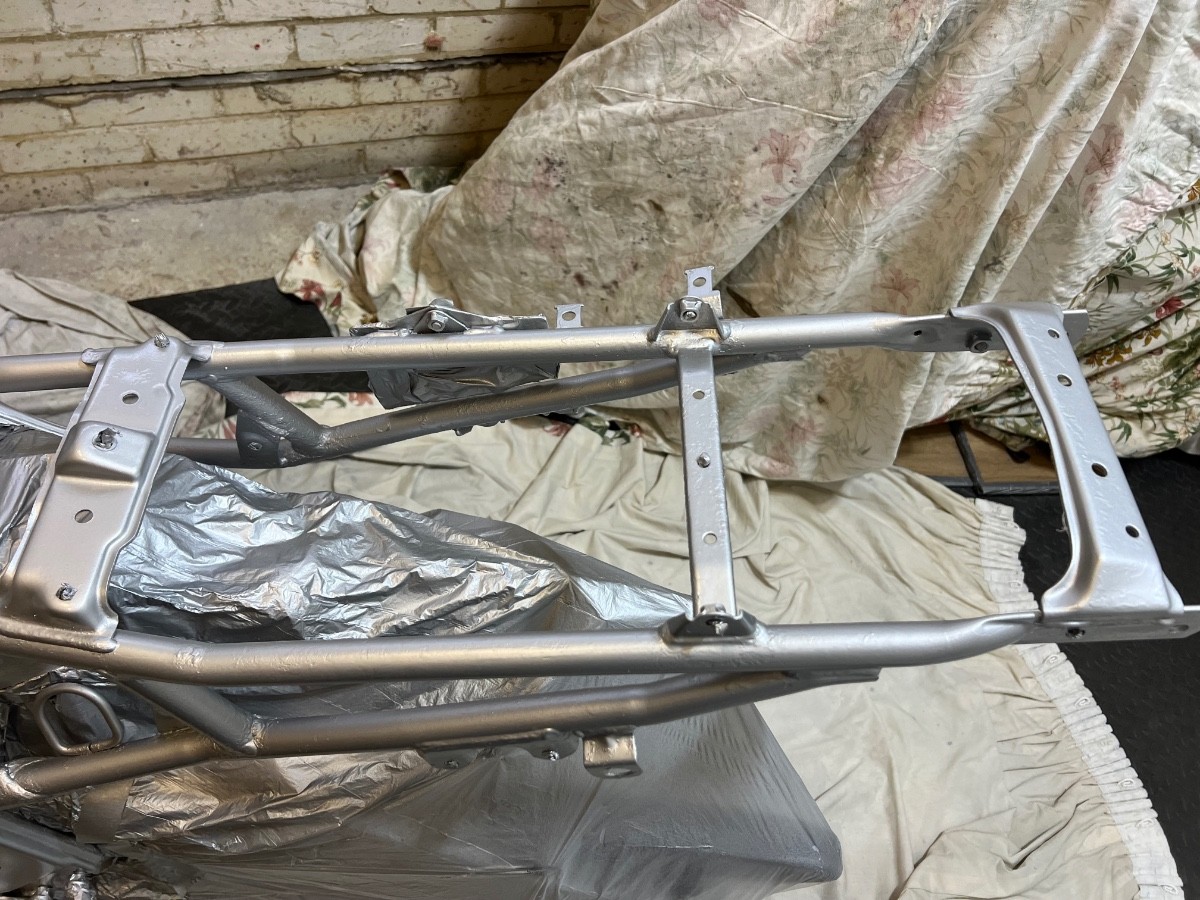
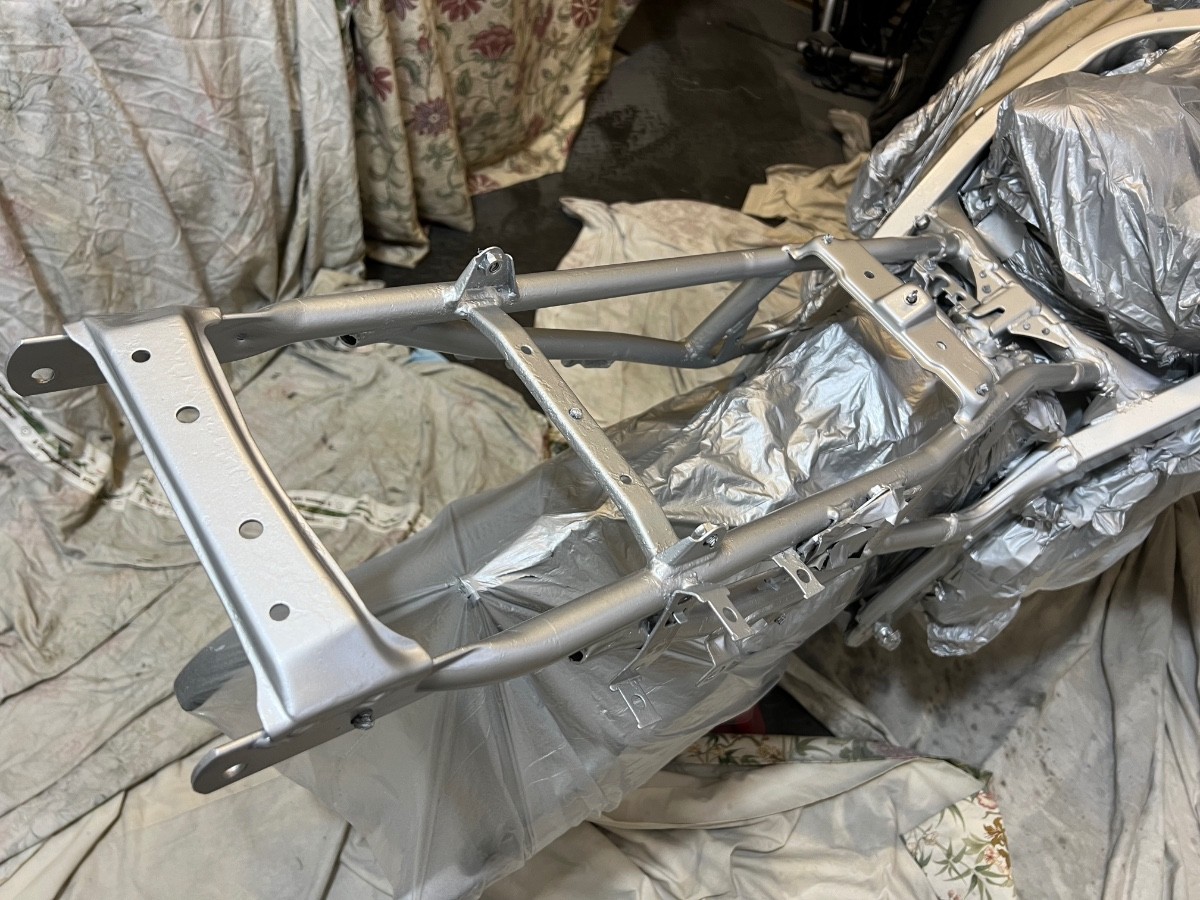
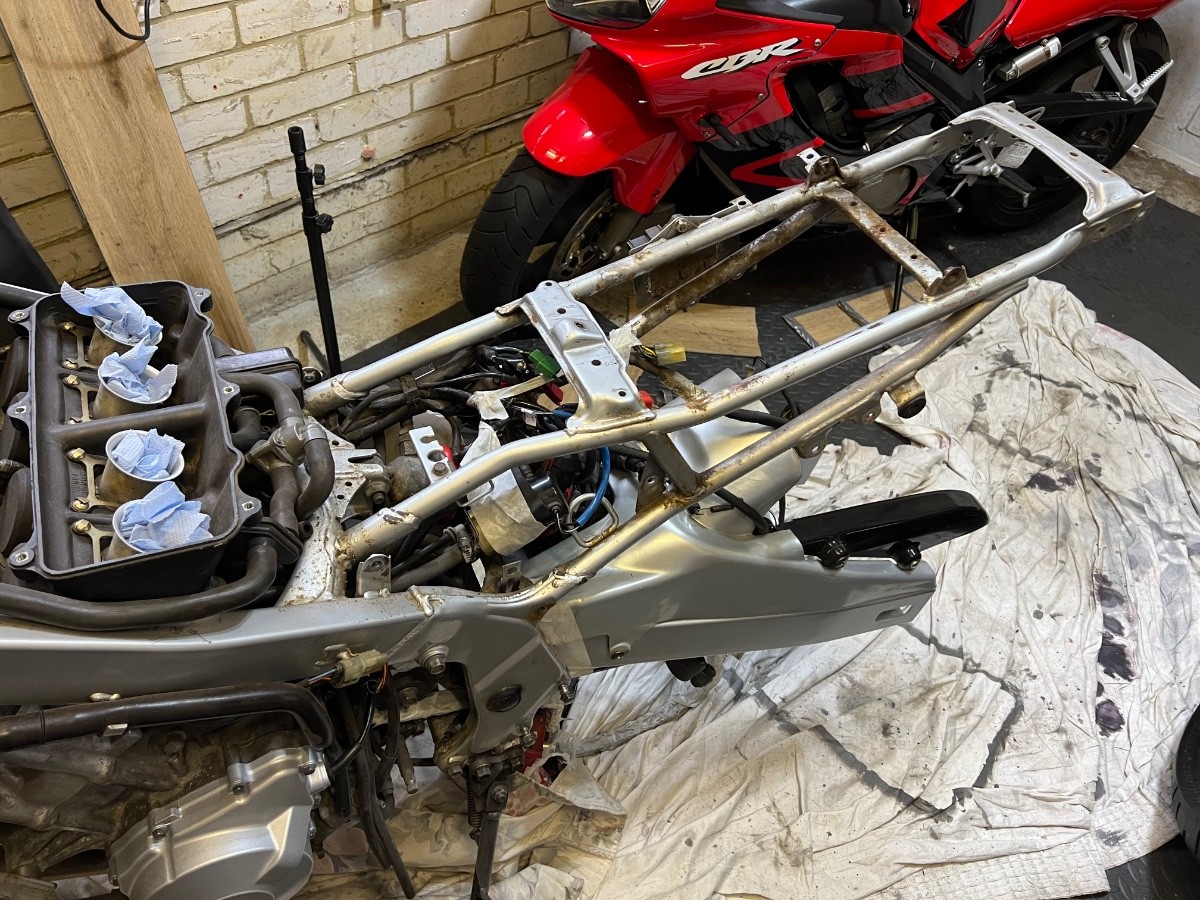
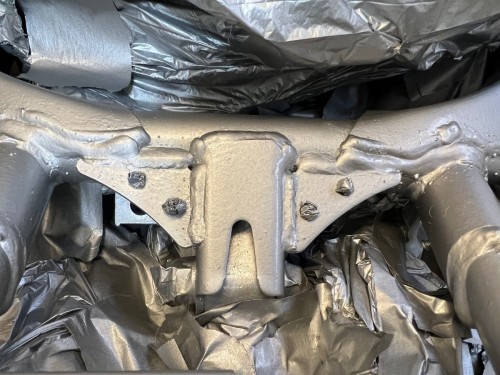
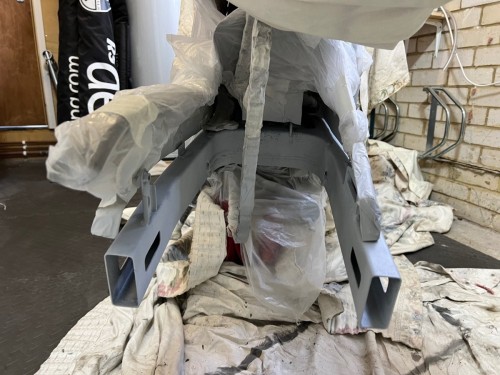
A milestone day - the frame is primed, painted and lacquered. Not really very much more to say at this stage - but the results are quite satisfying. Hopefully I'll start the build up tomorrow. Despite all temptations, this will be slow and methodical. All parts will get a final clean, be correctly torqued and will get a coat of XCP where appropriate. I'll also be replacing the brake fluid along the way. No rush though.


-
MOD1 AND MOD2 confused
Hairsy replied to Robcol's topic in CBT, Test and Advanced Training Information
From the DVLA website: When you do not need to take CBT You do not have to take CBT if you: - have a full motorcycle licence for one category and want to upgrade to another My interpretation would be that you don't need to take a CBT again. -
CBR600 F3 1998 - amateur restoration
Hairsy replied to Hairsy's topic in Old Motorbikes, Projects and Restorations
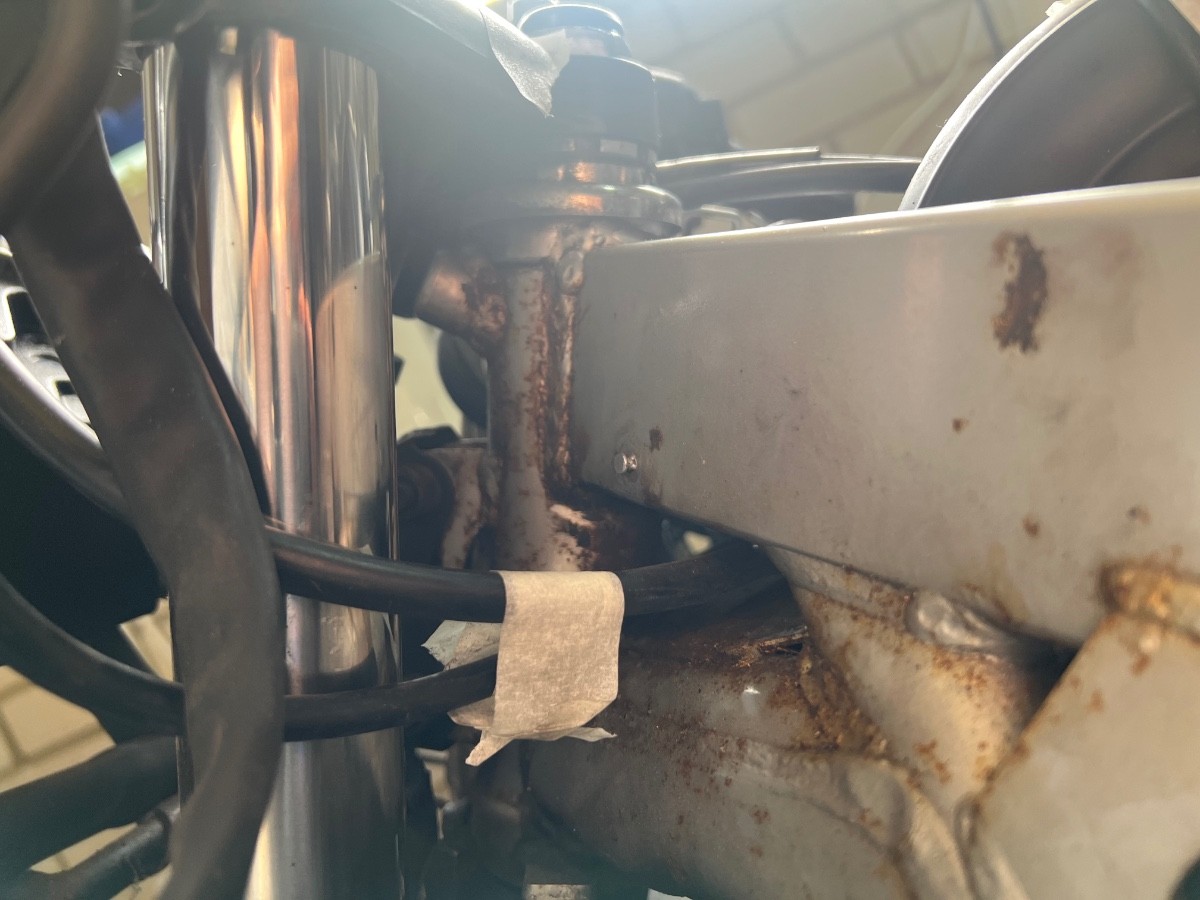
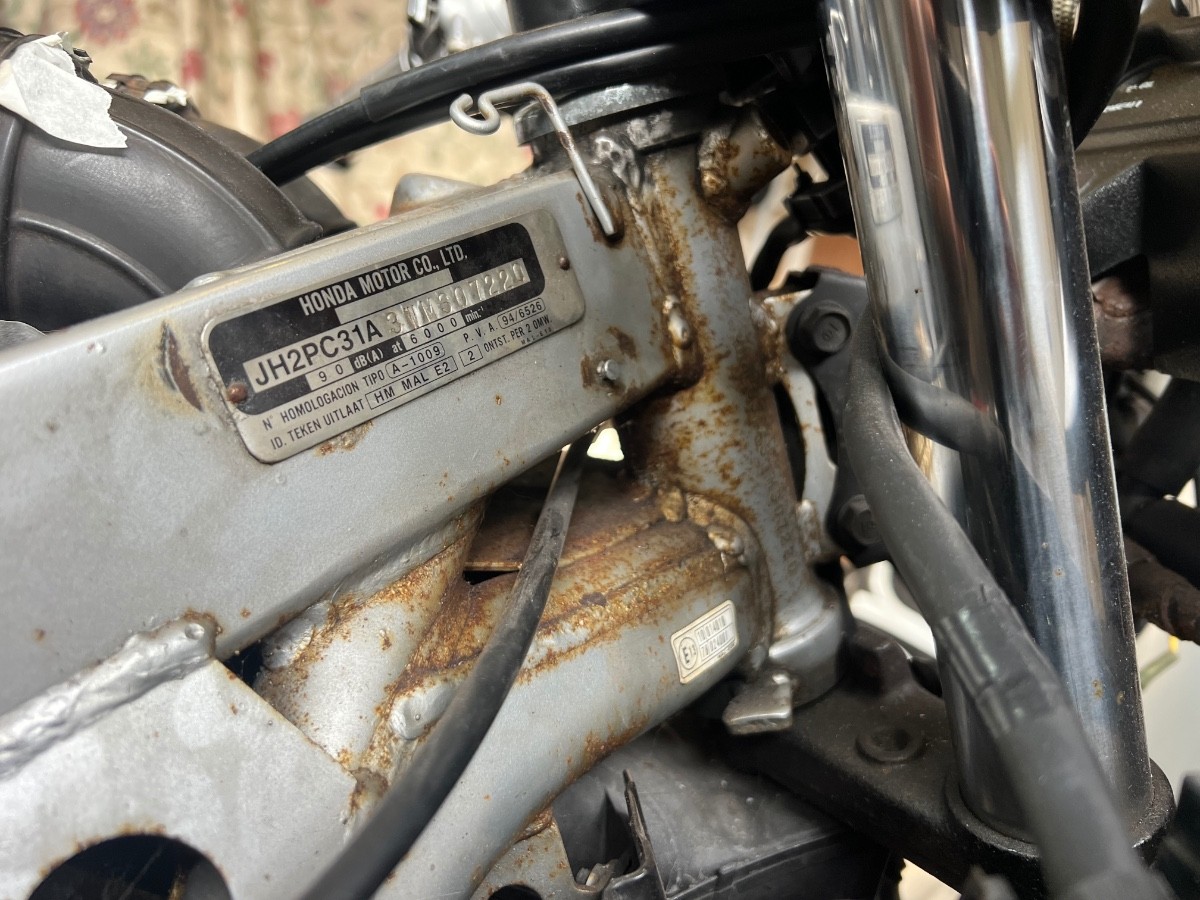
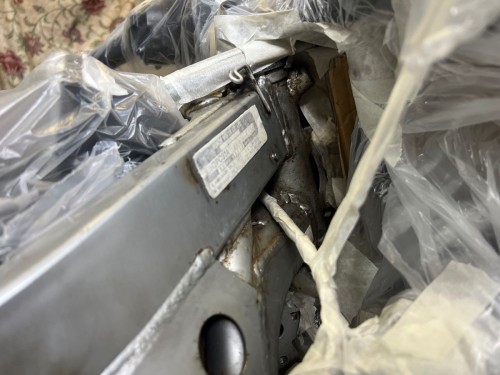
Wow! How jealous am I?! Thanks for the advice re reg/rec - really helpful. I've masked the mating surface of the mounting plate but I'll now mask the back as well - no point in adding paint to act as insulation. And when I remount it, I'll see if there's any scope to increase the size of the mating surfaces. -
Honda City express 1988
Hairsy replied to chris1456's topic in Old Motorbikes, Projects and Restorations
This one looks OK but has starting issues and ‘in need of tune up’. Which can mean a world of different things! But shows what a real bike made in less than great condition. https://www.ebay.co.uk/itm/325966261588?mkcid=16&mkevt=1&mkrid=711-127632-2357-0&ssspo=6nVwYzuHSui&sssrc=4429486&ssuid=zwc050N0R2i&var=&widget_ver=artemis&media=COPY If it helps, I’m doing something similar - restoring a bike that I’ll be selling and trying to avoid it costing more than I can sell it for. I’m hopeful that I won’t lose money but, either way, if you’re wired the same as me then the experience can be a positive one. -
CBR600 F3 1998 - amateur restoration
Hairsy replied to Hairsy's topic in Old Motorbikes, Projects and Restorations
It is actually already masked. I've just pushed it down so much that you can see through it. -
CBR600 F3 1998 - amateur restoration
Hairsy replied to Hairsy's topic in Old Motorbikes, Projects and Restorations
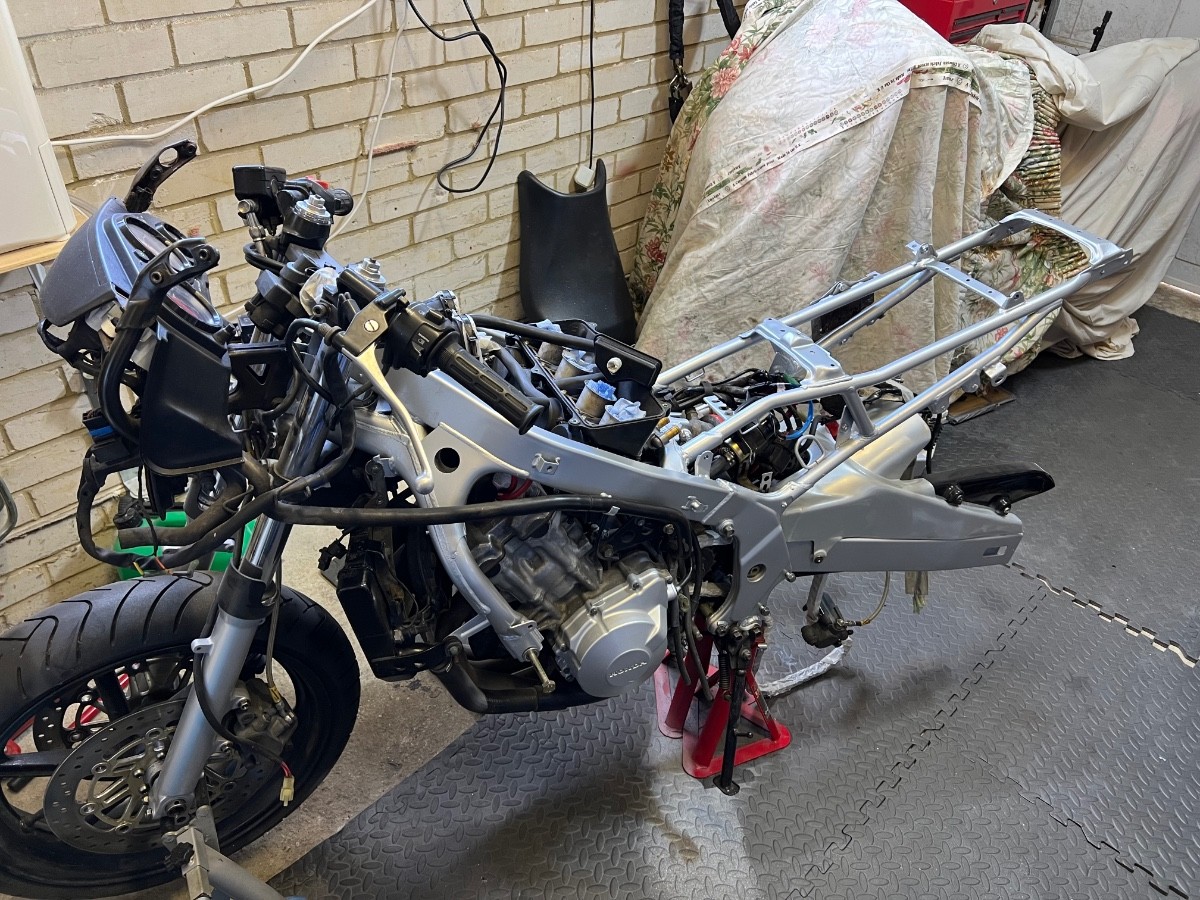
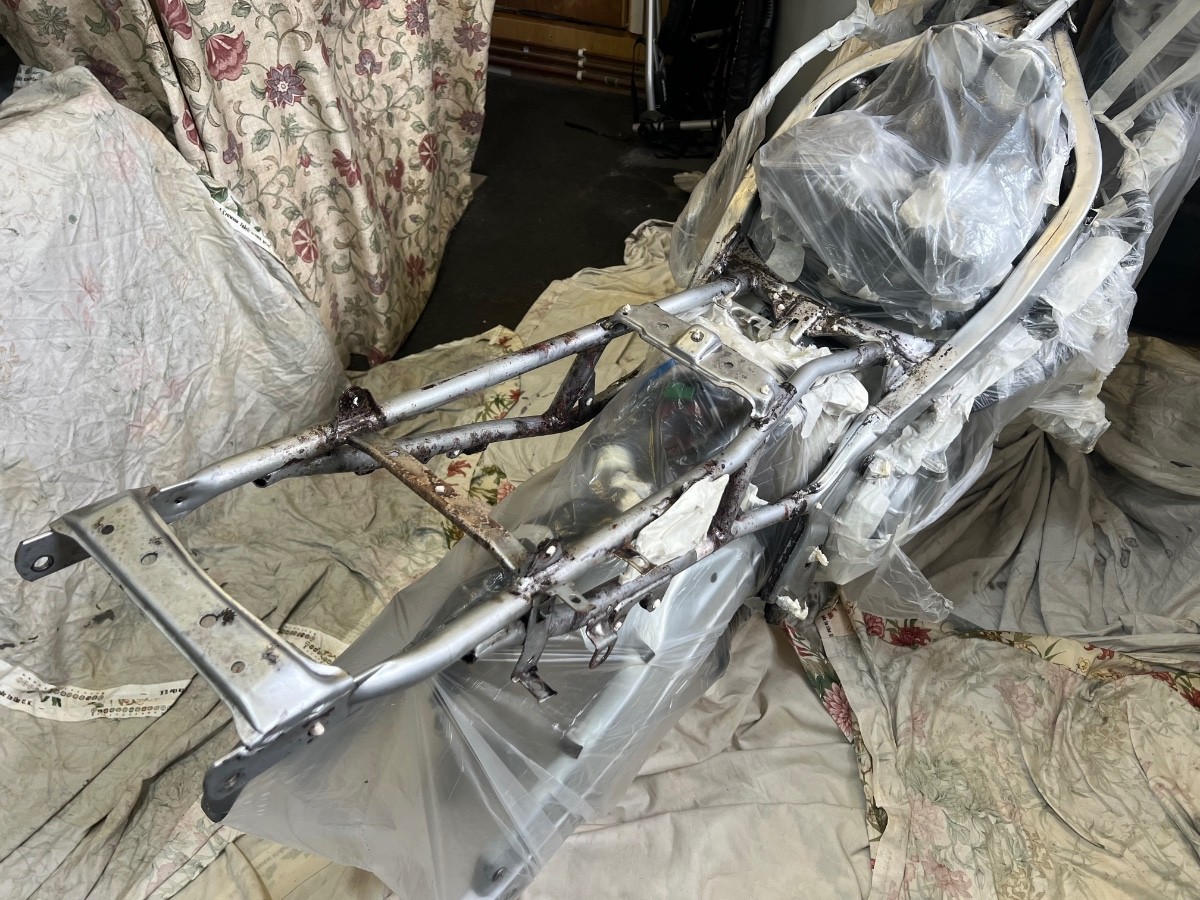
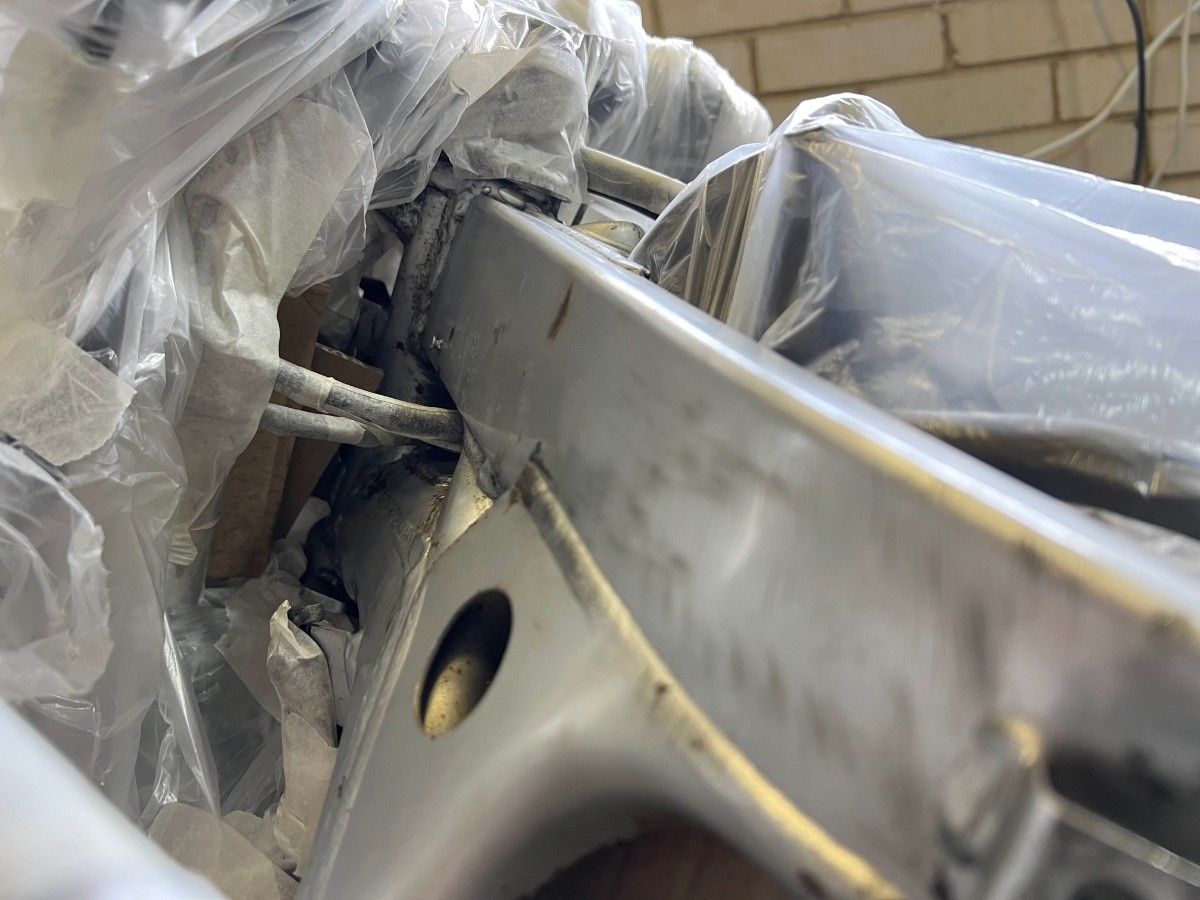
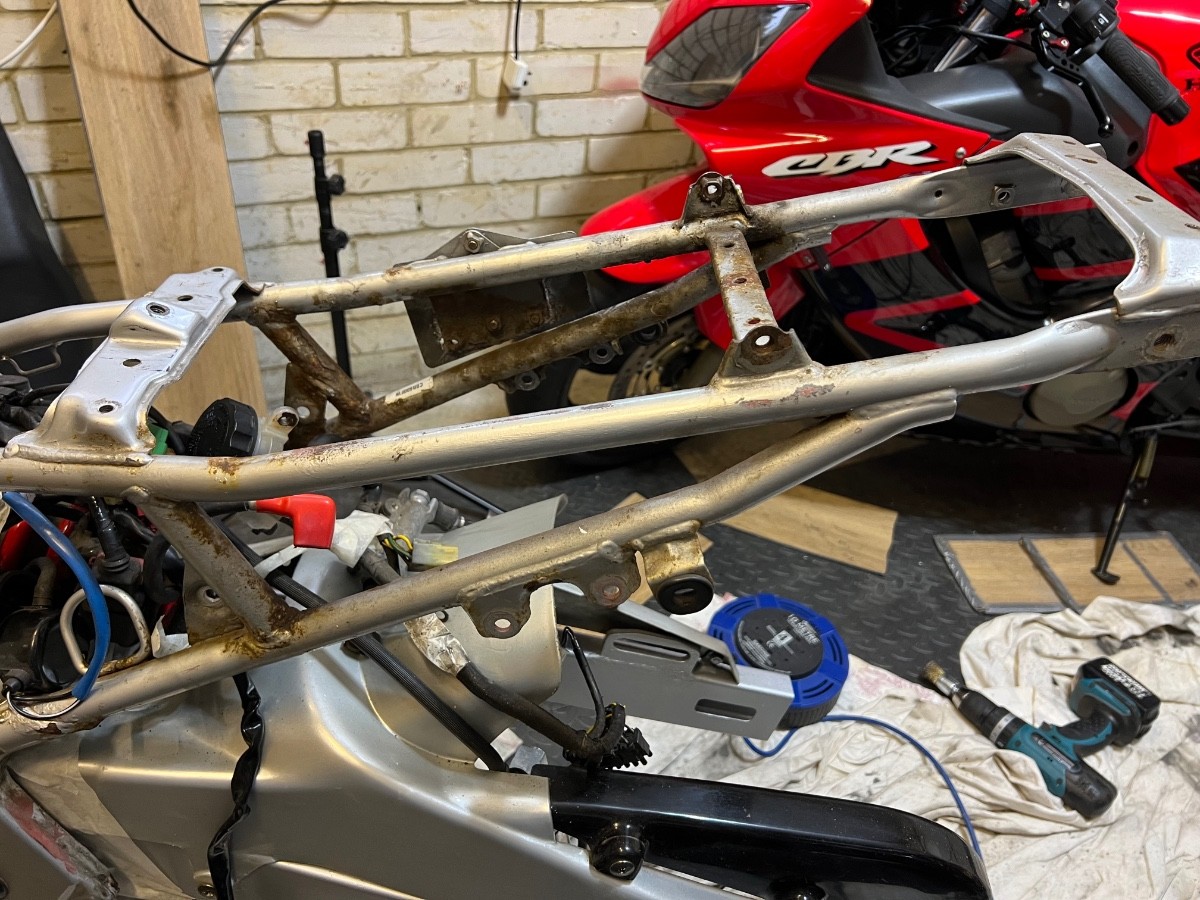
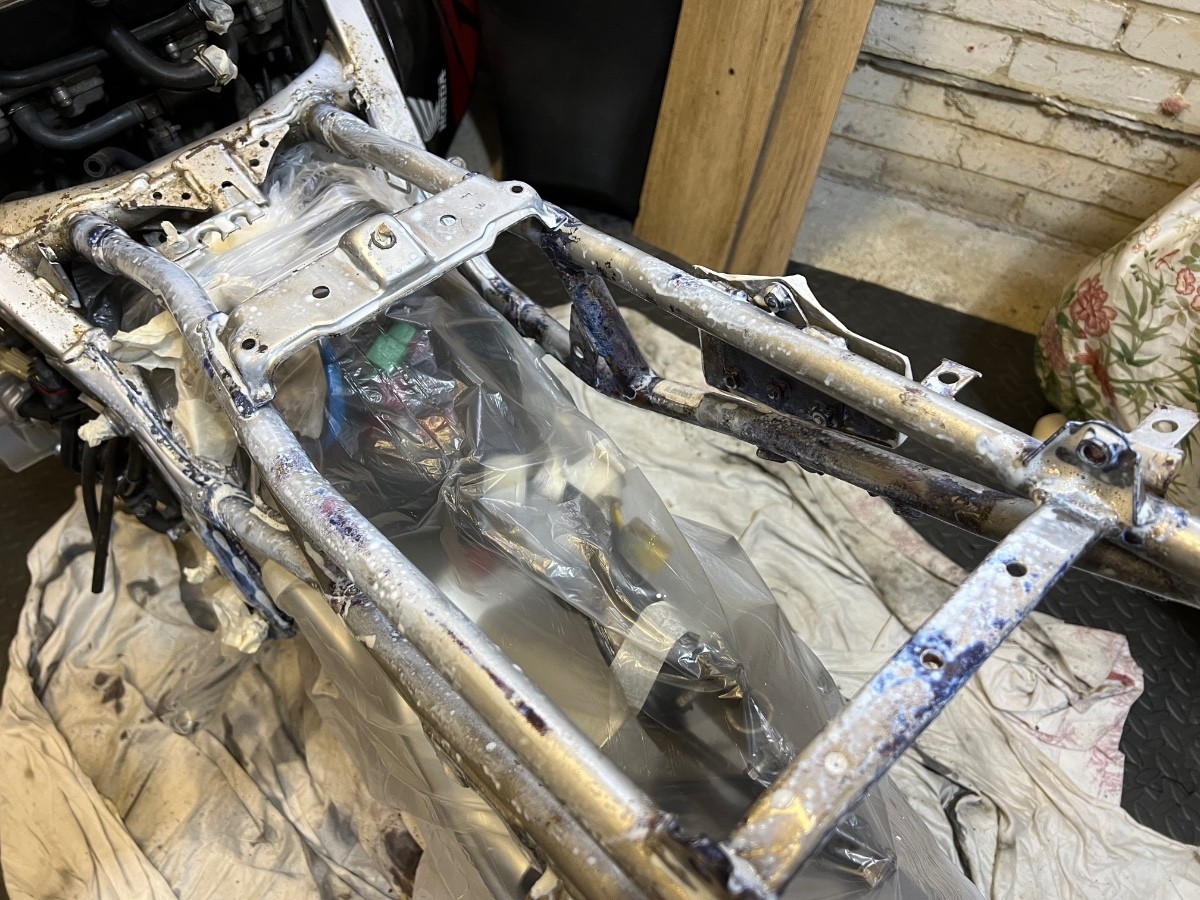
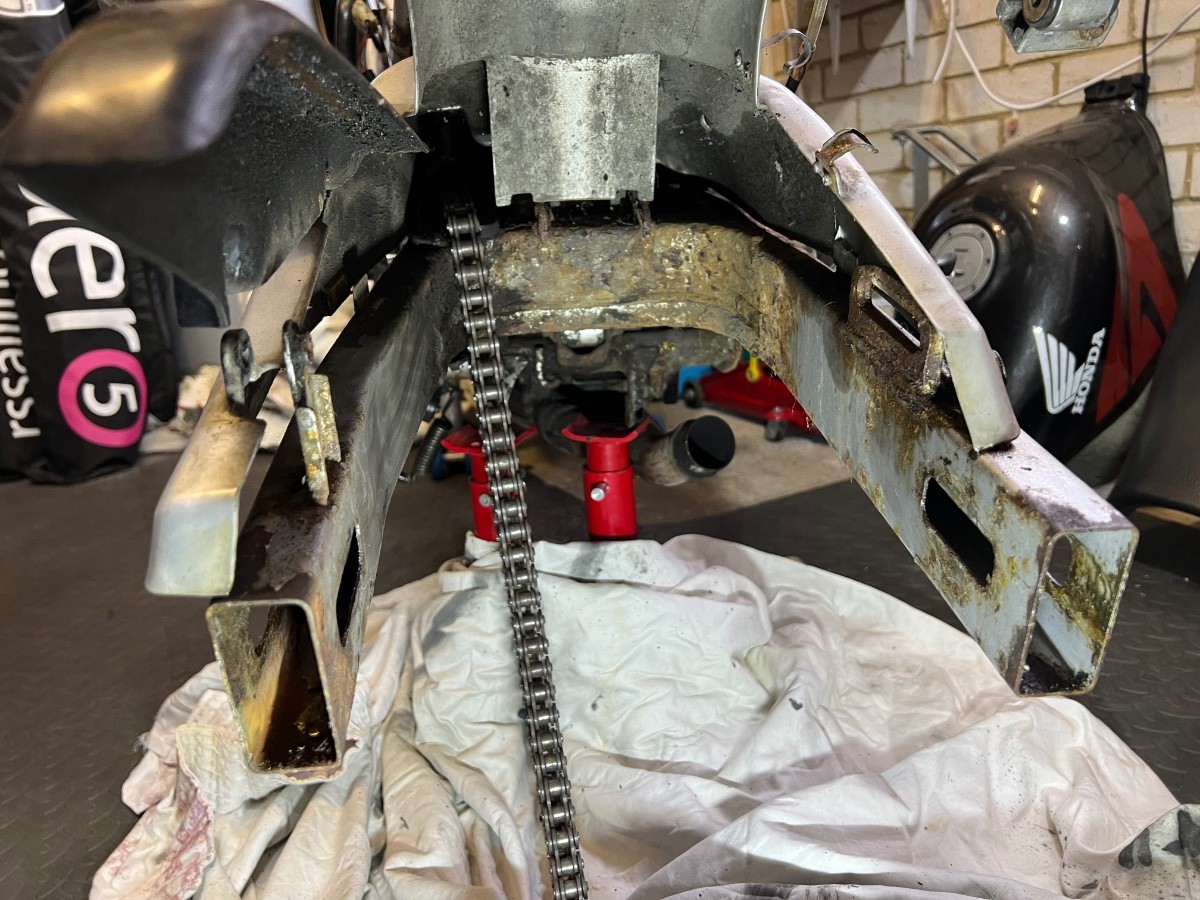
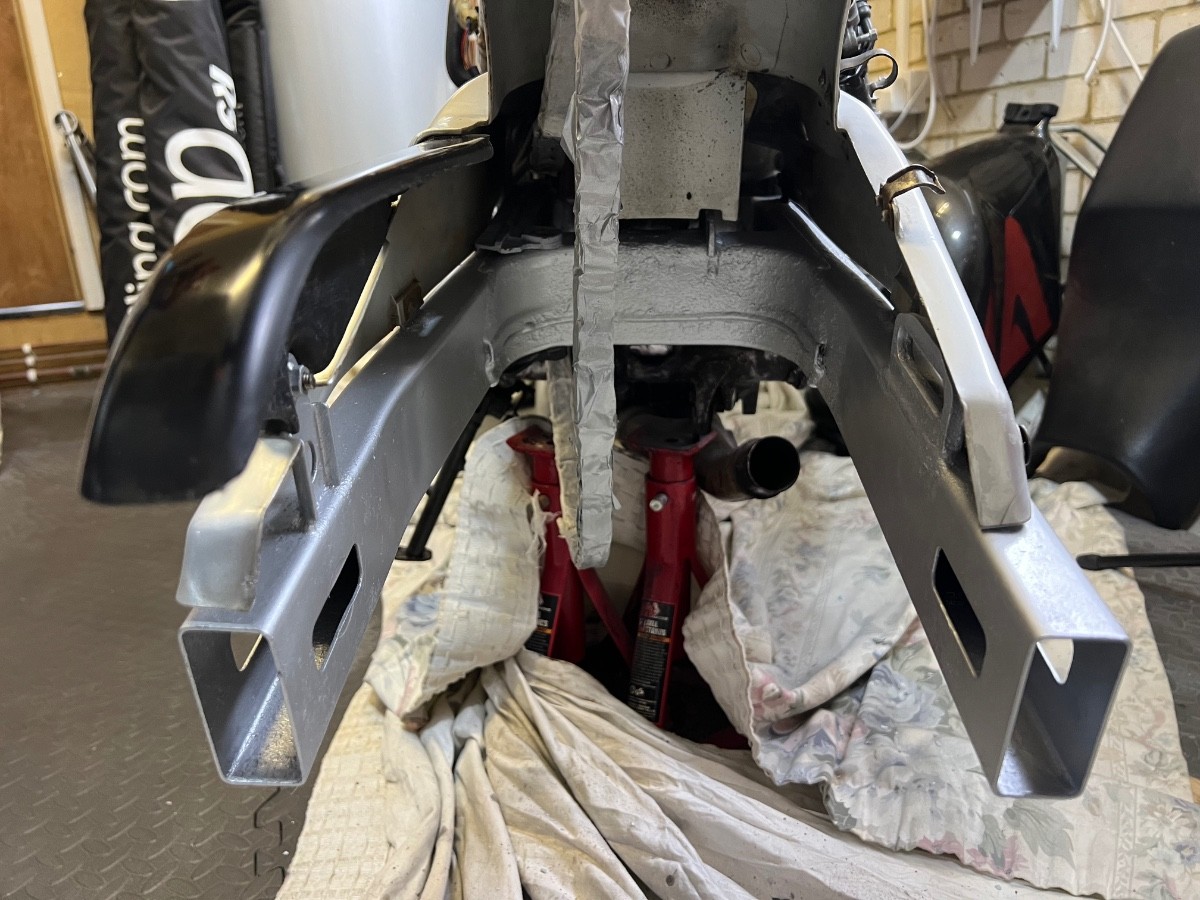
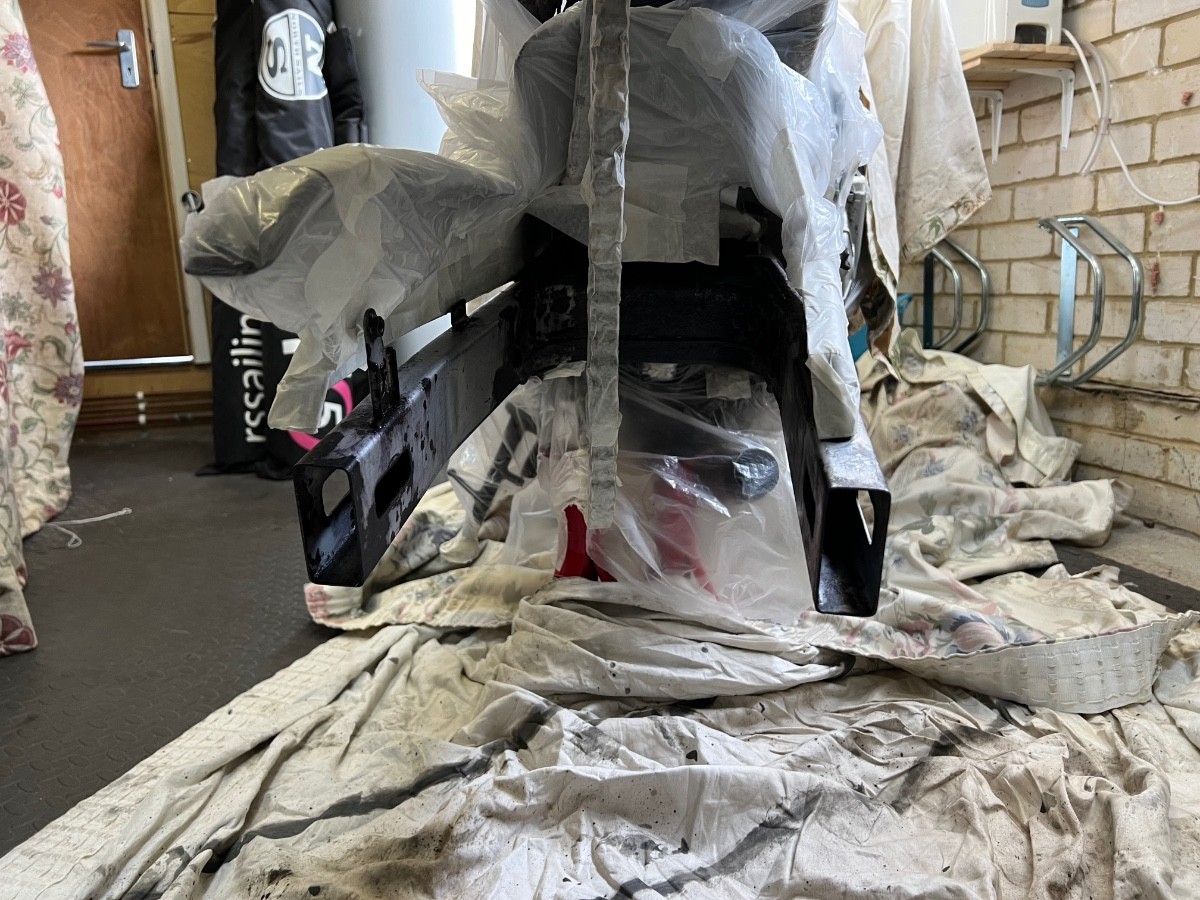
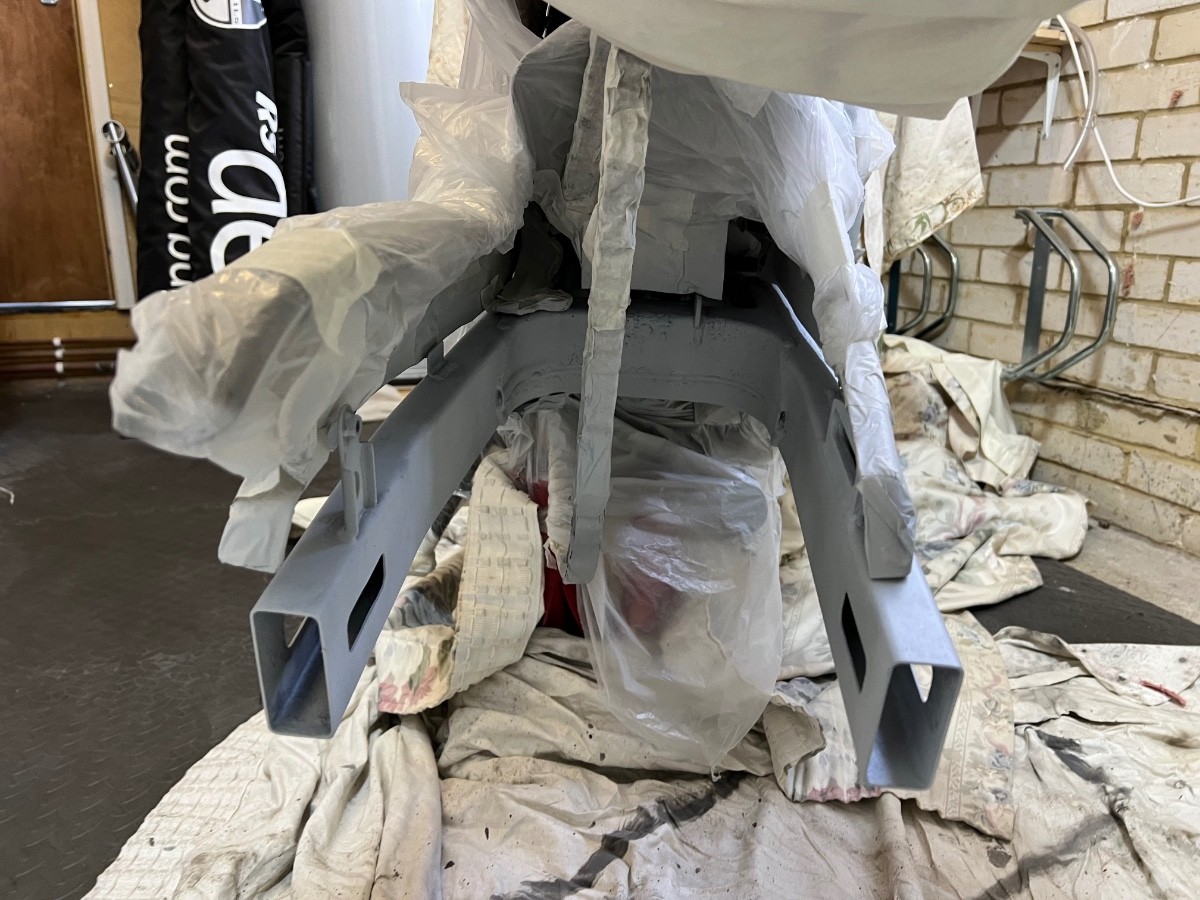
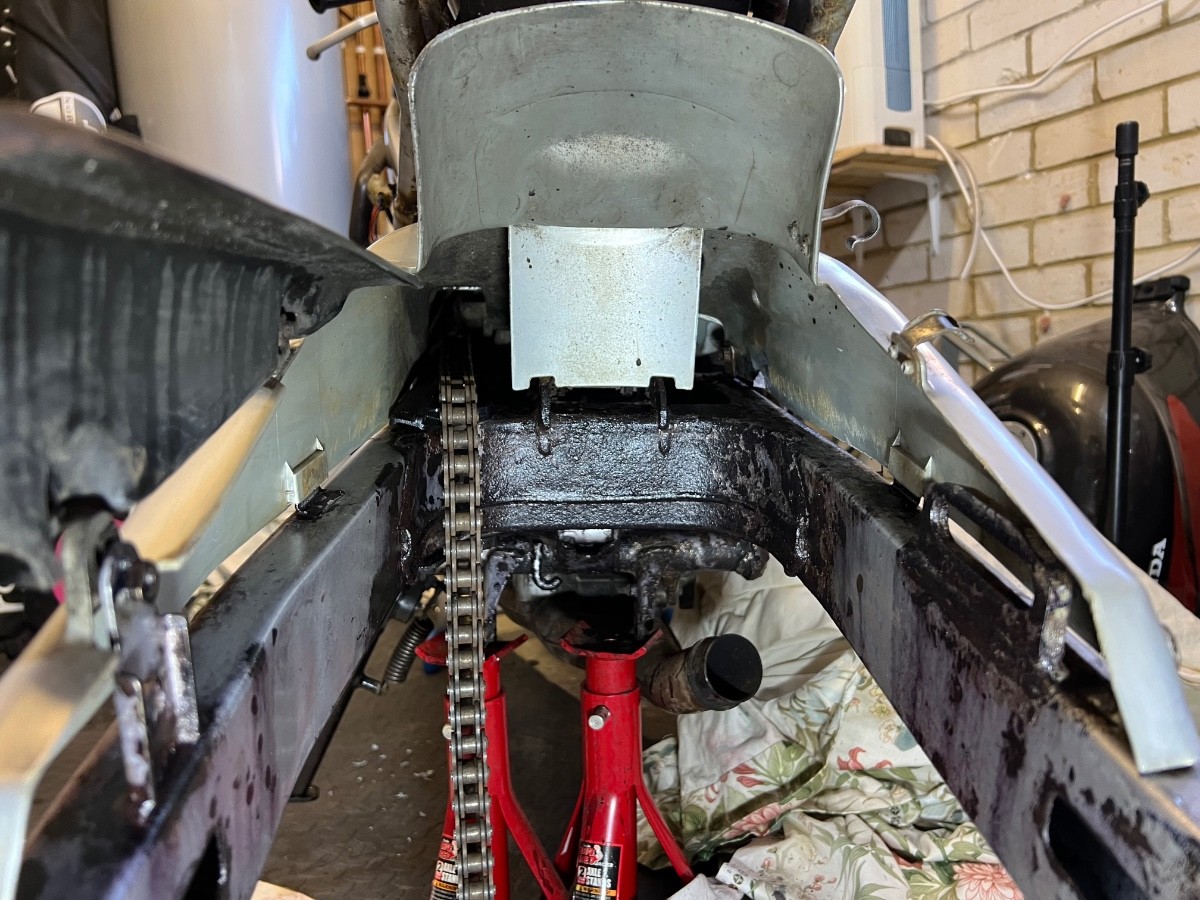
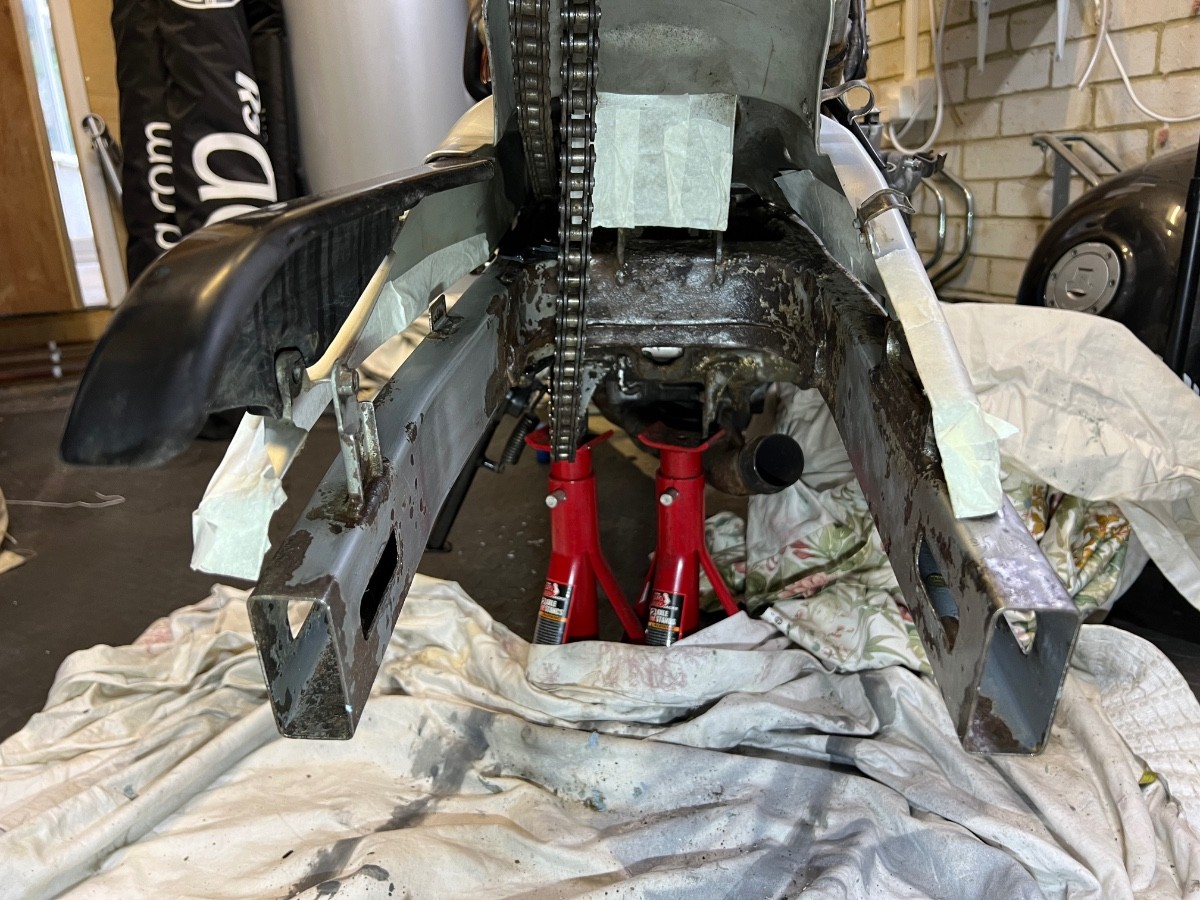
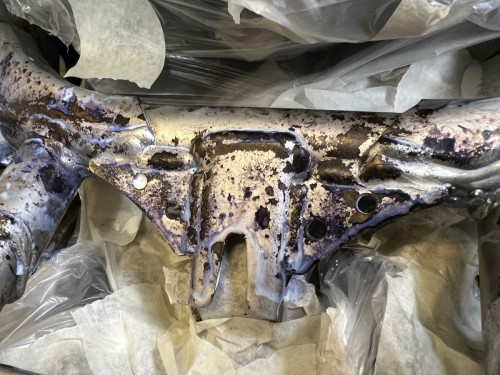
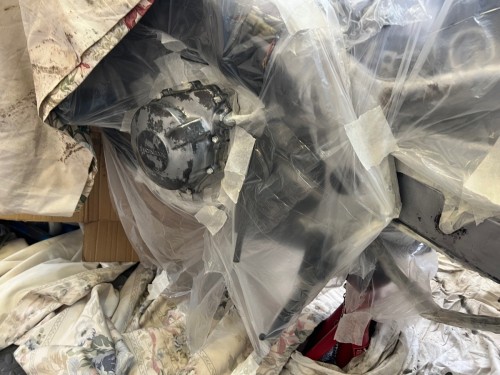
So yesterday I said "Tomorrow I'll move on to the front section". In my mind that was going to be fairly easy. What a fiddly and slow job that was. But it's done now. Removal of the surface rust was actually quite quick and easy. I sorted out the big accessible areas with the full size drill and then got into the nooks and crannies with the dremmel - getting through another half a dozen of the awful wire brushes I wish I hadn't bought. Then I moved on to the masking. This was SO fiddly. I treat the masking as important because I really want to avoid any over spray - which I see as the classic giveaway of an amateur job. I AM in amateur but I also want to do the best job I can. The pictures make it look as if I chucked a bit of plastic sheet on the bike and then applied a few bits of masking tape. If only it was that easy. There are about 20 individual plastic sheets and many small intricate parts with their own careful masking. One small bracket can take easily 10 or more minutes when it's almost impossible to reach with anything other than fingertips. And as more of the plastic sheet goes on to the bike, it gets even harder to get masking tape into small gaps that you've missed because the masking tape seems to be desperate to adhere itself to the plastic. I'm not seeking sympathy! But, if anyone is reading this with a view to doing a similar job, my advice is to not under estimate the time it needs. And if a part can be removed then do that instead of having to mask it. A few pre and post rust removal and masking pictures: The good news that I'm pleased to be ending the week with is that I'm down to the last stages of prep. A quick sanding of the Kurust treated areas to ensure they're well keyed, clean up everything with brake cleaner, vacuum the whole garage and, finally, mask up everything else in the garage so it doesn't cut a coat of paint dust. I estimate that I'll end up spending less than 1/2 an hour in total with a can in my hand and actually paint spraying - but the prep of the frame will have taken around 10 hours. I wonder - Is 20:1 a normal ratio or is that a measure of what happens when an amateur takes the job on?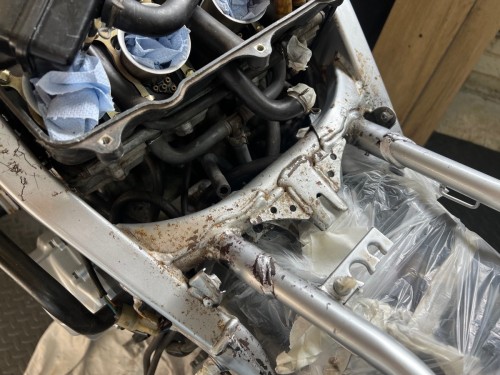


-
CBR600 F3 1998 - amateur restoration
Hairsy replied to Hairsy's topic in Old Motorbikes, Projects and Restorations
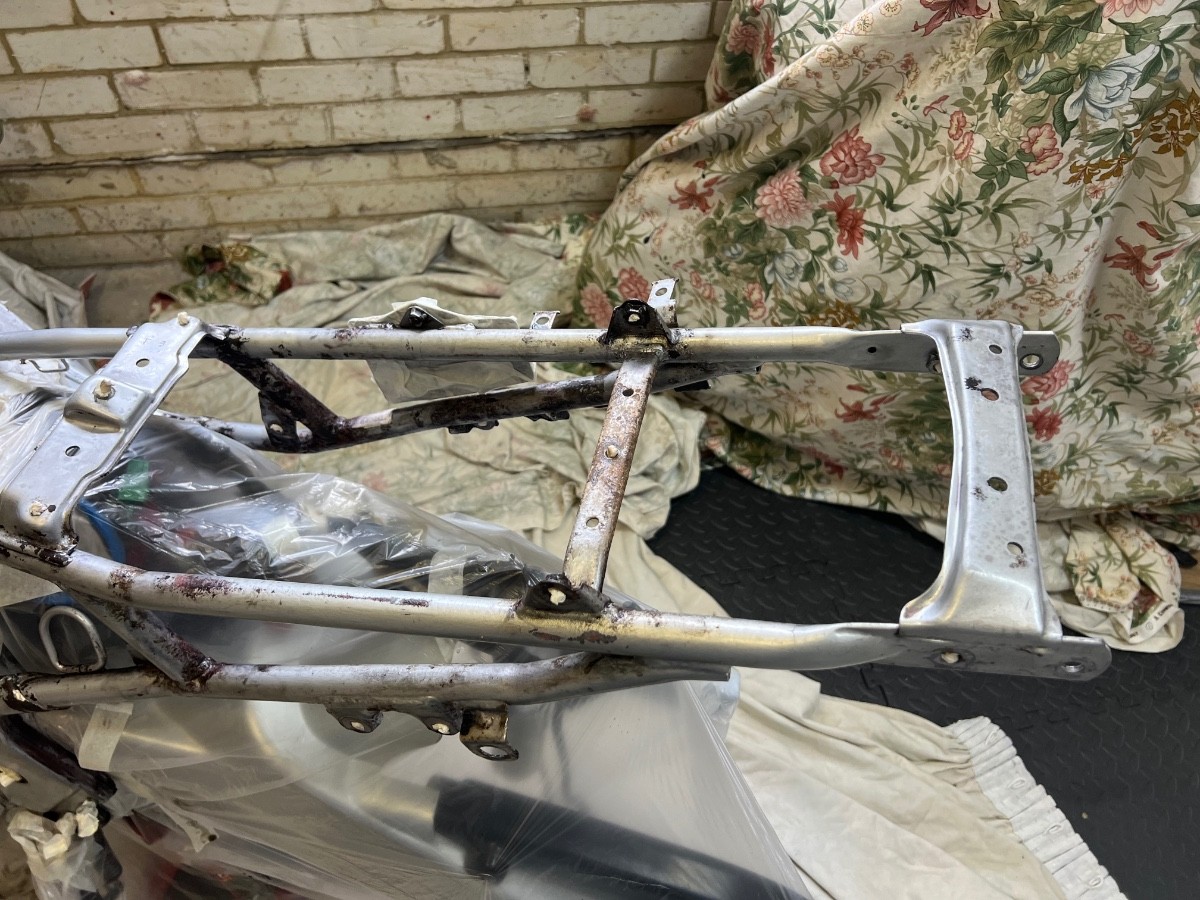
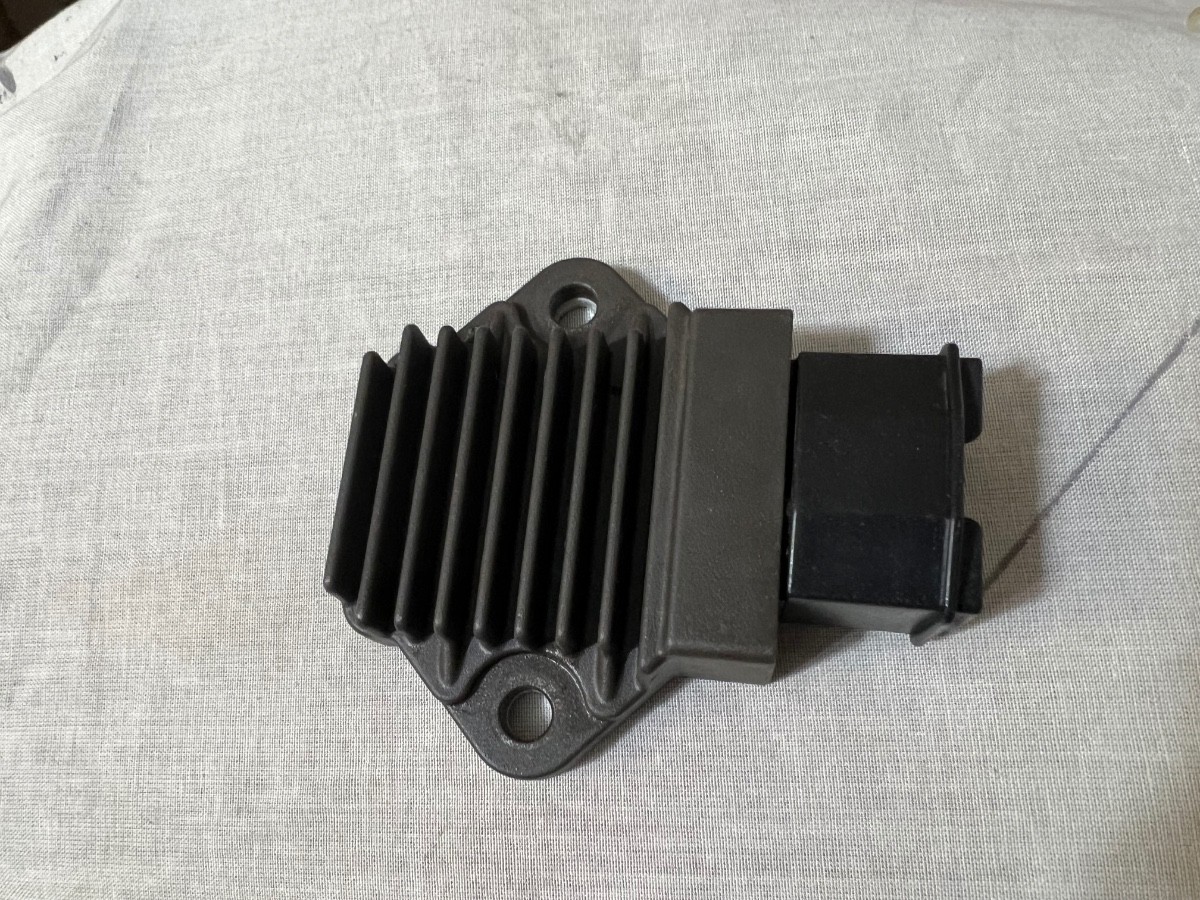
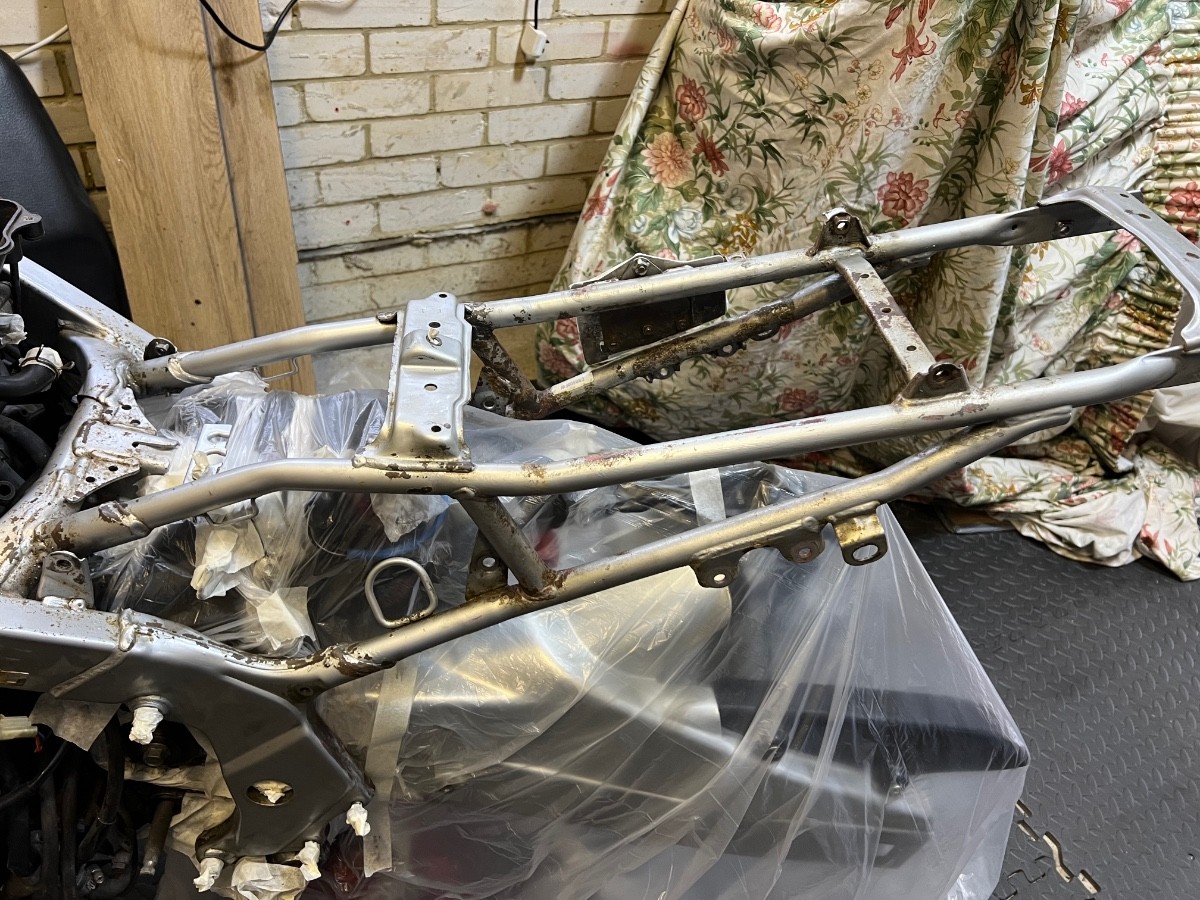
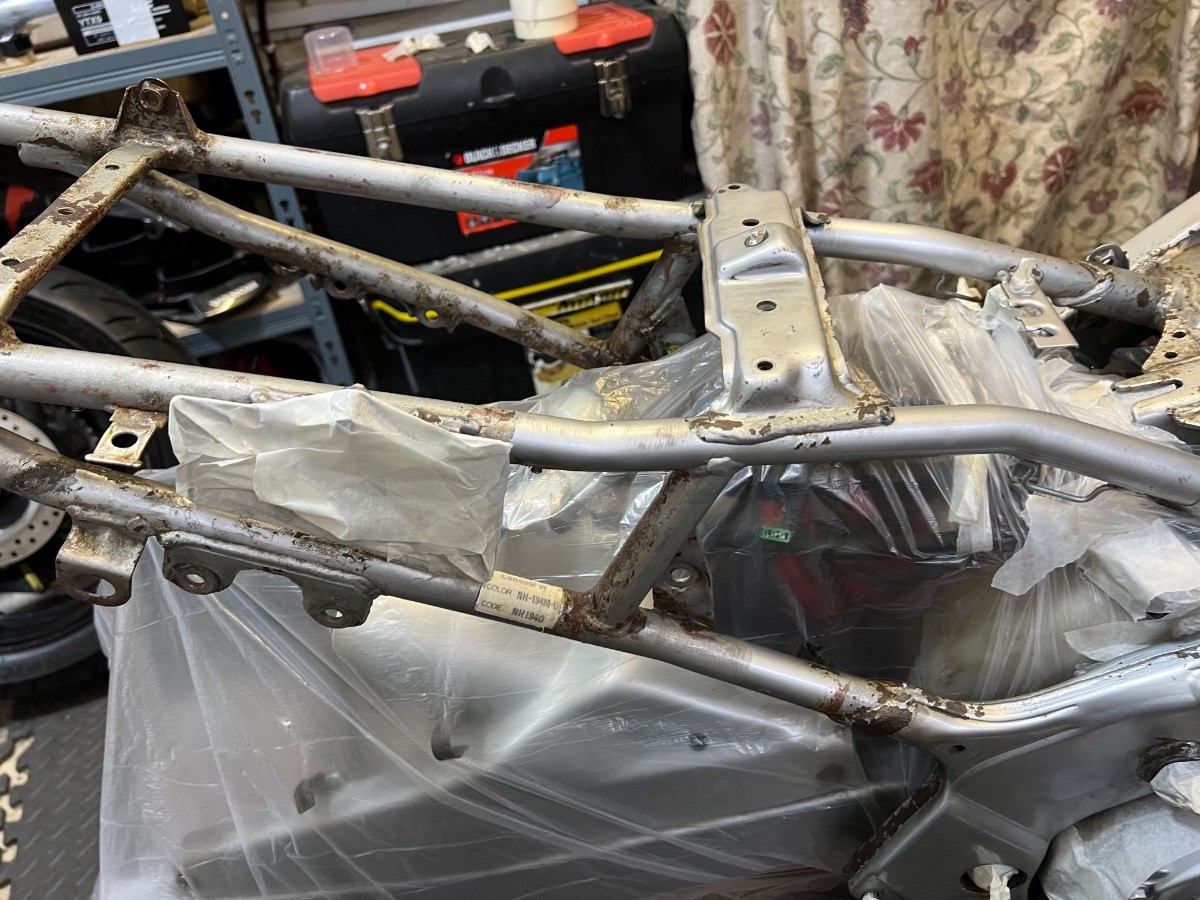
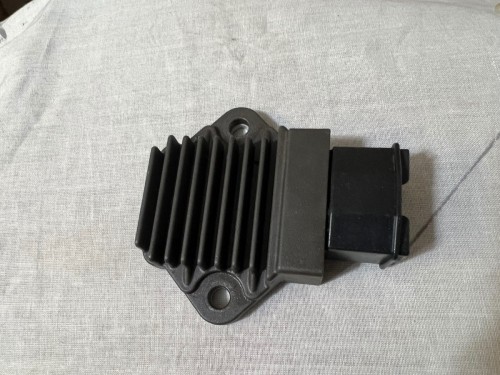
Another prep day but a fairly satisfying one. I worked on the back half of the frame. Mainly because the headstock section is going to be really fiddly and I want to hone my technique on the easier section at the back. First thing was to remove and clean the reg/rec because it was annoying me looking so dirty. Like so much of this job, it will be completely invisible after the build but something within me means I can't bring myself to leave things looking dirty. And it's very satisfying when it comes up like new. I also cleaned up the bolts and backplate. Then it was on to the surface rust removal. I used a full size drill with a couple of different shaped wire brushes and a cheap dremmel copy with, again, a couple of small different shaped brushes. As an aside, I bought the dremmel brushes very cheap from China - something like £3 for 70. They do the job but they're rubbish and throw bits of wire off at a high rate. I got through about 8 of them today. The bits of wire that are thrown off are tiny and get stuck in my clothes and then, over the course of the next couple of weeks, I find them when they get stuck in my skin. If anyone knows a source of good quality but not too expensive dremmel wire brush fittings then I'd love to hear about it and I will go for those when the current batch runs out. Although rust removal is a fairly destructive job, it's also a satisfying one as the smoother surface that's left behind gives hints of what's to come. I had contemplated whether to mask the rest of the bike up before rust removal and decided against it because the masking tape and plastic sheet would just get in the way and get caught up in the drill. The downside was that this left a huge amount of rust dust all over the lovely clean swingarm and the rest of the bike so the next thing I had to do was to get the vacuum cleaner out. First time I've vacuum cleaned a wiring loom. After vacuuming I gave it a quick going over with an air blower in case any bits were left. This left it looking OK again. Next was to give the whole area a thorough going over with brake cleaner. Then I masked the whole rear section finally I pained on the Kurust. You can see it turning purpley blue as it does its chemical thing. Tomorrow I'll move on to the front section so that, hopefully, next week I can complete the frame transformation and then start the rebuild - which I'm very much looking forward to. The bit I'm looking forward to less is the fairings. They're not in terrible condition at all but I need to work out how to get the best out of them with, as usual for this project, no budget. But I'm not going to think about that for now ...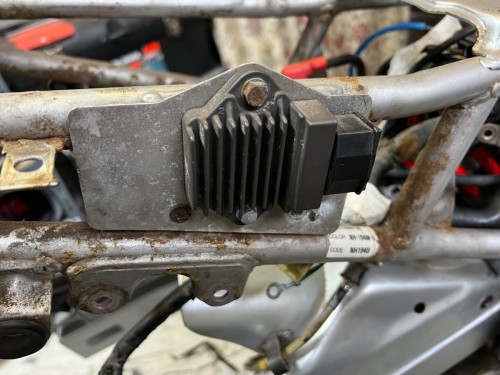


-
CBR600 F3 1998 - amateur restoration
Hairsy replied to Hairsy's topic in Old Motorbikes, Projects and Restorations
Top man - thank you. If I go down that route then I'll PM you. What a great community. -
CBR600 F3 1998 - amateur restoration
Hairsy replied to Hairsy's topic in Old Motorbikes, Projects and Restorations
Great idea - thank you! -
I often use the side stand to stop the engine. I find it very easy to do. The bit I struggle with is making it look as if I did it on purpose.
-
CBR600 F3 1998 - amateur restoration
Hairsy replied to Hairsy's topic in Old Motorbikes, Projects and Restorations
I don't but I'm sure I can borrow one if I need to. I'm going to be brave and hope my pictures are good enough - however that link is now bookmarked and armed for an emergency! -
CBR600 F3 1998 - amateur restoration
Hairsy replied to Hairsy's topic in Old Motorbikes, Projects and Restorations
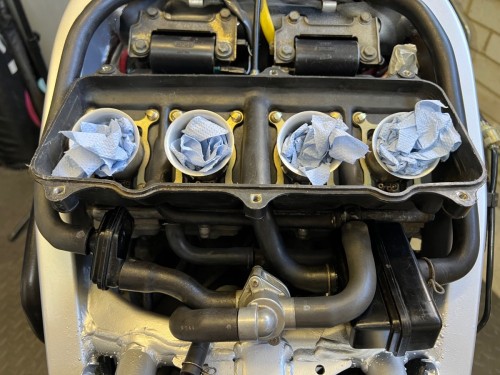
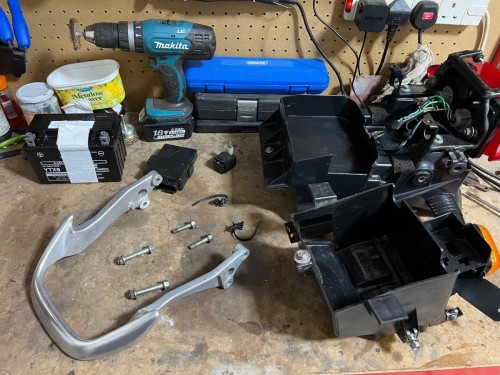
Spent some time today taking bits off and cleaning them. It's always more time consuming than you think but I'm happy that I'm making progress. Not a lot of narrative really - the cycle was : take pictures of stuff so that I remember where and how it goes back, remove it, clean it. I have to admit that, despite all the pictures I've taken, I suspect I'm going to have moments later on where I wish I'd taken more pictures. Things like cable routing that seemed obvious on disassembly may prove to have slightly more apparent options in a couple of weeks time! The stripping down so far: And some of the parts before and after cleaning. Nothing too spectacular but it will all make a difference on reassembly. Pictures tell me I really should clean my bench a bit. I may treat it to some paint when this bike is finished. It feels that there probably shouldn't be a lot more that I need to remove before I can start addressing the surface corrosion. But I know that I often feel I'm close to the end of a phase and then end up spending a few more days on it. As always ... I'll see how it goes.

-
Honda City express 1988
Hairsy replied to chris1456's topic in Old Motorbikes, Projects and Restorations
I can't help with parts but do start a thread and share the experience. It's good therapy when the days don't go to plan - you can look back and remind yourself that you've had good days too. -
CBR600 F3 1998 - amateur restoration
Hairsy replied to Hairsy's topic in Old Motorbikes, Projects and Restorations
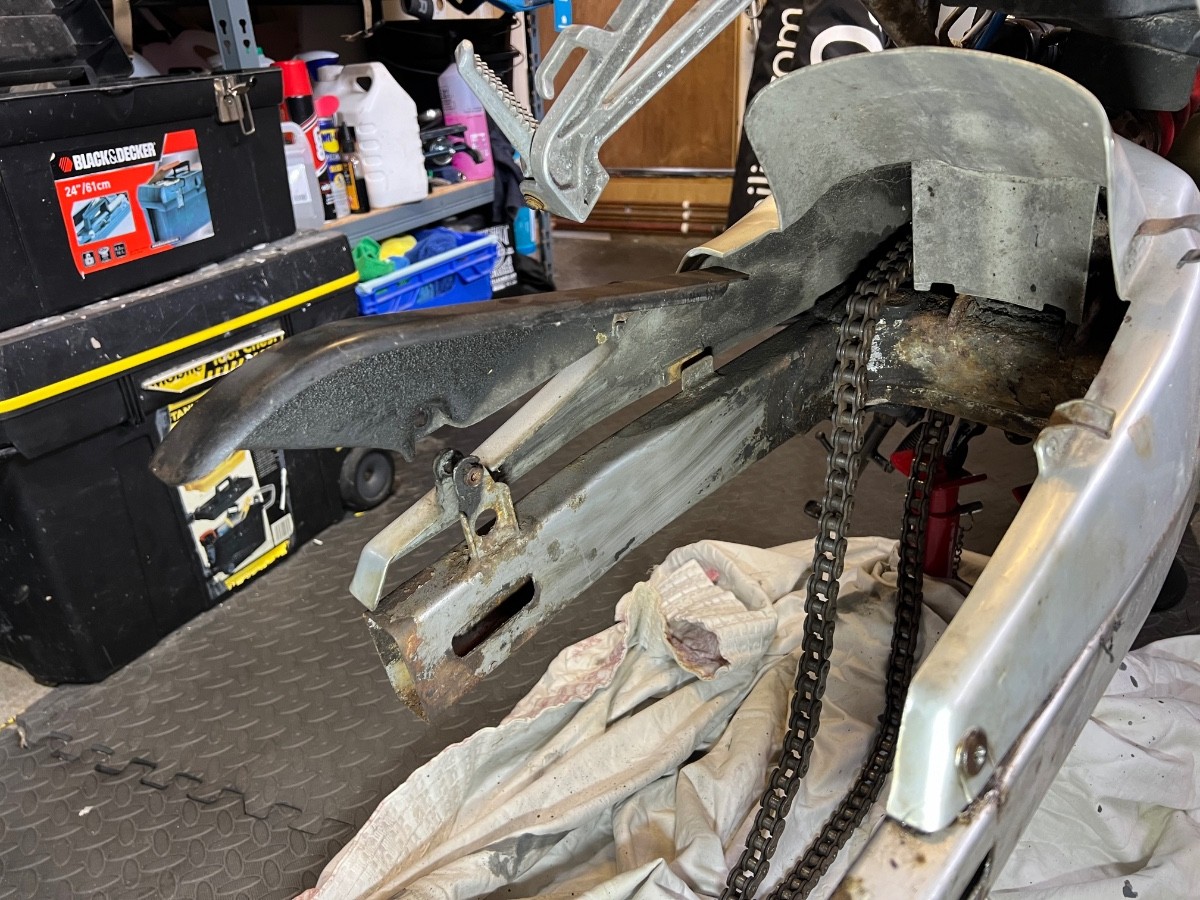
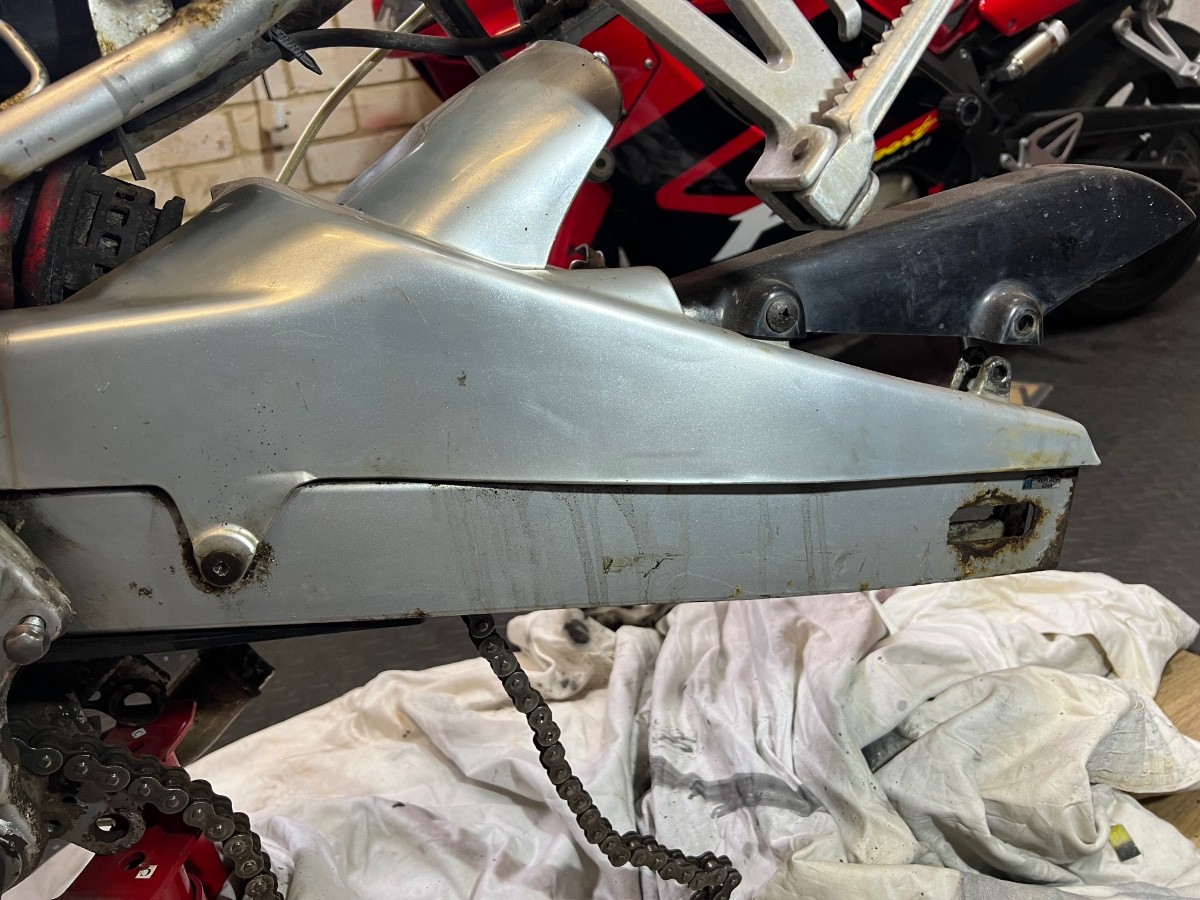
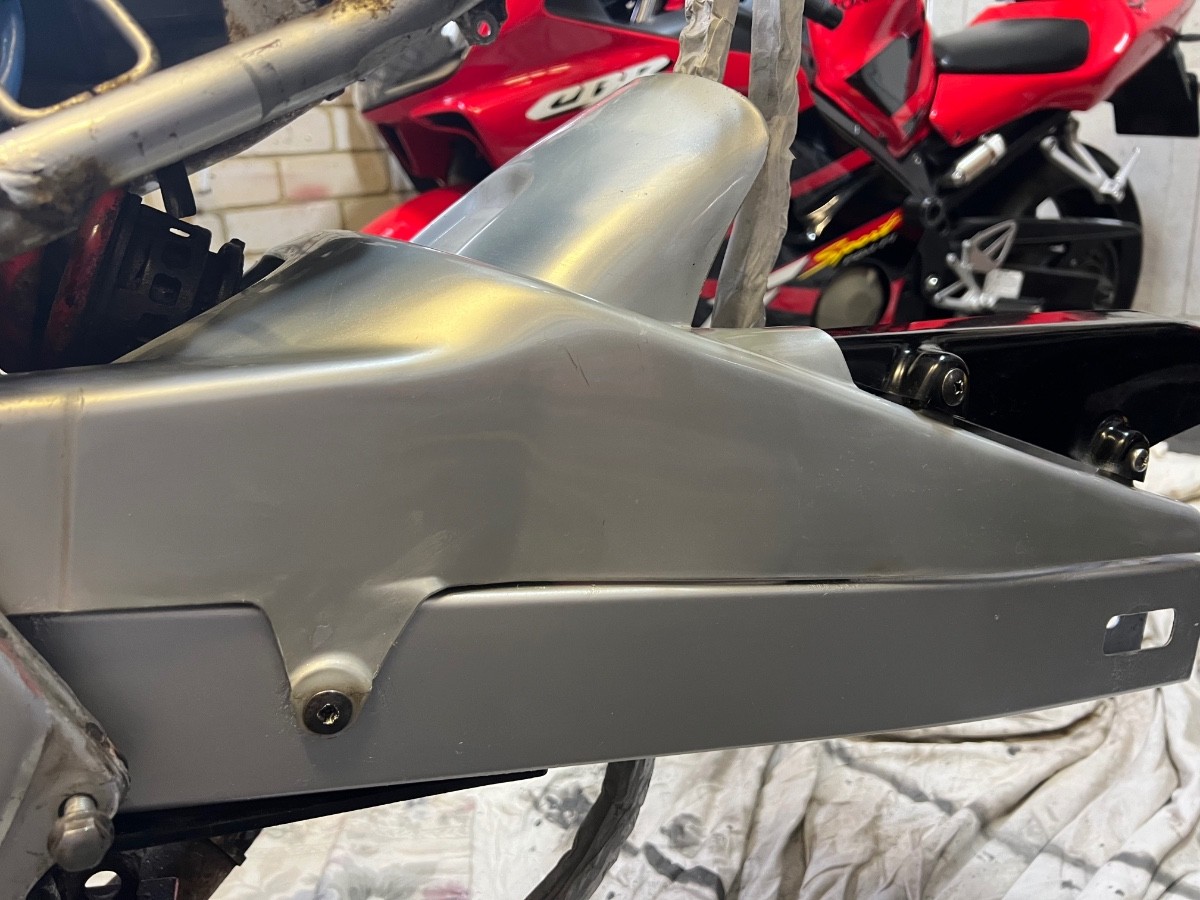
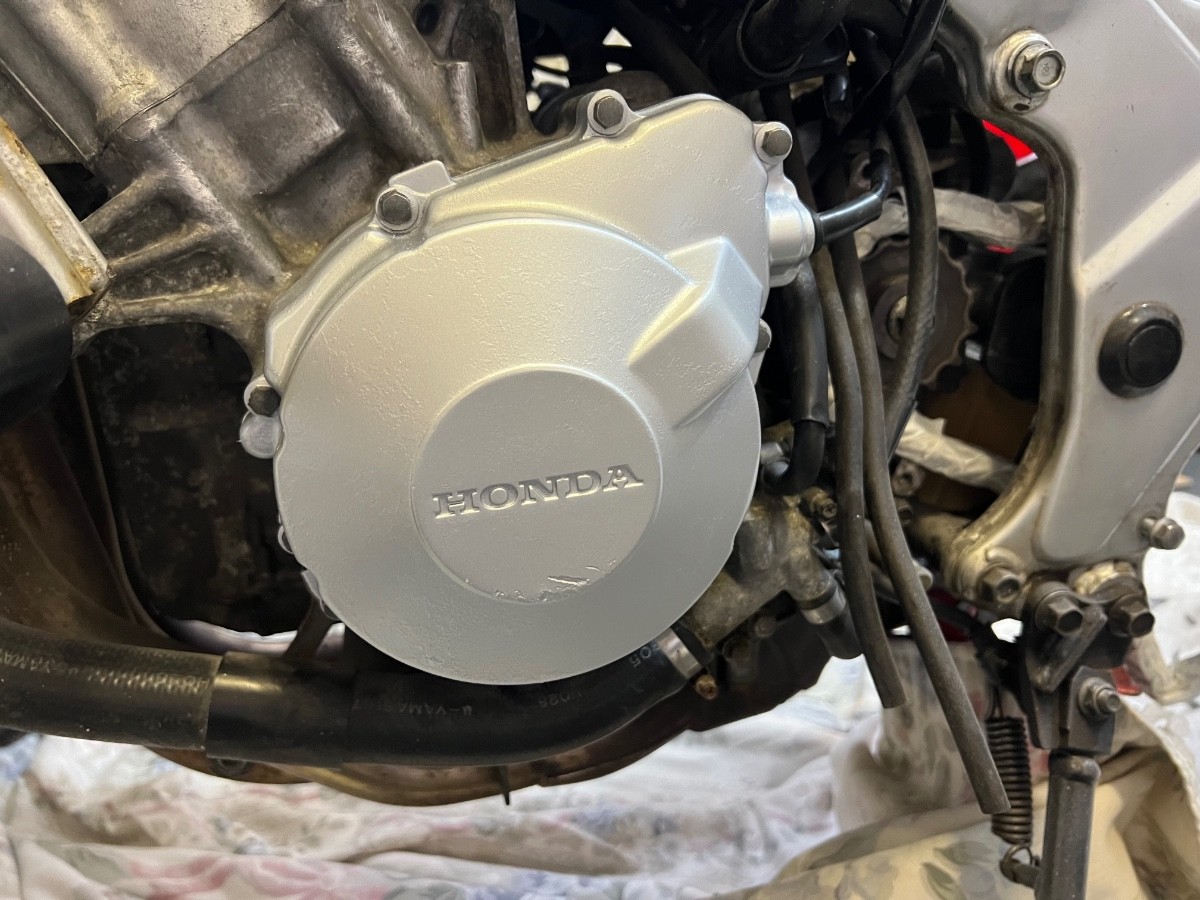
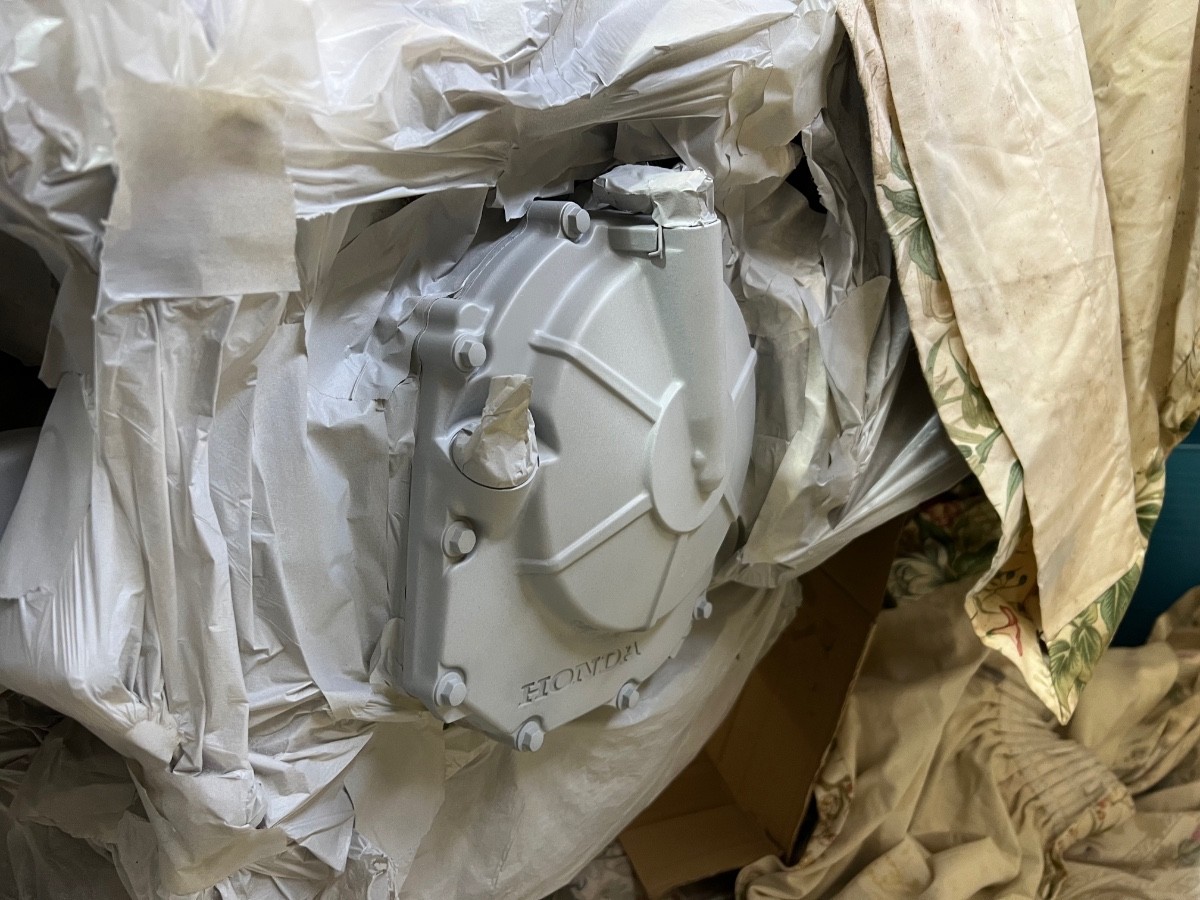
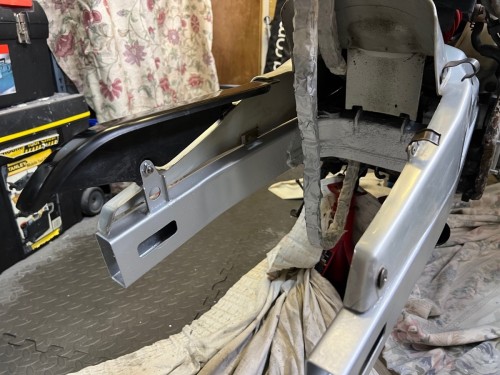
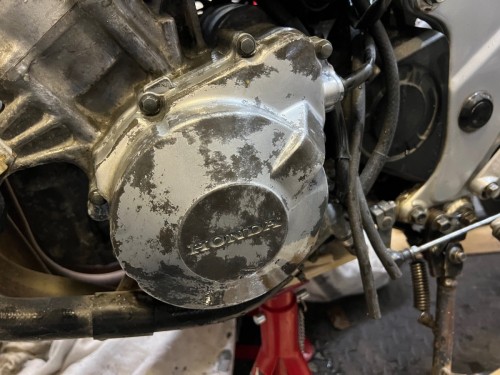
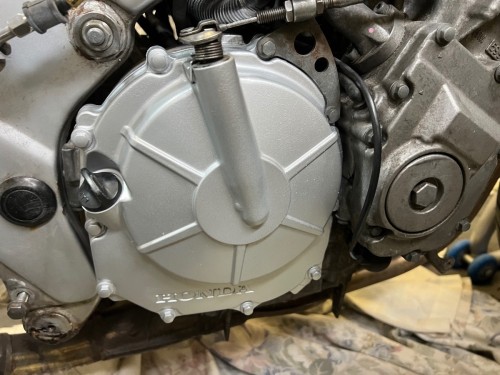
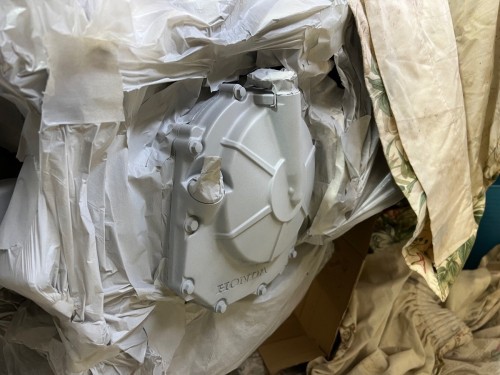
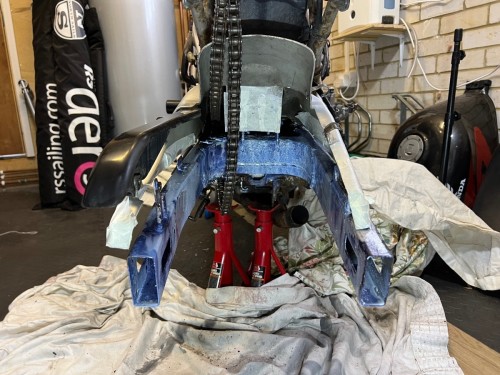
Swingarm finished. Finally. I thought it would never end when I couldn't seem to ever remove all of the built up grease. Over the last 24 hours, it's received 3 coats of primer, 3 coats of silver and 3 coats of lacquer. After a few hours to dry, I removed all of the masking - which took almost as long as putting it on. Of course this is only part of the cosmetic improvement so there's still some way to go but it does feel like a milestone accomplished. A few before and after pics ... Central swingarm - the pitting from previous corrosion is still visible but it's all been well treated now and so shouldn't return if the bike is cared for. I've left the chain masked up because it was a right fiddle and the paint cans will be out again in a week or two to do the frame. And I painted the crank case covers as well: It doesn't take a particularly fine eye to spot some imperfections but, for less than £15 worth of paint products and some elbow grease, I'm pleased. It's definitely going to make the whole bike more attractive. And hopefully it will be enough for the next owner to be a bit prouder than one or two of the last ones and actually clean it from time to time! Tomorrow I'll start removing bits from the frame to ease access. The frame will have surface corrosion removed, then all the areas of corrosion chemically 'sorted out' with the Kurust and then, finally, a few layers of primer, top coat and lacquer. And any bits that I remove will get cleaned along the way - mostly to give me an ongoing sense of achievement. I've no real idea how long the prep is going to take - we'll see ...


-
CBR600 F3 1998 - amateur restoration
Hairsy replied to Hairsy's topic in Old Motorbikes, Projects and Restorations
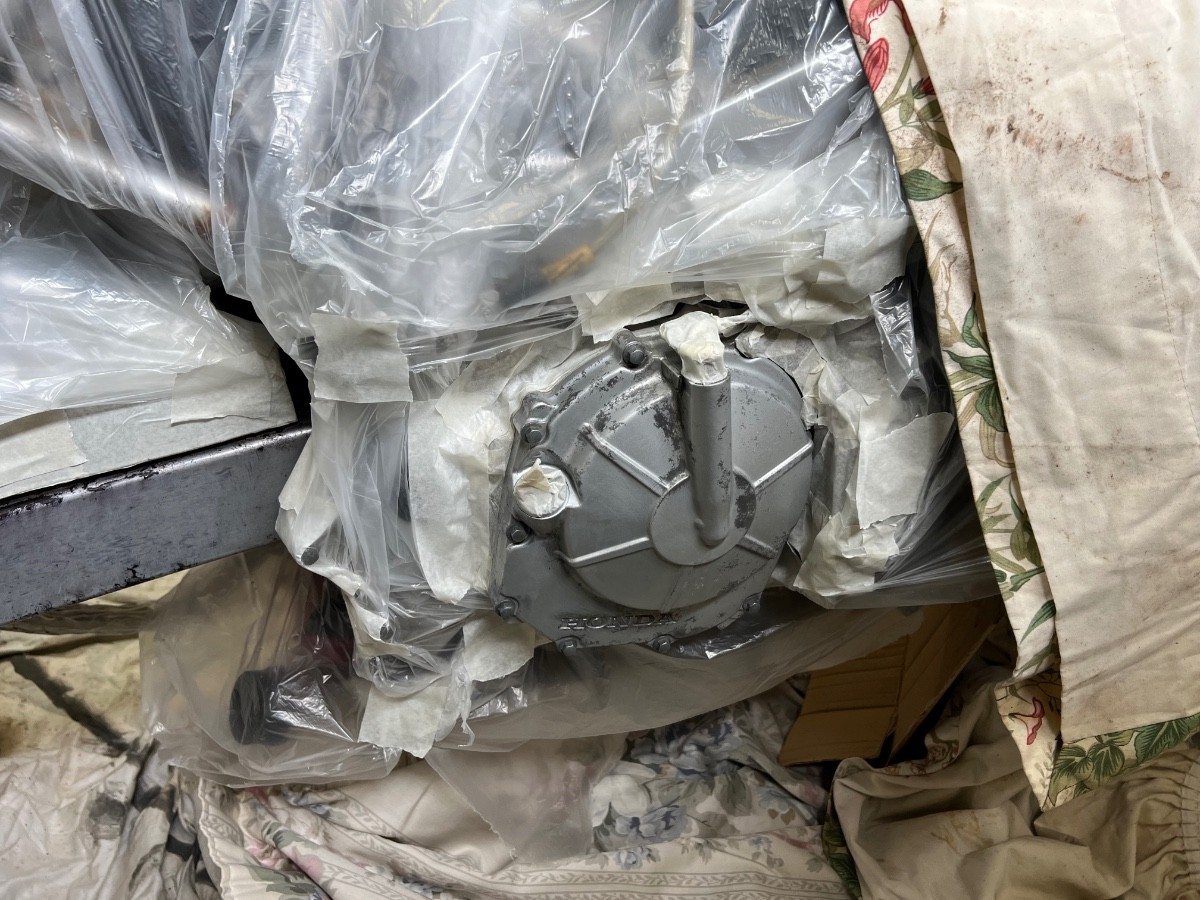
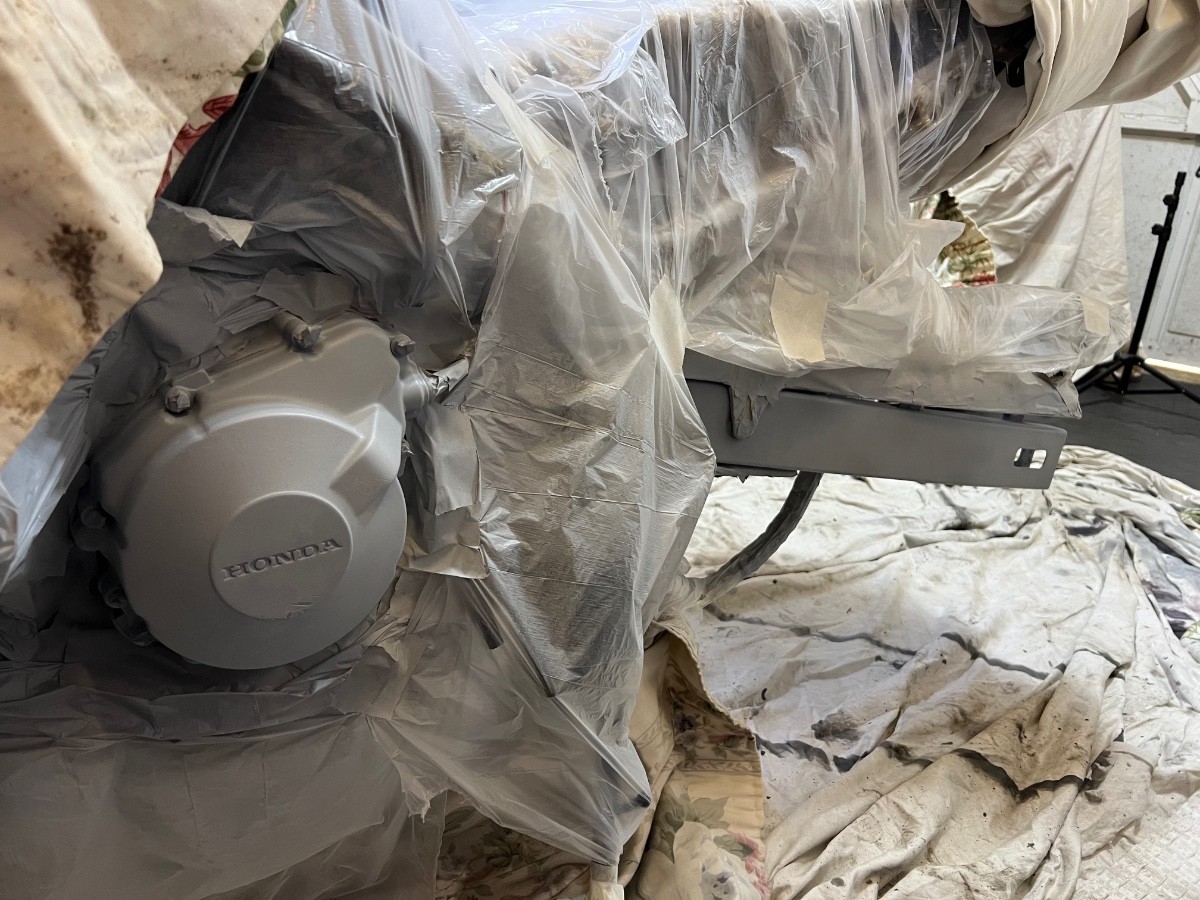
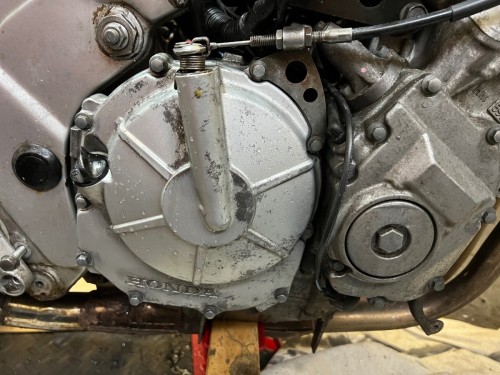
Fiddly day but I've finally reached the stage where the swingarm is starting to looking better. It's important to have those positive days from time to time. First thing was to run over the swingarm with some sandpaper just to ensure a good key for the primer. Next was masking. Wow - that was a slow process! I'm still annoyed with the corroded fixings on the hugger. If these had come off OK then I'd have simply dropped the swingarm off the bike and saved myself a 2 hour masking job. The alternative would have been to drill out all those fixings and then tap larger holes and replace with slightly larger fixings. Not the end of the world and, with the benefit of hindsight, that might not have taken any longer than the masking took. But that decision has been made so on with it ... I also masked off the clutch and stator covers because they weren't pretty and needed a coat of paint. Yet again, fiddly but not terribly difficult.. Really annoyingly, as I look at these uploaded pictures, I realise that I forgot to mask a few of the bolts on the clutch cover. What an idiot! If this bugs me as much as I suspect it might then I'll take the bolts off and remove the paint. However, they're now primed so I'll continue for now. Maybe it just won't be noticeable. Finally a thorough clean with panel wipe and then 3 coats of primer. There will still be a few marks after painting but I'm now feeling optimistic that it's all going to look so much better than it did before. Paint and lacquer tomorrow ...

-
CBR600 F3 1998 - amateur restoration
Hairsy replied to Hairsy's topic in Old Motorbikes, Projects and Restorations
There speaks the voice of experience. You said something similar to me early on and it's made such a difference. By far the most valuable bit of advice that I've had. So thank you. -
CBR600 F3 1998 - amateur restoration
Hairsy replied to Hairsy's topic in Old Motorbikes, Projects and Restorations
Nothing exciting to show today but the Kurust has dried and it certainly seems to have done some magic. All the previously rusty areas are now hard and dry. If I wipe them with a clean cloth it leaves no residue or marks on the cloth. Previously it would always leave a bit of brown rusty colour on the cloth. Limited time today so all I did was was to give the whole area another clean with brake cleaner in case the Kurust has any kind of film left on it. It didn't seem to have done but there's no harm. Tomorrow I'll give the whole area a going over with some sandpaper to ensure a good key and then get it masked up ready for paint.
-
What to do with keys???
Hairsy replied to Simon Davey's topic in Clothing, Luggage, Accessories and Security
In case it wasn't clear what I meant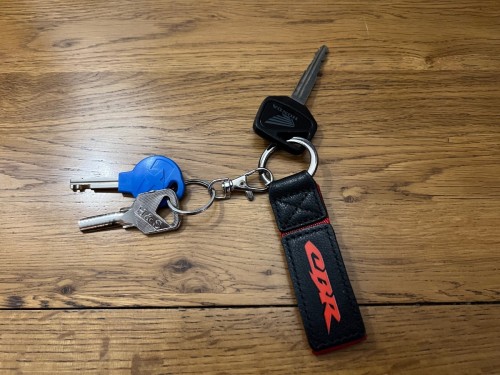
-
What to do with keys???
Hairsy replied to Simon Davey's topic in Clothing, Luggage, Accessories and Security
I use these. Ignition key stays stand alone and house / bike security goes on another ring which can be clipped onto the ignition key when I’m not riding. Cheap & cheerful. https://www.amazon.co.uk/dp/B0B5TR4H68?ref=ppx_pop_mob_ap_share -
CBR600 F3 1998 - amateur restoration
Hairsy replied to Hairsy's topic in Old Motorbikes, Projects and Restorations
Quick update after a delay for some quality half term time with my family. The Kurust has now arrived so I applied a generous coat to the swingarm today. Masked up the plastics in the area as the instructions said it can stain and then just applied it. It goes on white and then changes to a purple/blue colour as it does its chemical thing. Now need to wait and see what effect it has once its dried. Hopefully a good one, in which case I can move onto getting the swingarm primed, painted and lacquered next week. Again, subject to it doing a good job today, the Kurust will be coming out again later for other parts of the bike.
-
If you’ve had the system apart, rebuilt with second hand replacement components in place, and now you’re still getting old fluid out of the replaced components then you haven’t bled the system fully. At this stage, I would remain optimistic that a thorough bleeding could solve your problems. Just one question - did you replace all the copper crush washers with new?
-
Plastic repairs and paint job on a Blackbird
Hairsy replied to a topic in Old Motorbikes, Projects and Restorations
Watching with interest. I have some repairs to do myself in the next few weeks. -
Has the bike had any accidents that caused damage? If so, I’d check any wiring in the areas of that damage to see if that’s where your problem lies. Perhaps a bit of fairing was pushed in during an impact and hit the wiring loom? The evidence of the accident may only be a crack or scrape because the fairing popped back - but that’s where I’d look first.
-
Treating surface corrosion on 1998 CBR600F3
Hairsy replied to Hairsy's topic in Old Motorbikes, Projects and Restorations
eBay can be a pretty big mistake too. So I'm told ...