Hairsy
-
Posts
113 -
Joined
-
Last visited
-
Days Won
4
Content Type
Profiles
Forums
Events
Store
Gallery
Community Map
Everything posted by Hairsy
-
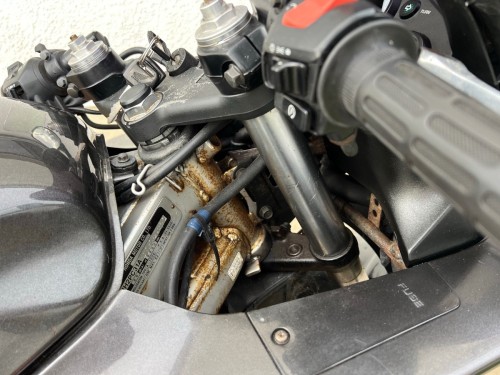
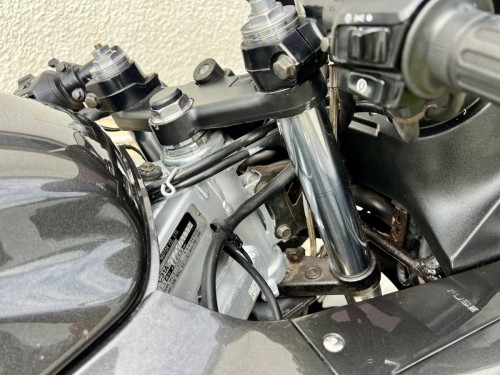
Try to dry it completely (with the petcock switched off). Then turn the petcock on just for a second or two and try to spot the source of the leak. I once spent lots of time trying to locate a leak like this and it turned out to be a fuel pipe above the carb that was dripping onto the carb and then down.
-
CBR600 F3 1998 - amateur restoration
Hairsy replied to Hairsy's topic in Old Motorbikes, Projects and Restorations
Given the lack of reliability of non OEM carb parts, I decided to clean the original pilot jets and see whether that solved the problem. And it did! I'm afraid I didn't take photos of this process but all 4 pilot jets had at least some blockage. A combination of generous amounts of squirty carb cleaner and air were needed, along with leaving them to soak for a while in carb cleaner. This allowed me to clean them all so that all openings were letting through light as intended. I also reset the idle screws, all of which were turned in about half a turn more than factory settings. I put the carbs back together (I'm getting quite quick now) and the bike immediately settled to a better purr than before. With everything open, I took the opportunity to do a carb balance and this turned out to definitely be needed following the cleaning of pilot jets. The bike now picks up on the throttle nice and quickly and settles back to idle quickly instead of a slow drop, which it was doing last week. I took the bike for a 20 minute ride in today's glorious sunshine and all the work felt worthwhile. Sadly though, I don't have space to keep multiple bikes indefinitely so this afternoon I've advertised the project bike for sale. Just in case anyone is interested - the advert is here (but you already know far more if you've been reading this thread!). https://www.gumtree.com/p/honda-motorbikes/honda-cbr600f3-1998/1478534295 -
Where to get QUALITY jets
Hairsy replied to Hairsy's topic in Old Motorbikes, Projects and Restorations
WeBike Japan looks to be very cheap - £25 incl. postage for 4 jets. Seems to claim they're OEM. Has anyone used them - are these likely to be genuine OEM parts? -
I'm going to be rebuilding a set of CBR600F carbs. I plan to clean parts where possible but I've been advised that it's wise to replace the pilot jets rather than try to clean them. There's lots of cheap rebuild kits on eBay etc but I want quality. I don't want to do the job twice. Can anyone suggest a source of reliably high quality jets? In the absence of a reliable alternative, I'll go OEM Honda but they're going to set me back £80+ for the 4 jets. So if there's an quality alternative then that would be nice!
-
CBR600 F3 1998 - amateur restoration
Hairsy replied to Hairsy's topic in Old Motorbikes, Projects and Restorations
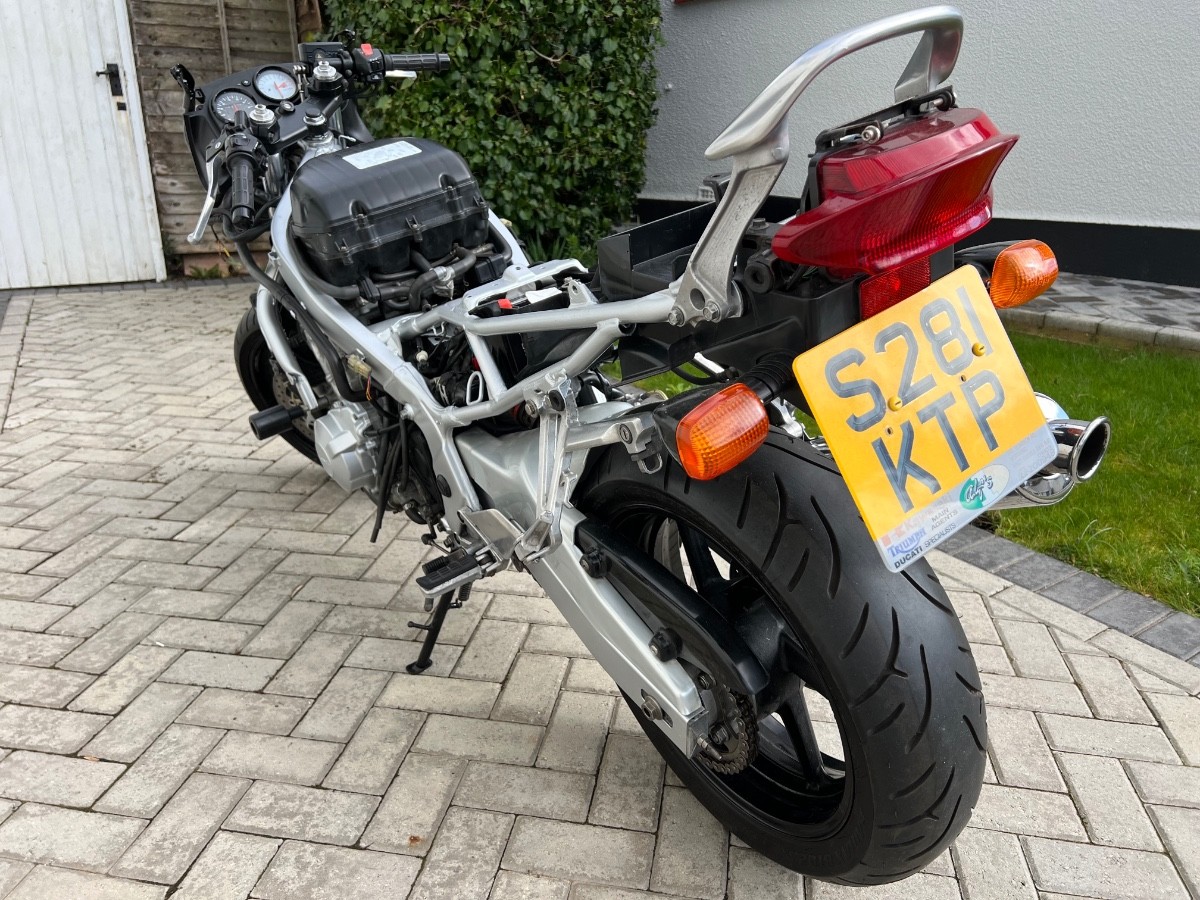
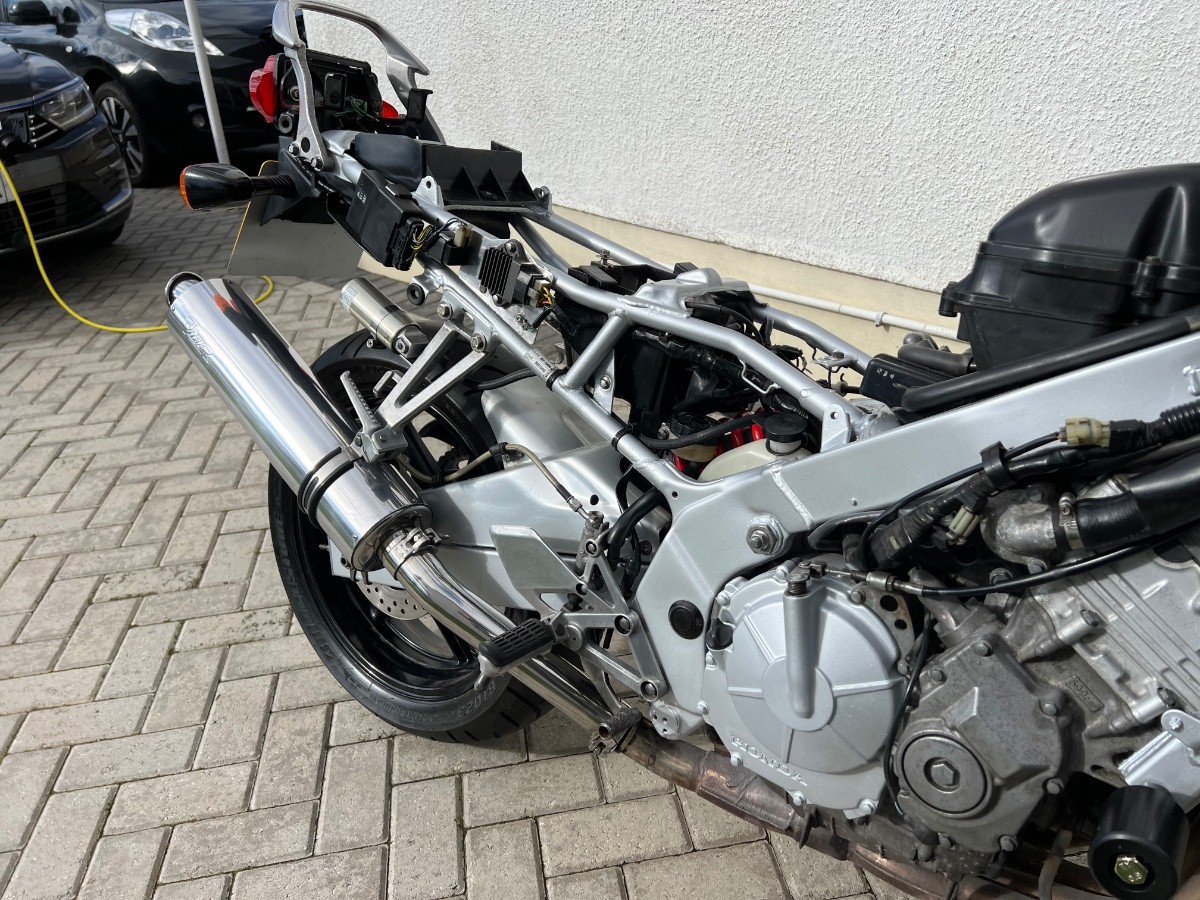
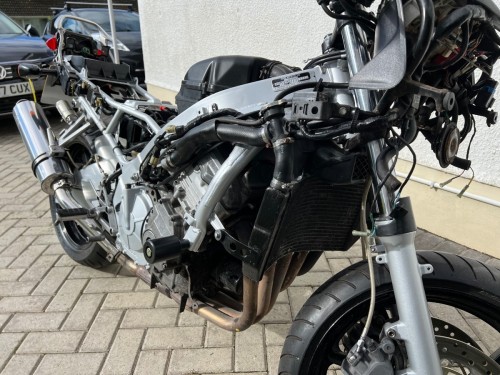
It's been a while since I gave an update, mostly because other things have been getting in the way and it can be hard to re-engage once momentum has stopped. But today I finally got around to getting the MoT done. One advisory for slight play in a front wheel bearing but not of concern. However, as a result of the ride to the MoT place and back I've realised that I'm not happy with how smoothly the bike runs at low speed. Dirty pilot jets are definitely the main suspect. Those who've been following this thread may recall that I replaced the carbs with a second hand set from a recently running bike. I contemplated doing a full clean and rebuild when the replacement carbs arrived but I was so desperate to know whether the bike would run at all that I fitted them with only a minor clean of the bowls. The bike does run OK now, and there's probably bikes out there that run worse, but I can't consider the bike finished with this rough slow running. The MoT place were very complimentary about the bike and that just gave me even more incentive to get her running right. So next week I plan to, once again, strip away the bodywork and pull the carbs off. They'll then get a proper comprehensive clean, rebuild and then balance which, I hope, will leave the bike just how she should be. A few more updates coming soon. -
How To Clean Electrical Connectors
Hairsy replied to EasyGoingPat's topic in Old Motorbikes, Projects and Restorations
Similar to the above ... I would start with alcohol, rubbing the area with a little children's paint brush if it's fiddly (I buy packs of 5 from Poundland!). If that doesn't work then I'd step up to White Spirit and / or Paraffin. With either of these though, I'd then follow up with alcohol or brake cleaner. Nail polish remover (acetone) can be good but, as mentioned above, I would worry about its effect on plastics so I'd be more cautious with that. -
CBR600 F3 1998 - amateur restoration
Hairsy replied to Hairsy's topic in Old Motorbikes, Projects and Restorations
Very kind of you to say so and if it gives you that boost then that’s fantastic. I certainly got a boost from reading other threads on here. And I’ll keep an eye out for you when your work is finished - we live in the same town! -
CBR600 F3 1998 - amateur restoration
Hairsy replied to Hairsy's topic in Old Motorbikes, Projects and Restorations
I’m certainly contemplating keeping it, yes, even though logic says I shouldn’t. I’m certainly not in any rush to advertise. The reality is that I have a bit of a yearning for something that I can do a bit of touring on - specifically VFR800 or Sprint ST1050. In which case, both my CBRs will have to go to fund the replacement. We’ll see. The experience of taking a rusty non runner and making it in something that I can feel good about has been a great one. So, whatever happens, it’s all been positive. I’ll update the thread with whatever ends up happening with the bike. -
CBR600 F3 1998 - amateur restoration
Hairsy replied to Hairsy's topic in Old Motorbikes, Projects and Restorations
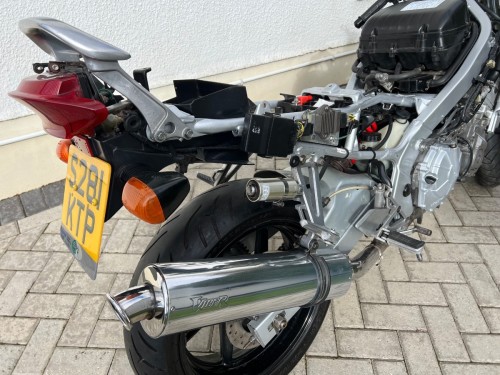
So last job will be to take the bike through an MoT but I'm not in a great rush to do that because I suspect that people will start looking for bikes once the nice weather starts. No real benefit in having a quick MoT and then spending 2 months waiting for a buyer. I suspect I'll look to MoT and sell after Easter. The key question will be how much to sell for? The bike has done 40,000 miles (the odometer reads in km) which isn't unreasonable for the age but I don't have the service history so that's got to factor into the price. The plus side of course is that this thread will hopefully serve as a helpful accurate record of what's been checked out and/or sorted out. The price for rideable bikes seems to range from £1,000 to £2,000 (although I've seen one recent optimist looking for £3,500!). We'll see. If anyone happens to be interested in buying the bike then please feel free to DM me. And of course there remains the possibility of falling in love with the bike when I take her for the MoT! -
CBR600 F3 1998 - amateur restoration
Hairsy replied to Hairsy's topic in Old Motorbikes, Projects and Restorations
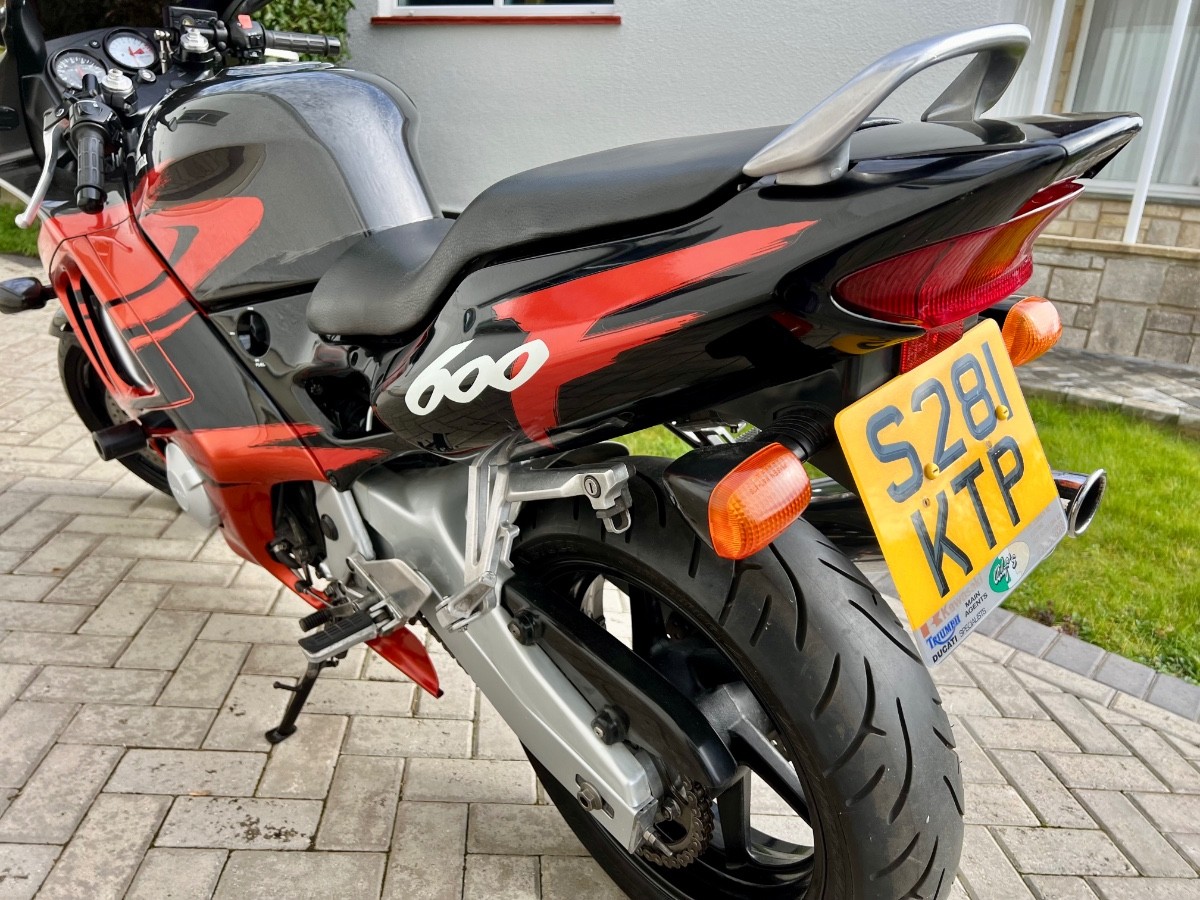
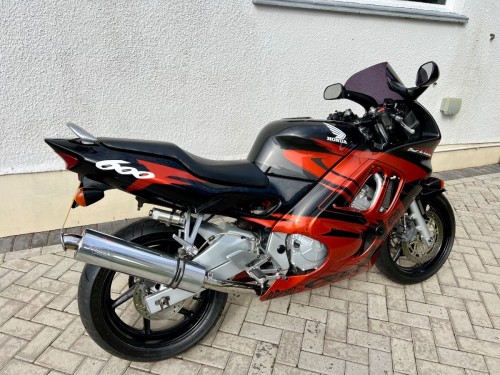
Everything is now back together and even had a brief moment of dry weather for some pictures. And a few before and after of key areas of corrosion ... Feels nice to be done!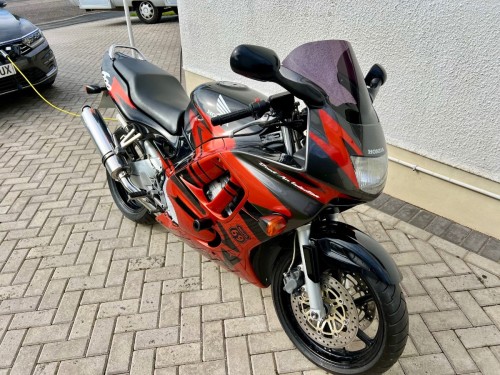


-
CBR600 F3 1998 - amateur restoration
Hairsy replied to Hairsy's topic in Old Motorbikes, Projects and Restorations
Very brief update - the second hand tacho arrived - and it works! Instruments are now back in place, along with most of the fairings. Photos to follow when its complete and there's a break in the rain so I can get it outside. Happy boy. -
CBR600 F3 1998 - amateur restoration
Hairsy replied to Hairsy's topic in Old Motorbikes, Projects and Restorations
Just some polishing and waxing of body panels today. Photos don't really show the benefit so I'll save that for when the bike's back together. Waiting for the replacement tacho to arrive now - and praying that it will work. -
CBR600 F3 1998 - amateur restoration
Hairsy replied to Hairsy's topic in Old Motorbikes, Projects and Restorations
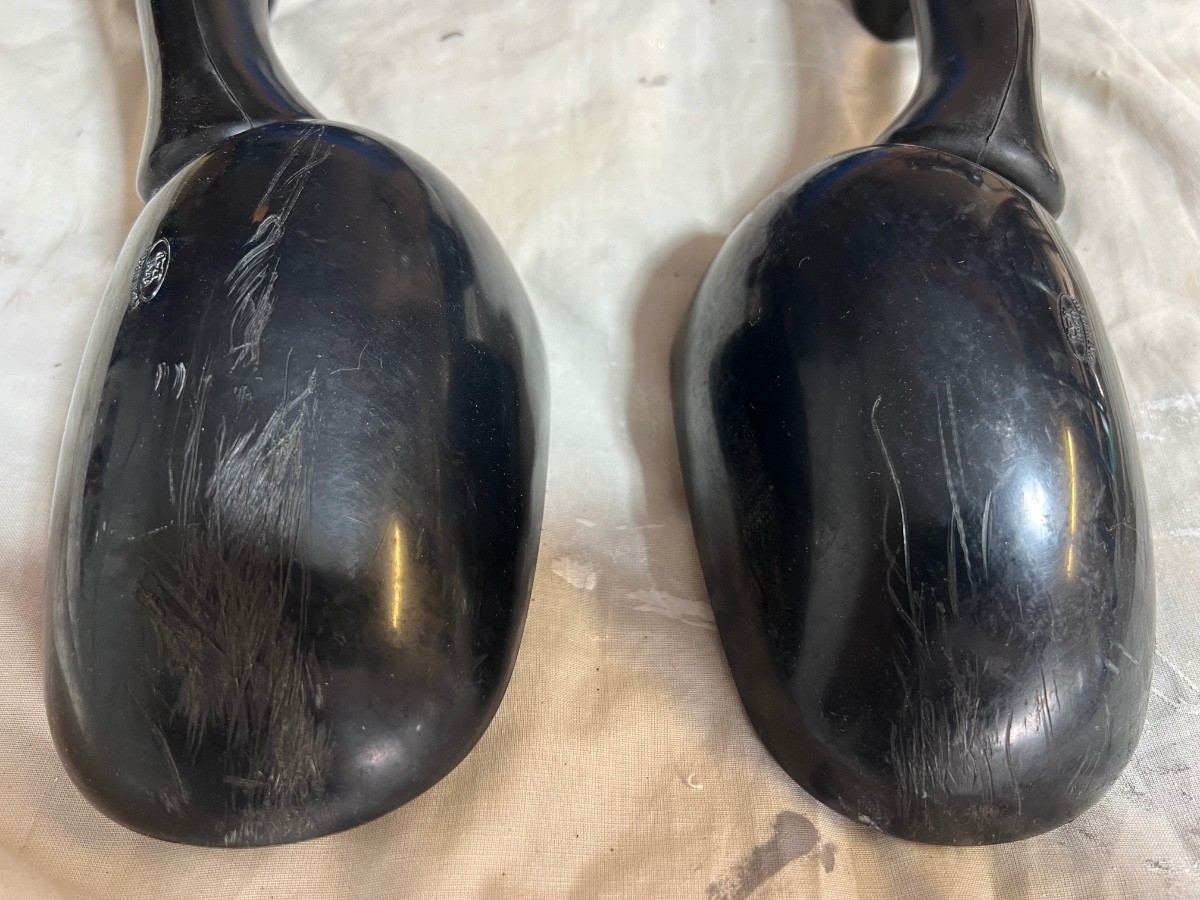
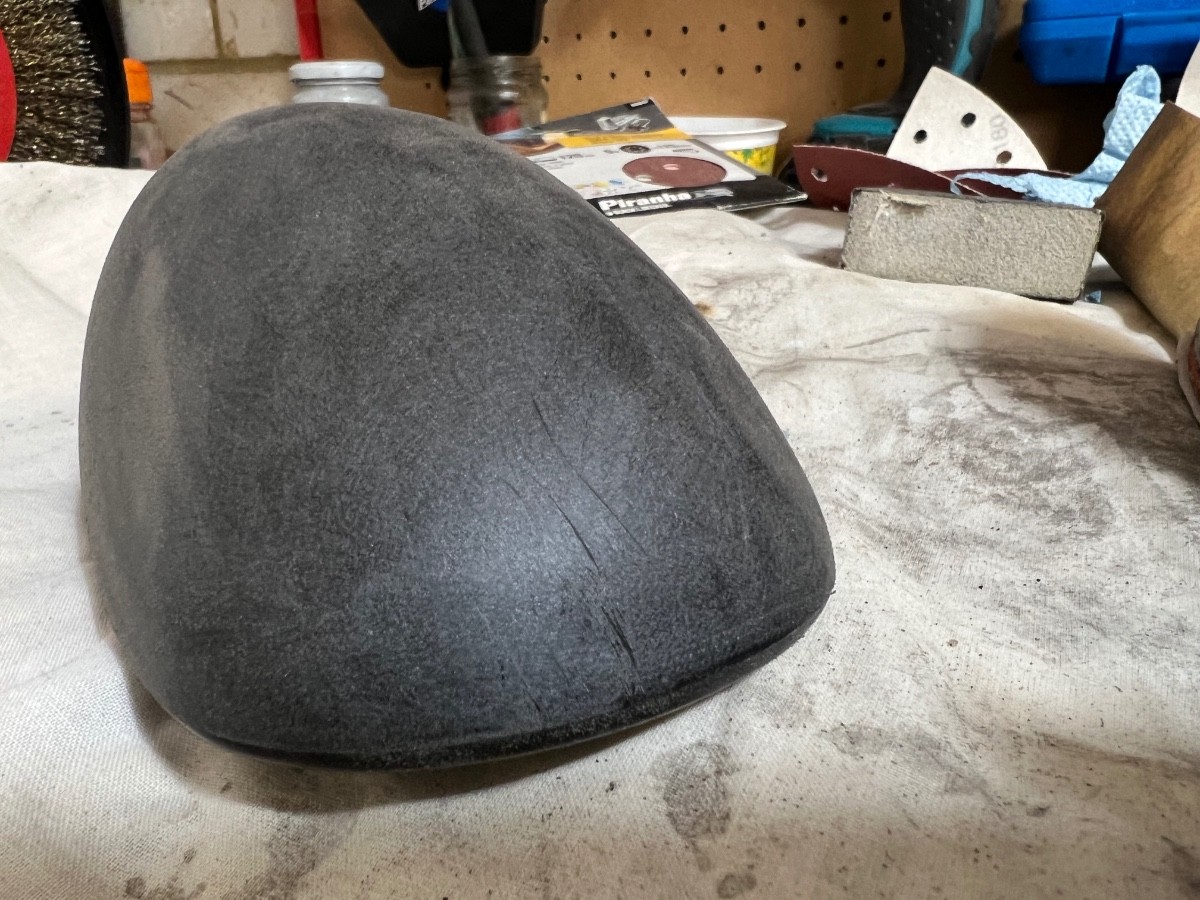
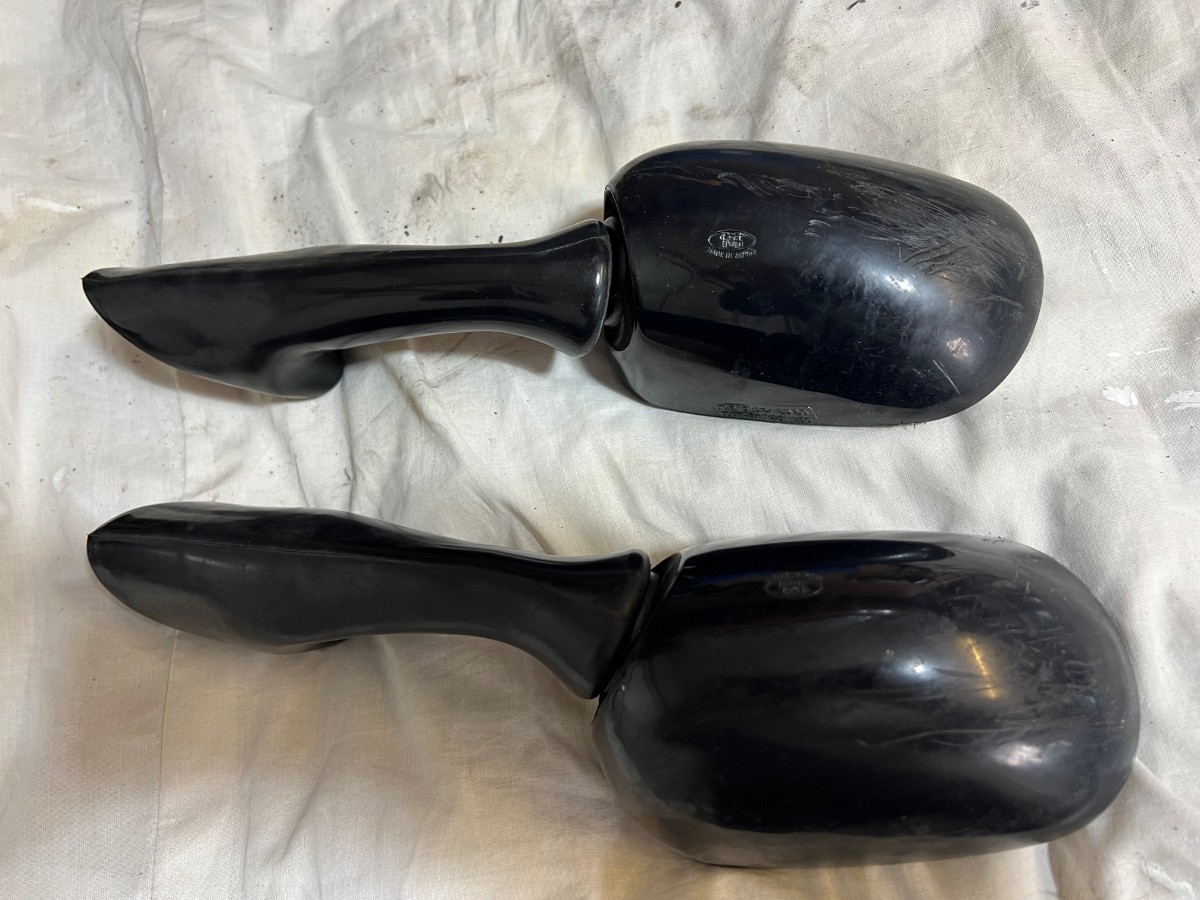
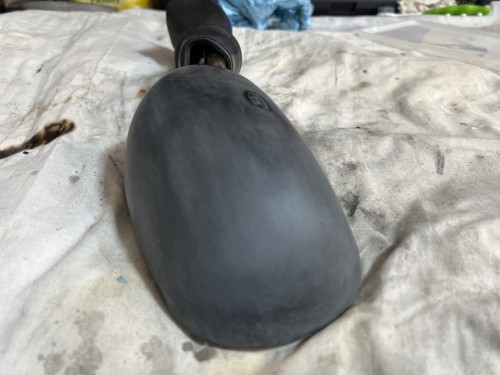
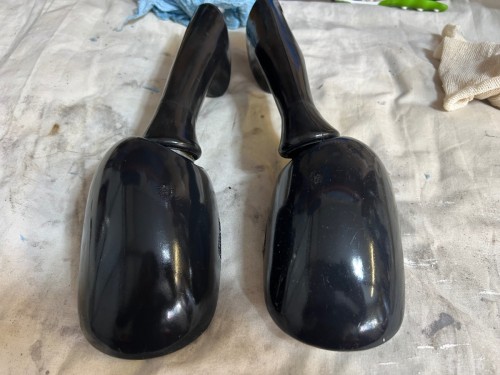
The tougher days seem to often be followed by a better day. After my update yesterday, I did some searching and found a second hand tacho on eBay. I got in touch with the seller who had bought the tacho second hand himself to replace an intermittent one on his back. In the end he didn't swap it. Sounds very like my situation but he's never actually tested it. The great news is that he's happy for me to return it if it doesn't work. So that's ordered and will hopefully arrive later this week. This morning I worked on the mirrors. They came off the bike with plenty of evidence of past abuse. Definitely seen better days. I've never tried to repair this sort of damage before but new mirrors are outside budget. Following some research I started by attacking them with some 120 grit sandpaper over the whole thing. After 15 minutes or so they were looking very dull but a lot of the scratching had gone. Those remaining scratches did then need a lot of elbow grease to take the plastic down to the level of the scratches. Each mirror got about 30 minutes of sanding but they ended up looking OK but obviously very dull. I then moved on to smoothing out the surface, initially with 400 grit wet & dry and then finally with 800. They still looked pretty awful but the final step was to melt the surface with my heat gun set to high. After a couple of tests I found the best technique was to get the whole mirror as hot as possible and then hold the heat gun very close to melt the surface and move systematically over the whole mirror. It needed care and patience but once I had the hang of it, it felt a bit like spray painting with hot air. They took some time to cool and I'm really pleased with the outcome. I'd definitely recommend this. It just takes patience and having the faith that, as you make it look worse, it will come good in the end. Before and after ...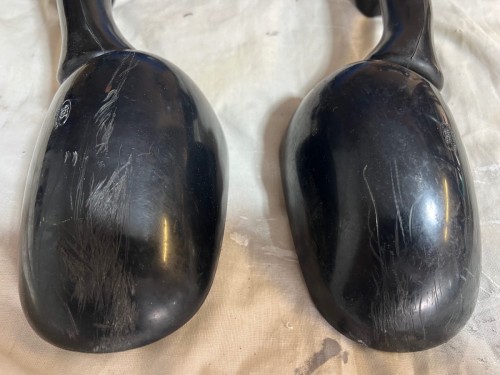


-
And was your problem sorted?
-
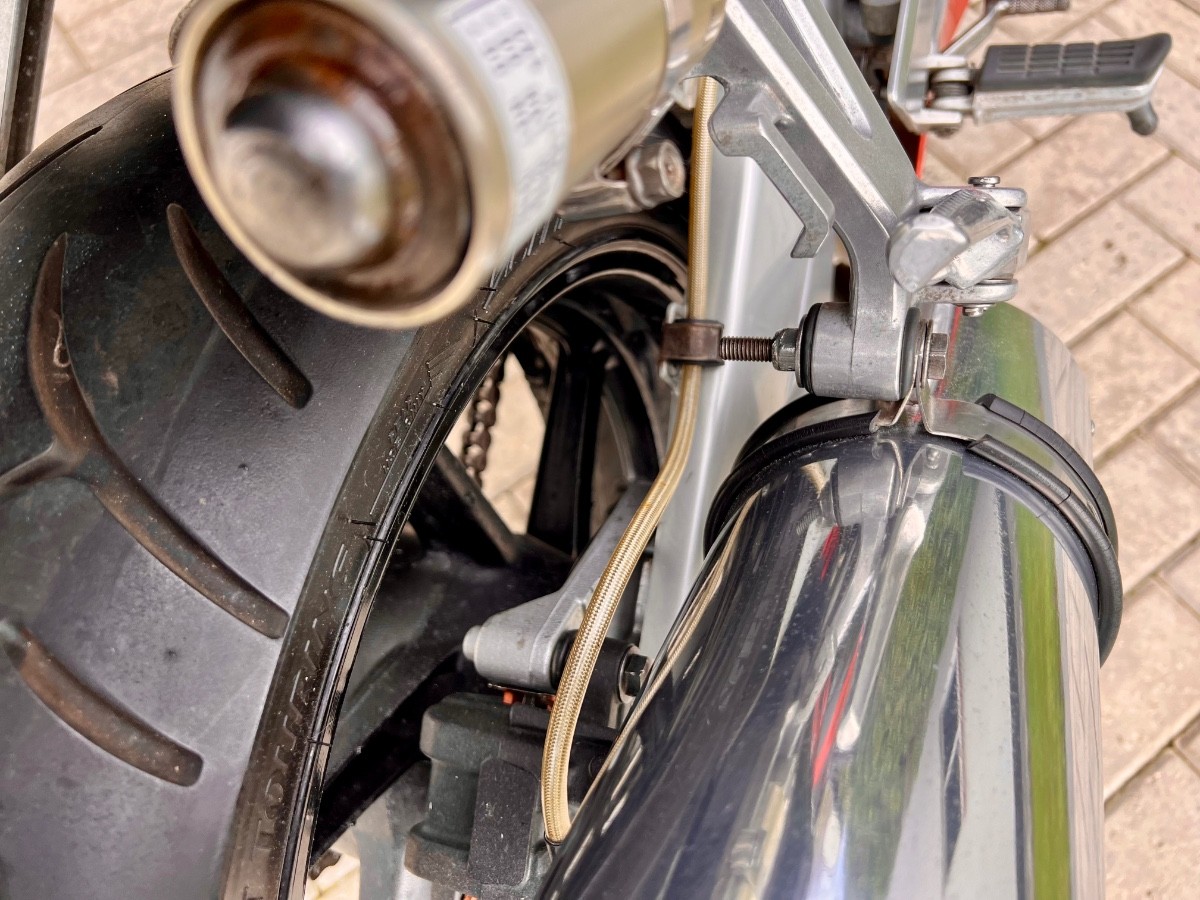
Welcome and looking forward to seeing how your restoration develops. I like small bikes. Re the advice about pipes, post pictures showing both ends of them!
-
CBR600 F3 1998 - amateur restoration
Hairsy replied to Hairsy's topic in Old Motorbikes, Projects and Restorations
Thanks for that info. Unfortunately the motor is connected directly to the PCB and has a load of plastic housing around it so I just can't see. To be honest, I doubt it's brushed as it must need a significant level of precision and I'm not sure a brushed motor has that. But I don't actually know I went to see my tool supplier friend and he didn't have anything that would give me a peak reading - and most of his stock was out on the van doing the rounds. However, as I've been able to see that the output from the ICM is consistent whether or not the tacho happens to be working at that time, I'm pretty confident that the problem is the tacho. With that in mind, I'm going to try to get hold of a replacement second hand tacho at a good price. If it turns out to be expensive then I may wait and see whether the current one becomes less intermittent life after some usage - but I'd be happier if I could replace it. And while I'm waiting, I'm now starting work on getting the fairings as good as they can be. They're used with some previous crack repairs but I think they're still going to look good - certainly not worth replacing. There's also a crack that hasn't yet been repaired so I'll need to sort that out. -
CBR600 F3 1998 - amateur restoration
Hairsy replied to Hairsy's topic in Old Motorbikes, Projects and Restorations
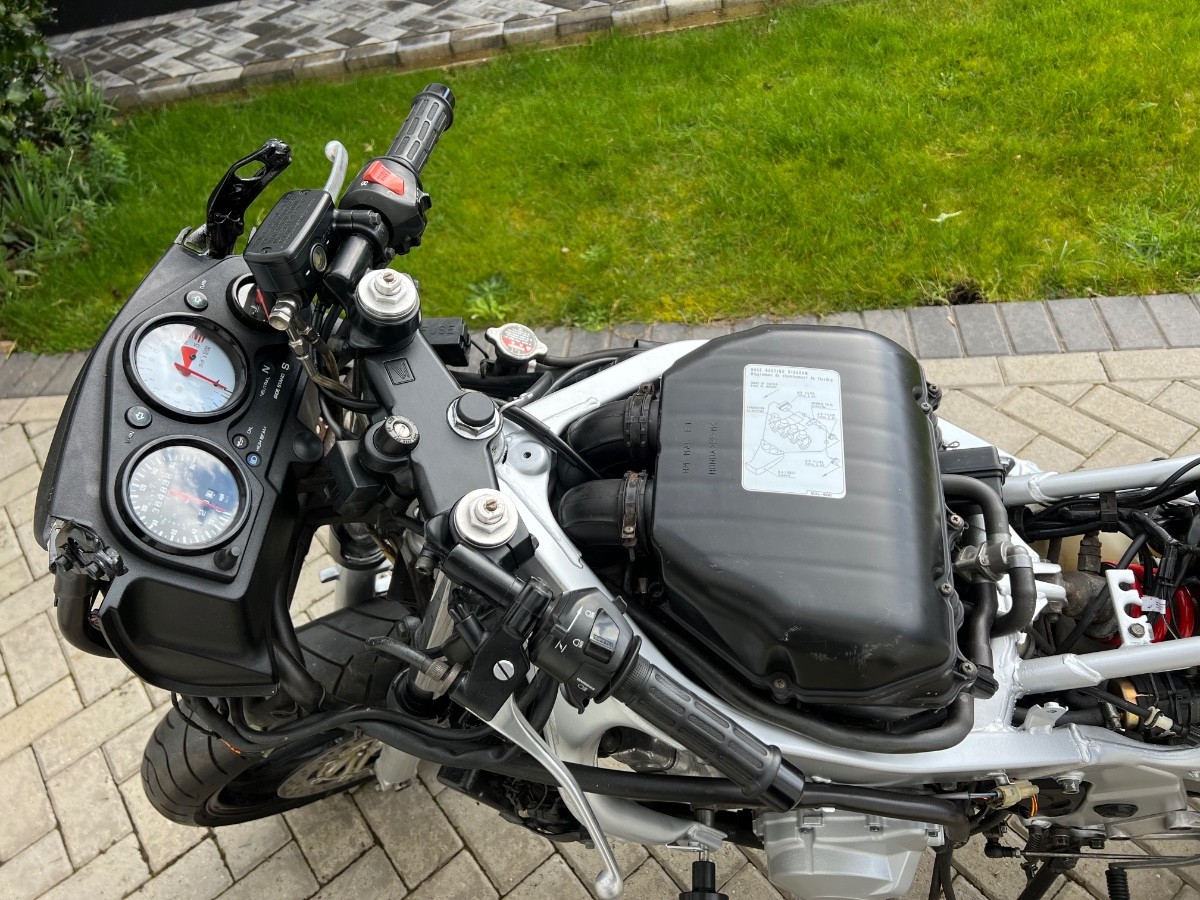
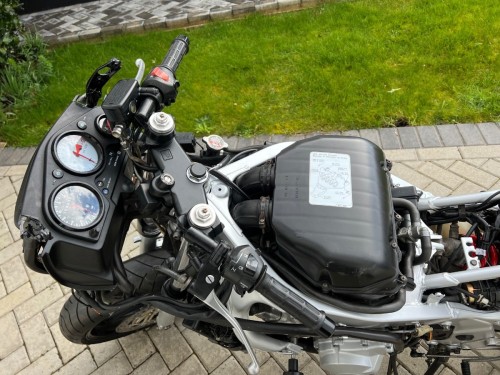
I've gone over all that corrosion and sorted it. There's good connectivity through those screws that provide the connection to the tacho underneath. I took it all apart again this morning and sprayed some contact cleaner into the coils of the motor that moves the needle. I connected the bare instruments to the bike. It started with some erroneous readings but after a short time it settled into working well. I left it for a few minutes and all was as it should be. In a good mood, I put the instruments back into their casing and fitted them. Started the bike again and ... no reading! After a while it kicked back into life but it's not quite right. So I'm fairly sure that it's the tacho itself. I've taken a voltage reading from the signal wire and it averages at around 1.3 at idle and increases with revs. While this type of reading doesn't give the precision I want, I'm fairly confident that this is OK. Those readings are the same whether the tacho happens to be working at that stage or not. I'm popping over to see a friend who is a tool supplier to the trade in a moment as he may have a proper peak voltage meter. That would allow me to have more confidence that the ICM is OK. Where there's mechanical movement, as is the case with the little motor that drives the needle, a bit more operation might allow the contact cleaner to do its job and bring it back to life. After all, the bike was left sitting for 3-4 years. I don't know whether the motor has brushes - if it does then there's even more likelihood that the combination of a bit of use and the contact cleaner will sort it out. Alternatively, I bite the bullet and get replacement part(s). A full set of instruments will cost me over £100 and would mean a mileage change on the bike. I don't really like that as it will then call into the question the integrity of the mileage. That's already complicated by the fact that the mileage counts in km and one or two of the MoTs have incorrectly recorded the odometer as miles (the speedo face has been replaced to show mph). A better option would probably be just a second hand replacement tacho - it should be possible to find one so I think that's the option I'll pursue. I just get nervous about buying sensitive parts that someone else has hacked off a donor bike! The question is whether I do it now or try riding the bike for a while and see whether the contact cleaner on the moving parts does its job.
-
CBR600 F3 1998 - amateur restoration
Hairsy replied to Hairsy's topic in Old Motorbikes, Projects and Restorations
Well it was a short lived celebration. I moved onto the tacho this afternoon which has been reading intermittently. Sometimes it reads nothing. Sometimes it reads absolutely max revs and sometimes it works fine. I was really hoping to quickly find a dirty connection or broken wire but sadly not that simple. The bike runs well so I think it's safe to say that the ignition itself is working well from the Ignition Control Module. That module also sends out the tacho pulse. There's good continuity from the module connector through to the relevant part of the circuit board where the rev counter picks up the signal. There's also an ignition +ve feed to the tacho. That has good voltage when the ignition is turned on. Finally, there's an earth going to the tacho. That earth is shared by the instrument lighting - which is working fine. However I will trace that back tomorrow to its source tomorrow just to check it - but I doubt that's the problem. So I took the tacho off and cleaned up the connections on the circuit board. You can see in the second picture that they don't look great but, unfortunately, when I put it back on the bike and connected it up there was no improvement. So I think I'm left with two likely suspects - the ICM or the tacho itself. As I understand it, to test the ICM I need a multimeter that can read Peak Voltage. I don't have one but I have got a schematic for a module that I could make to allow my standard multimeter to read a peak voltage (it uses a capacitor to build up voltage from the source and then you measure the voltage at the capacitor). If the ICM is producing a good voltage (I believe it should be >10.2) then the problem is likely to be the tacho. If it's lower than that then it's the ICM. I fear this is going to eat further into my pretty much non existent remaining budget. But it needs doing. However, if anyone has any further bright ideas then let me know. The intermittent nature of the problem makes me think there must be something loose but I just can't figure out what more I can test. And I can't really fiddle with the tacho once it's connected to the bike because there isn't any space.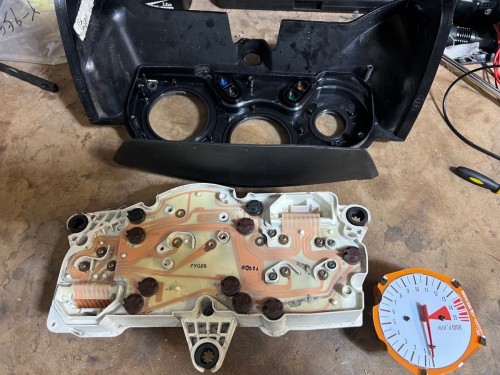

-
CBR600 F3 1998 - amateur restoration
Hairsy replied to Hairsy's topic in Old Motorbikes, Projects and Restorations
Well in an extremely rare instance of good fortune, when I started investigating the nuts I found a loose one. Took it out, cleaned up threads, torqued it up to spec and problem solved! Amazing how much we can panic and assume the worst. I'm glad I didn't go and invest in a load of tools - I celebrated by giving the garage a good hoover! Family activities are taking priority so nothing more today. But, as you'd expect, I'm quite happy! -
CBR600 F3 1998 - amateur restoration
Hairsy replied to Hairsy's topic in Old Motorbikes, Projects and Restorations
Never heard of that - looks like a really interesting product. Maybe I try heat and, if that fails, then cold. Or vice-versa. From what I can see, it will work best if I can get the cold focussed onto the stud rather than the nut. I'll have a think tomorrow after I've taken a proper look. Whatever happens, I'm not going to start getting physical with it until it's had a few days of penetrating fluid to start things off. The nature of forums (and other face to face advice that I'm seeking) is that I'll get different advice from different people. Which means inevitably I won't follow everyone's advice. I hope no-one will be offended by this. I'm grateful to anyone who takes the time to share their own experience and make suggestions. -
CBR600 F3 1998 - amateur restoration
Hairsy replied to Hairsy's topic in Old Motorbikes, Projects and Restorations
You're asking all the same questions that I am! I need to get a proper look at it first which I'll do tomorrow. I do have a wildly optimistic hope that it'll tweak up but I tend not to be quite that fortunate! The headers are in fairly good nick - I doubt they're original so that gives me a little optimism. But that may turn out to be short lived. And, I guess you're right, full disclosure at sale is an option. It really is a very small blow and I guess some owners might just tolerate it. But I know it would bother me if I owned the bike so I'd certainly like to solve it if I can. We'll see how things pan out. Thanks for the suggestions - it's all appreciated. -
CBR600 F3 1998 - amateur restoration
Hairsy replied to Hairsy's topic in Old Motorbikes, Projects and Restorations
Thanks for the suggestions. I don’t really know what expensive is but my first searches threw up costs of around £75+ which was just more than I expected. All tips are welcome. Based on early research, my plan is … - wire brushing to remove surface rust - 2 or 3 days of applying penetrating fluid - a few heat cycles with plenty of hammering along the way plus spraying penetrating fluid - heat and try to remove with a short ratchet arm so that I can’t apply too much torque - repeat as needed if it’s still too tight Sound OK? -
CBR600 F3 1998 - amateur restoration
Hairsy replied to Hairsy's topic in Old Motorbikes, Projects and Restorations
Giving some thought to the challenges presented by yesterday, I need to be able to apply plenty of heat around the exhaust studs. Apart from my wife’s kitchen blowtorch and an electric heatgun, I don’t have anything that will provide the sort of heat I want. Having looked at the price of butane torches, they’re a lot more expensive than I was expecting for what, I assume, is just a trigger mechanism. I may be able to borrow one but it would be nice to get my own, even though it won’t get a lot of use. Can anyone guide me on what I need to be looking for in a torch and perhaps recommend a budget option that will help me with removing my headers? It will only get very occasional use. Thank you. -
CBR600 F3 1998 - amateur restoration
Hairsy replied to Hairsy's topic in Old Motorbikes, Projects and Restorations
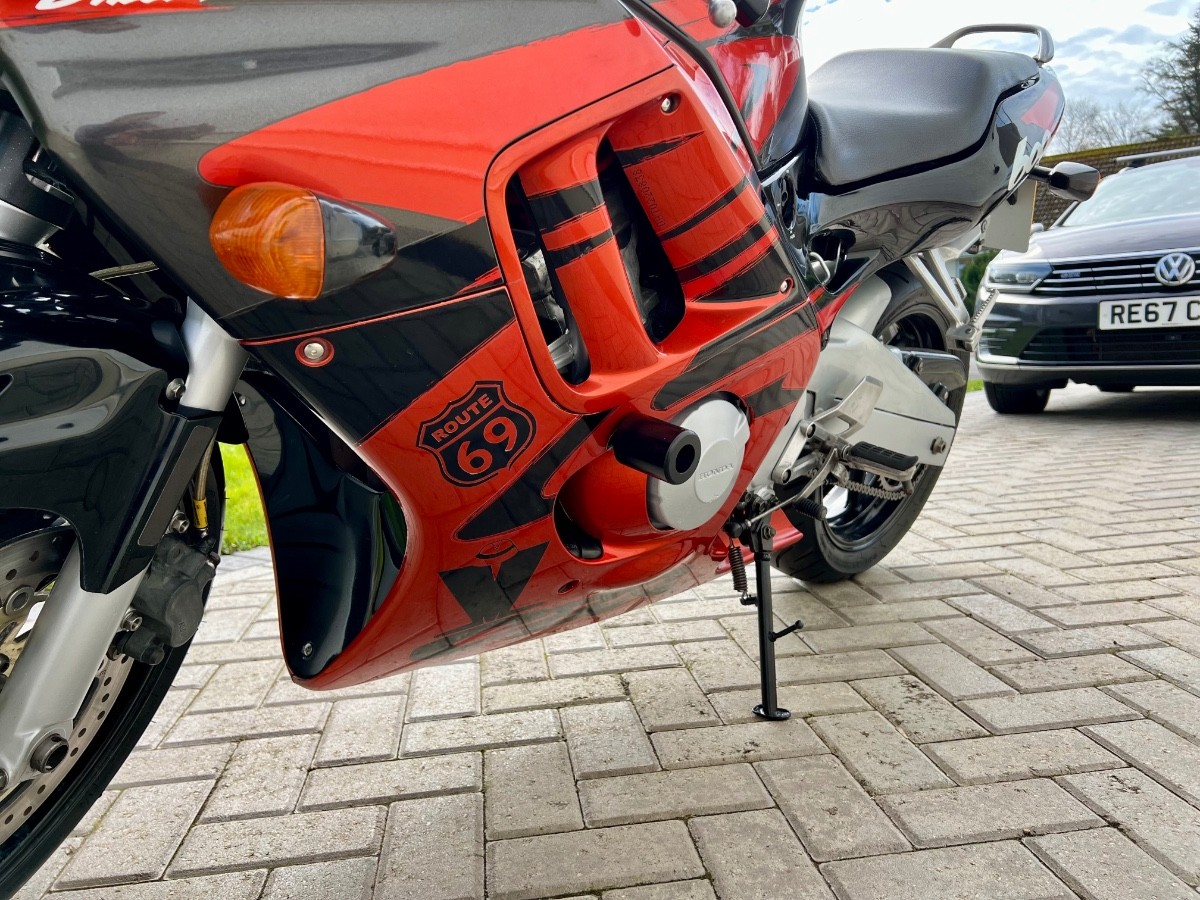
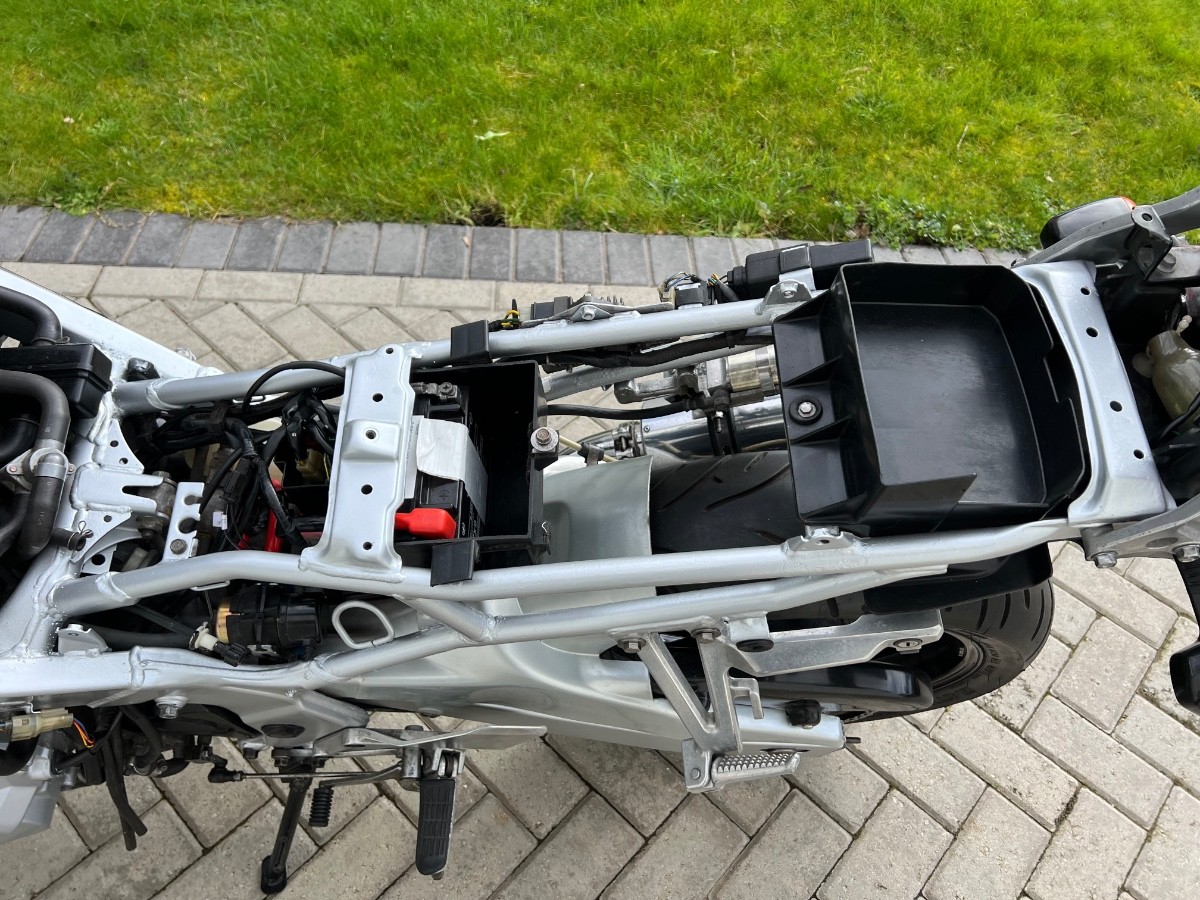
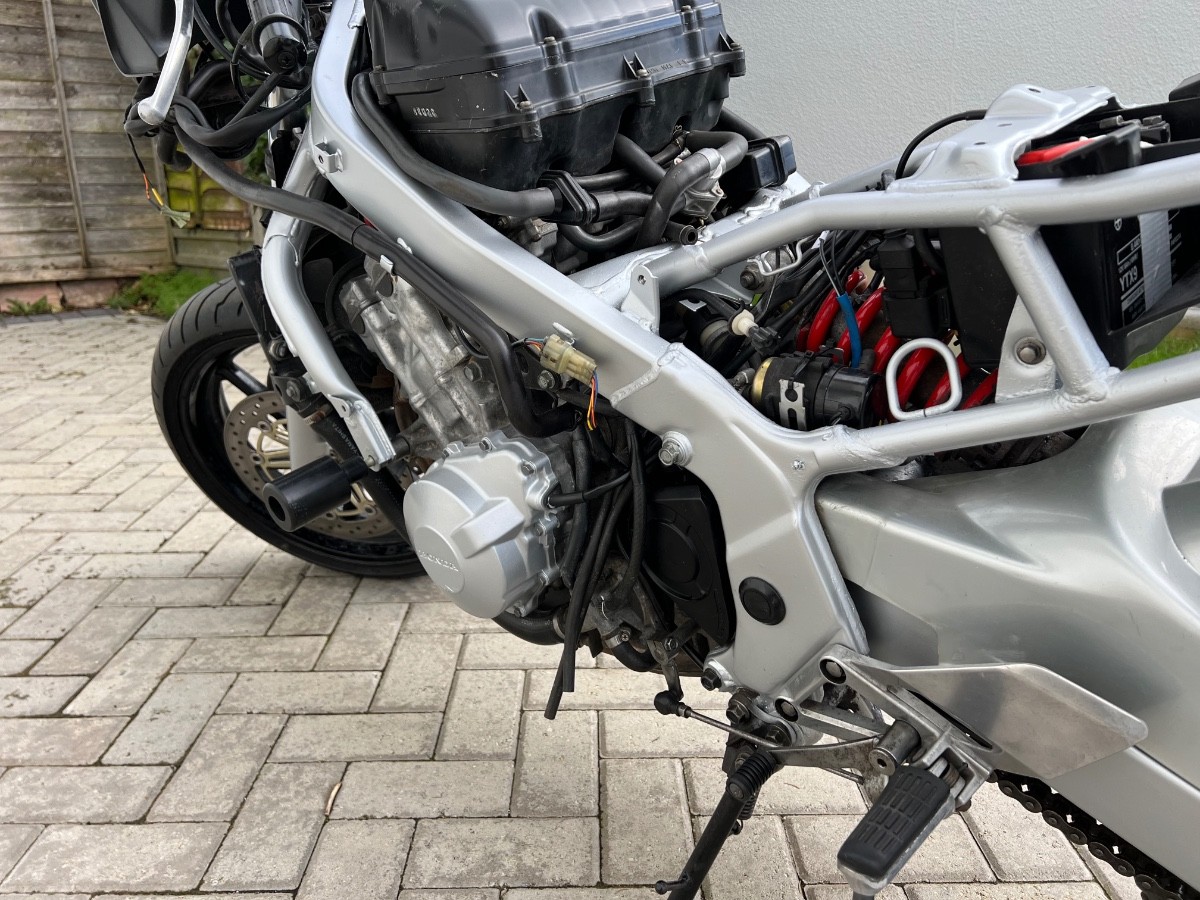
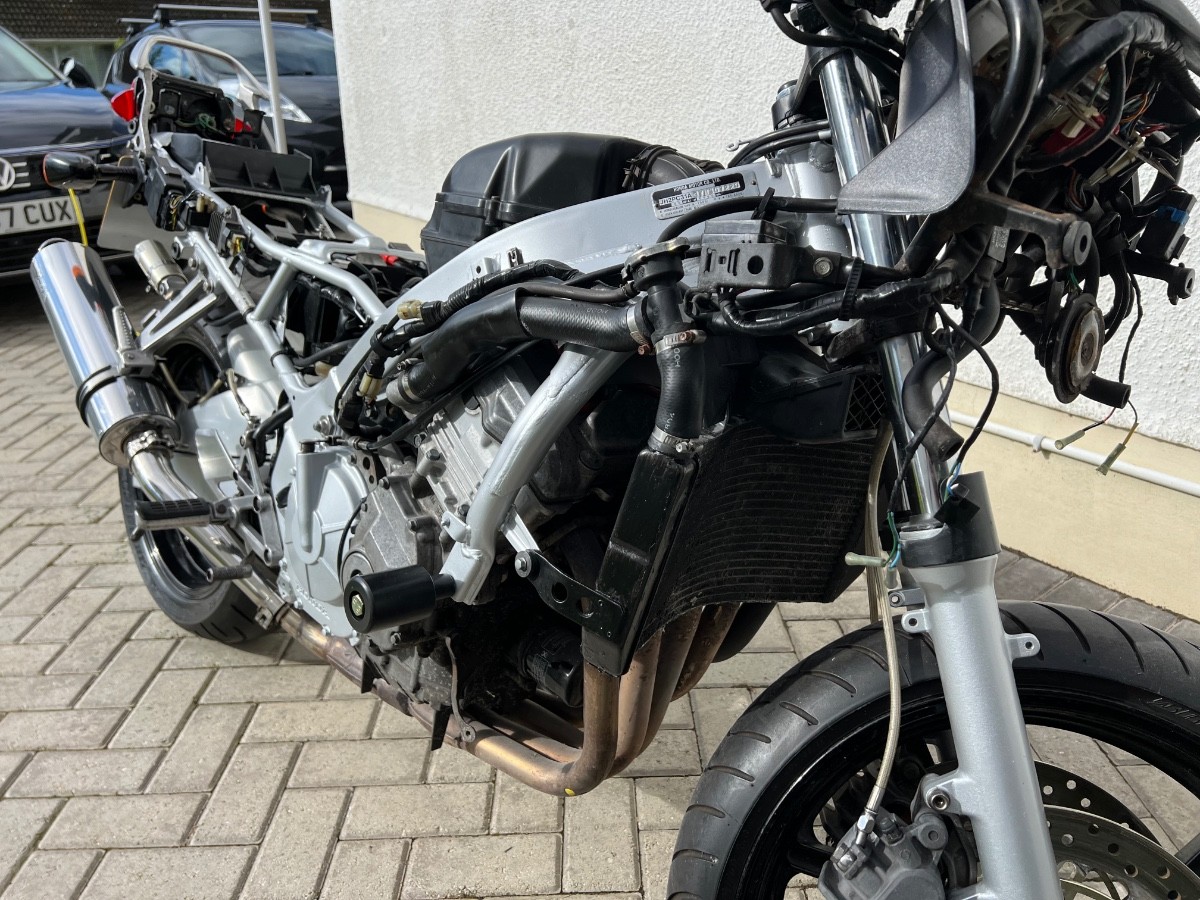
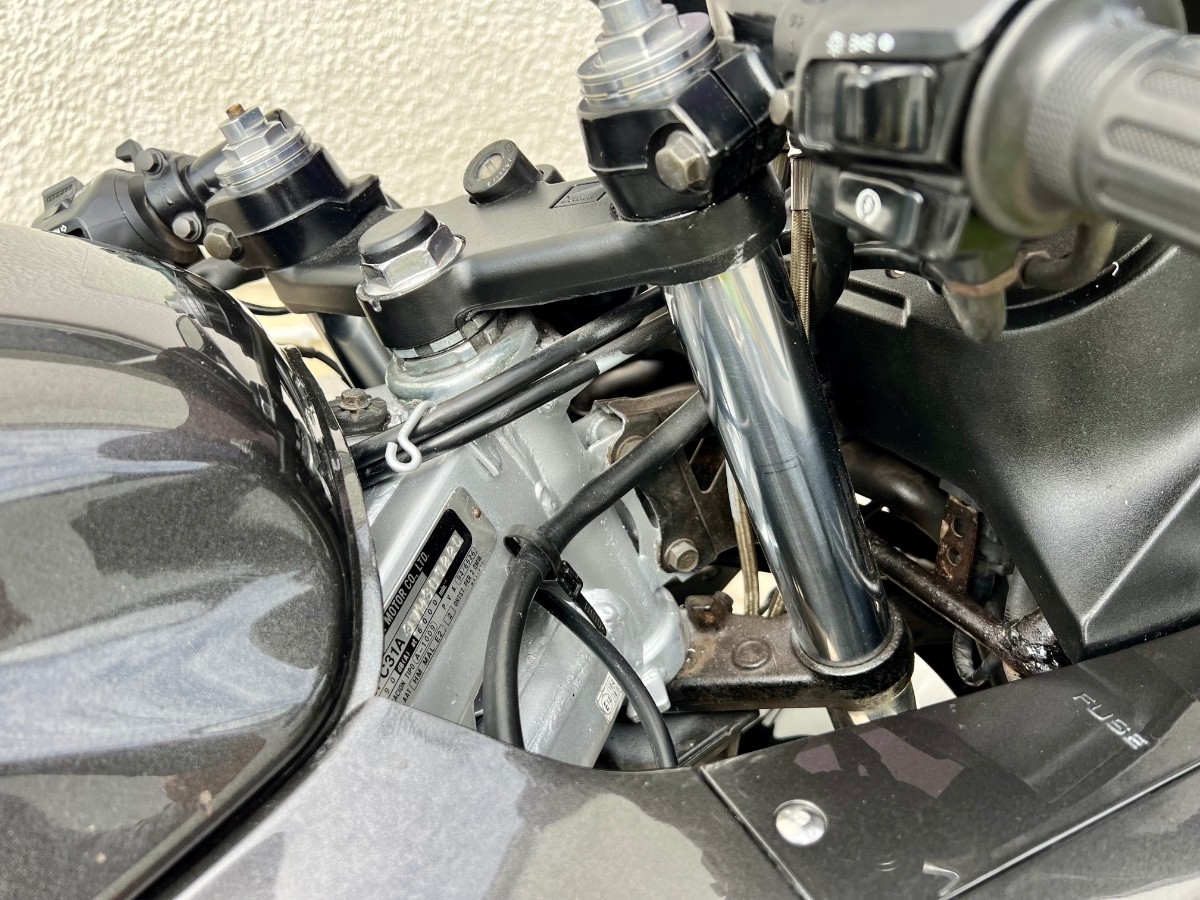
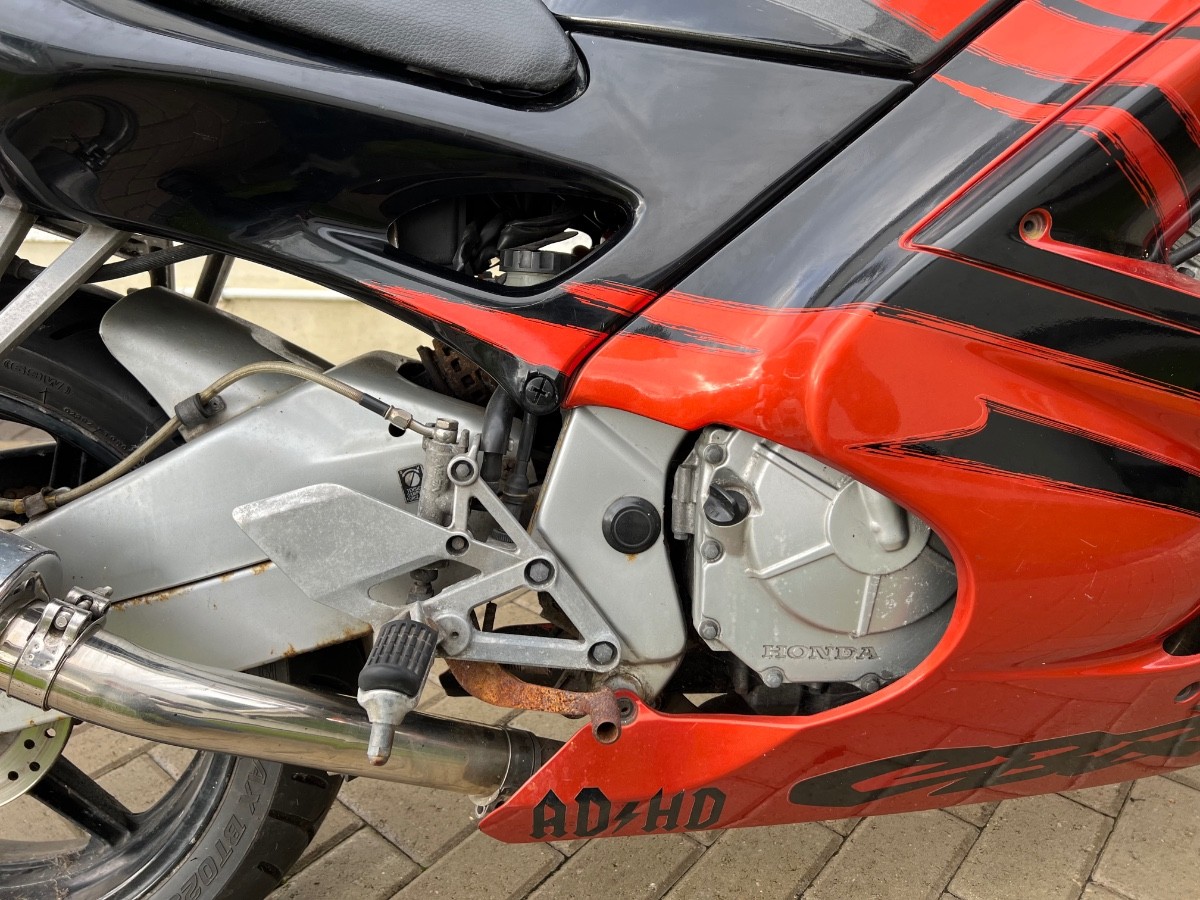
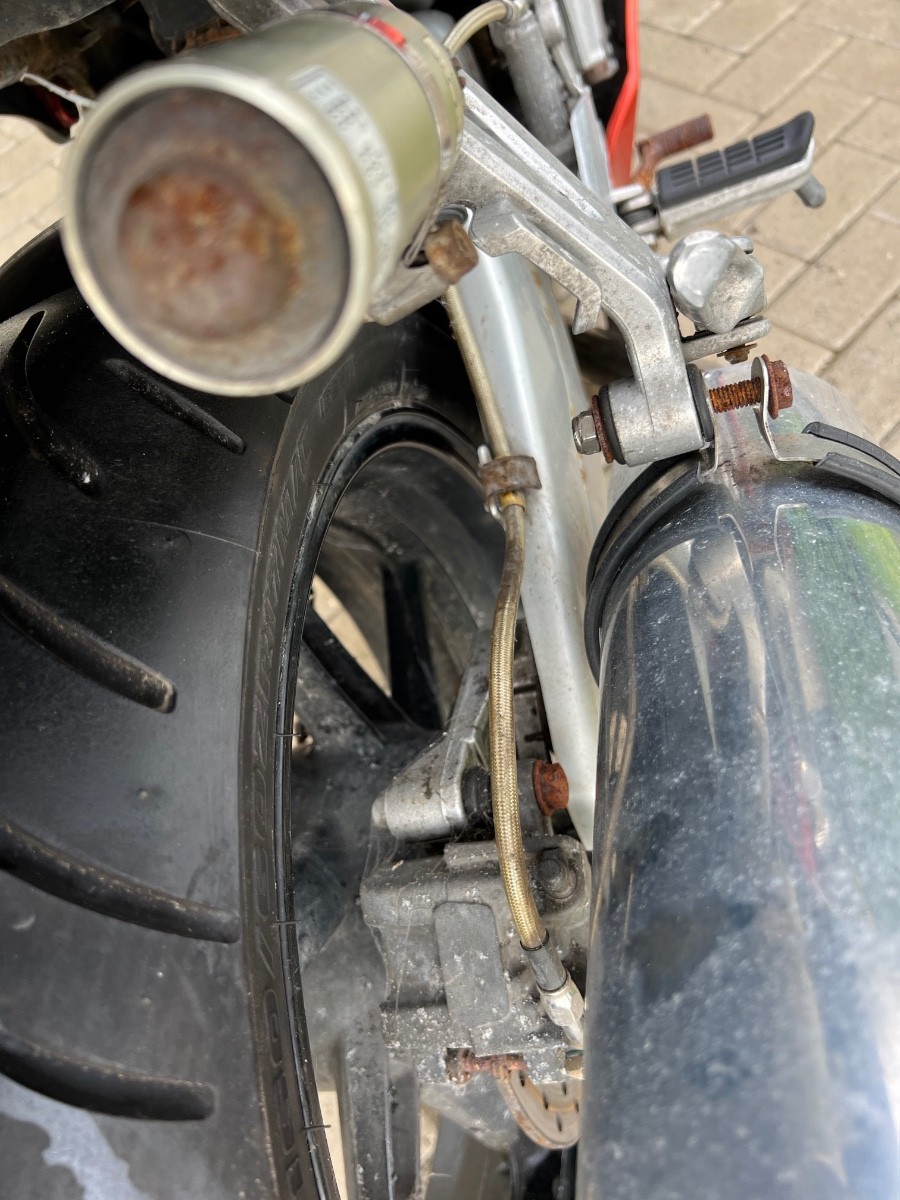
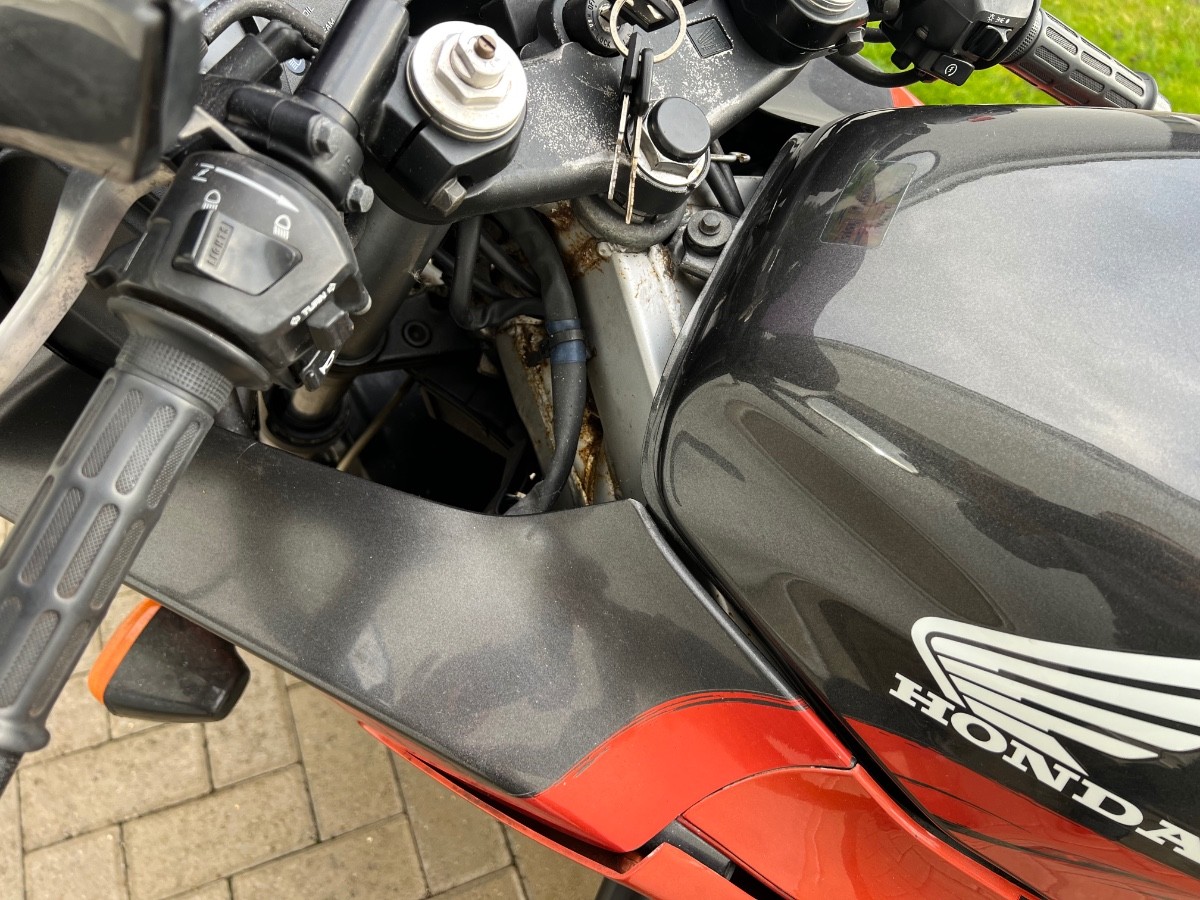
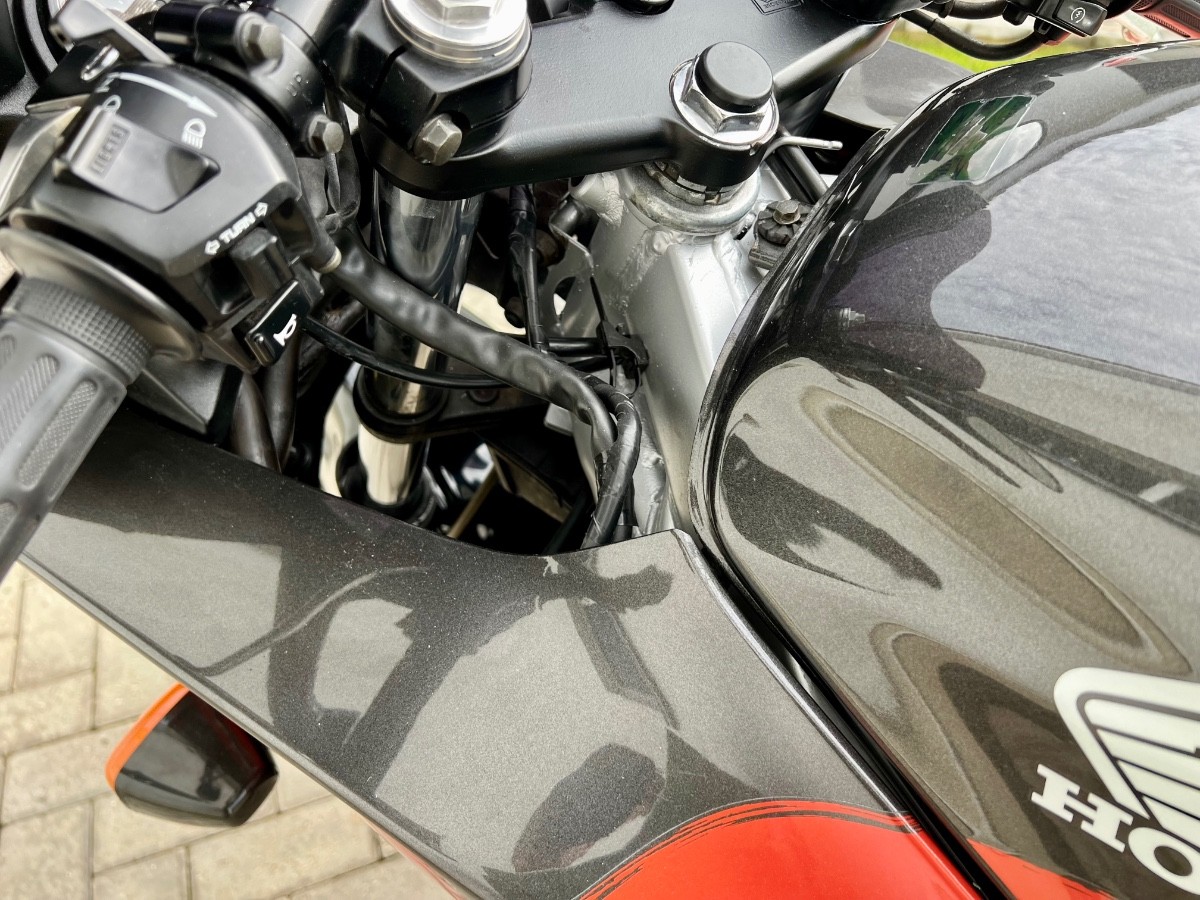
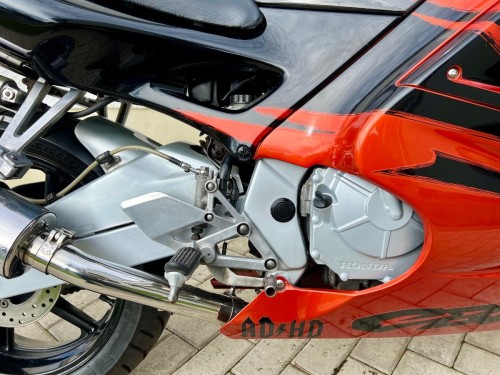
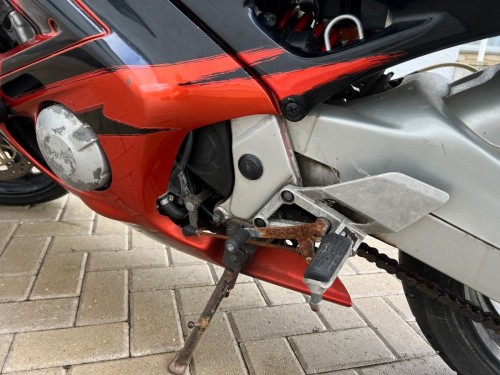
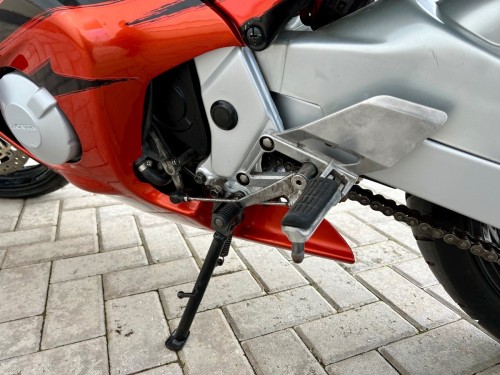
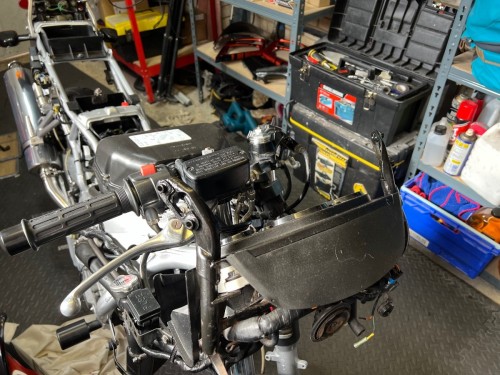
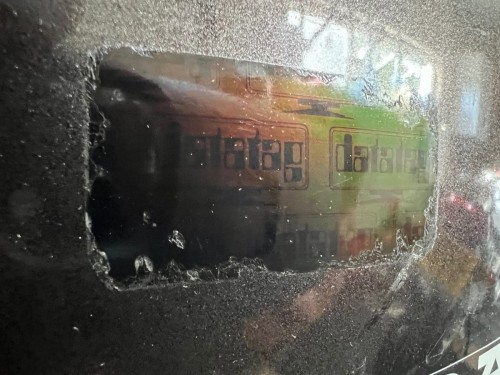
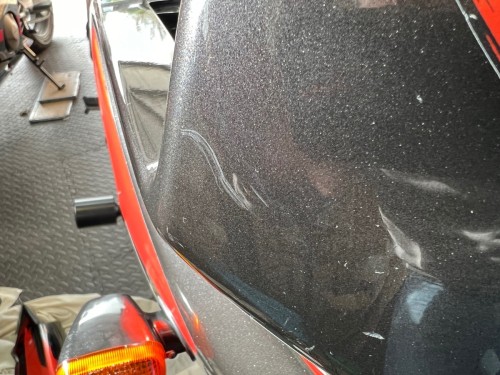
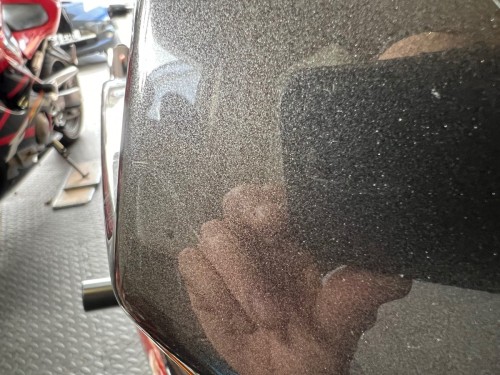
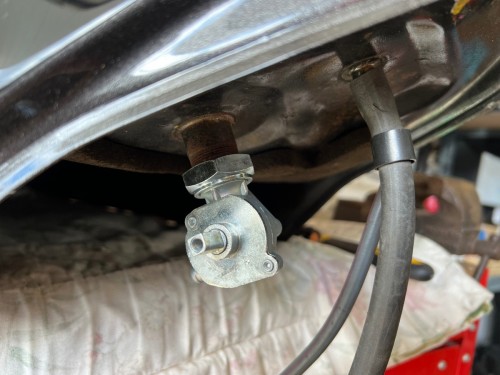
A mixed day today. First, the bracket for the front fairing had a bit of rust on it. It's completely hidden but it was annoying me. I wish these things didn't bother me but they do - so I gave it a coat of hammerite. I then gave the front fairing a thorough clean. I removed the headlight and indicators completely and cleaned them up, including their fixings. The front fairing had what I thought was some old sticker residue. I took a photo to enable a before and after picture and then realised that it's marked 'datatag'. I removed it anyway as it was a mess. Then I briefly took the bike outside into a brief moment of sunshine and took some nice clear under-fairing shots which I'll use when I advertise the bike. Then back inside and fitted the front fairing. The bodywork is not perfect but I want to get it as good as it can be. So when I spotted a scratch, I decided to give it 10 minutes of effort and that improved it nicely. Next was to get the bike started again just to make sure everything is good before I move onto the final bits of bodywork. Before doing this, I had to fit the new petcock to replace the one that was leaking. It's very nice to be able to pick up the tank without getting covered in fuel. I fitted the tank and connected it up and started the bike which was great. However, I noticed two problems that I now have to add to my list. Firstly, there's a small blow from cylinder 4's exhaust gasket. Secondly, the rev counter is again being intermittent. So I ended the day's work there - as I come to terms with the fact that the home straight, that I thought I was on, has couple more awkward bends in it.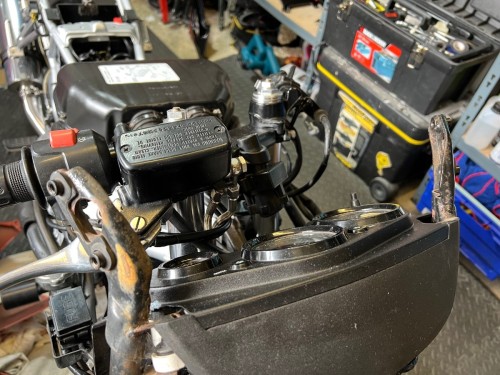
-
CBR600 F3 1998 - amateur restoration
Hairsy replied to Hairsy's topic in Old Motorbikes, Projects and Restorations
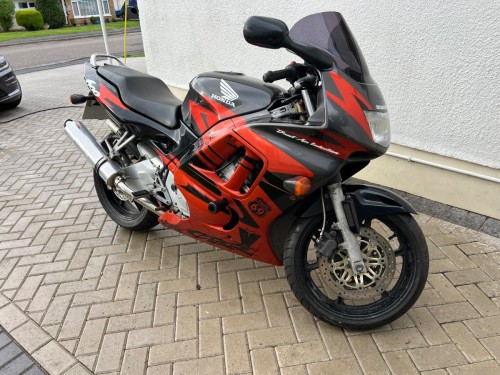
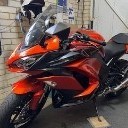
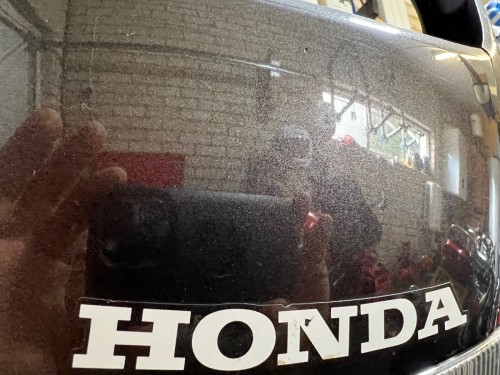
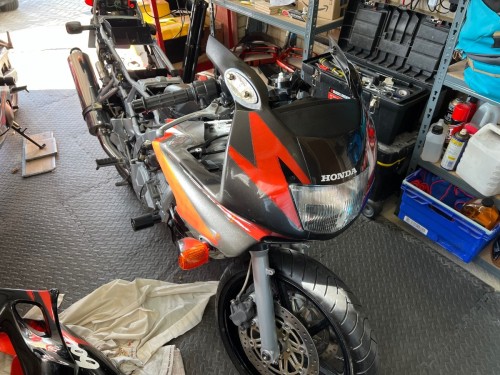
Somewhat delayed in responding to this - but thank you. Do you, or does anyone else, know the name of the colour scheme? I want to get a touch up pen for the metallic orange and it's difficult to search for a paint code when you don't know the name of the colour scheme. Unfortunately the colour sticker on the bike only has the colour for a metallic grey - which I guess is the darker part of the colour scheme. EDIT : A Facebook group has come up with the answer so, in case anyone is reading this in the future, the colour is Honda Candy Blaze Orange. Code YR-196C. Today I gave all the bodywork panels a thorough clean. I'd never really looked at them and although they're not too bad, I think they could be improved - hence seeing if I can track down a touch up pen. This is the colour scheme (picture from before I started working on it);