

okupant
-
Posts
11 -
Joined
-
Last visited
Content Type
Profiles
Forums
Events
Store
Gallery
Community Map
Posts posted by okupant
-
-
That said (guessing here) the reason you're getting most issues is probably because you're taking power/source from battery + sub harness
I've hooked up the lights to the battery and the high beam signal I've tried to take from the handlebar switchgear. The ignition-on signal was coming from the sub-harness. Where can I get the last one from without damaging the existing harness?
-
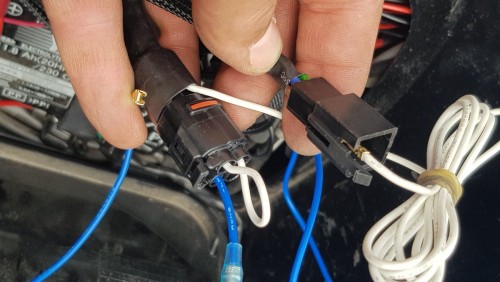
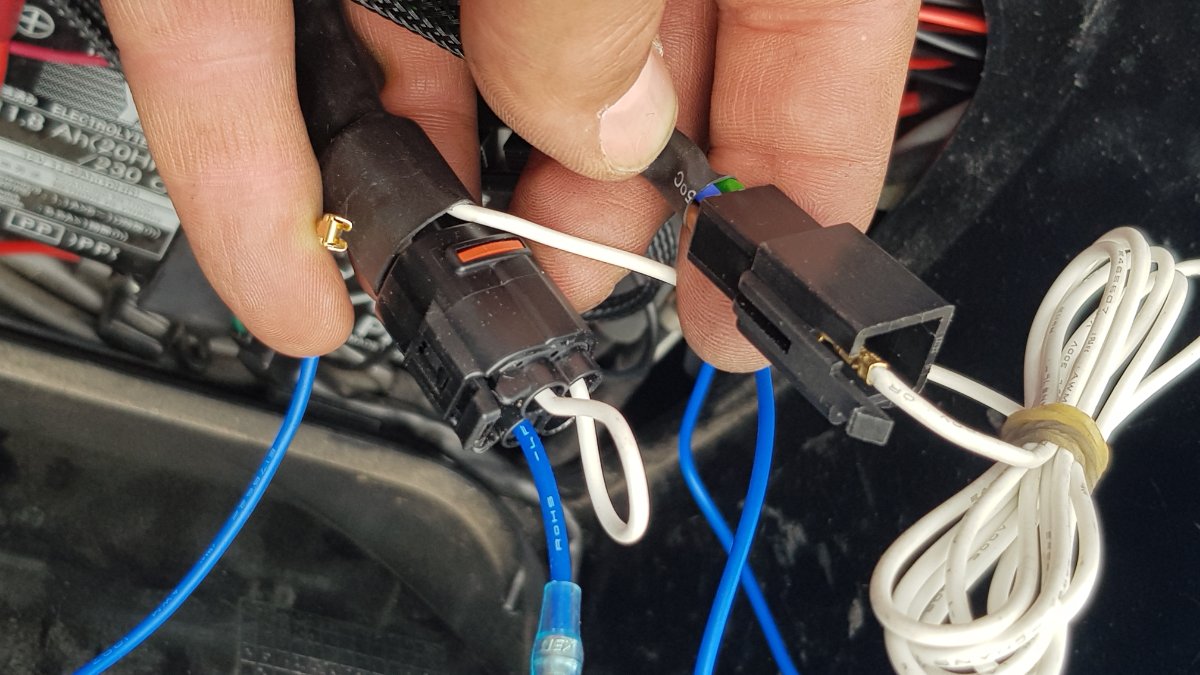
I've connected Denali harness positive and negative to the battery and the white one to the brown in the sub-harness. The remaining blue one I've tried to connect to the white socket:
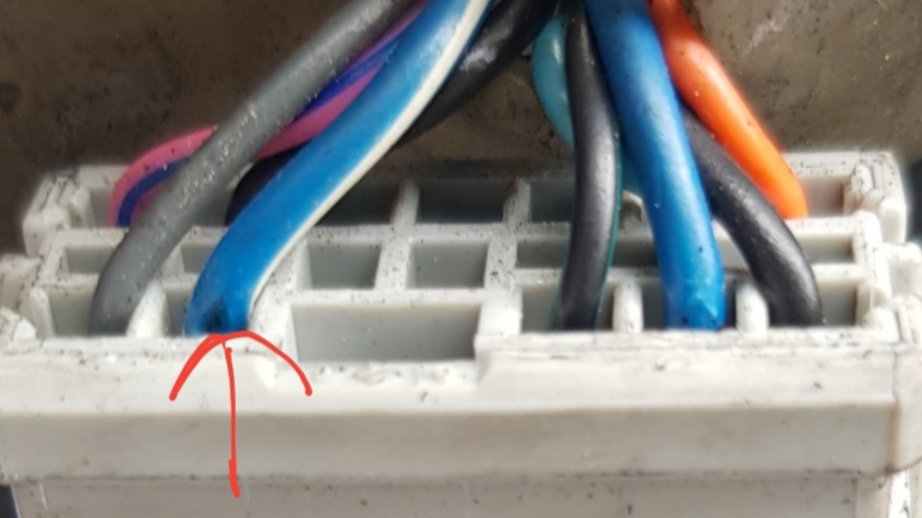
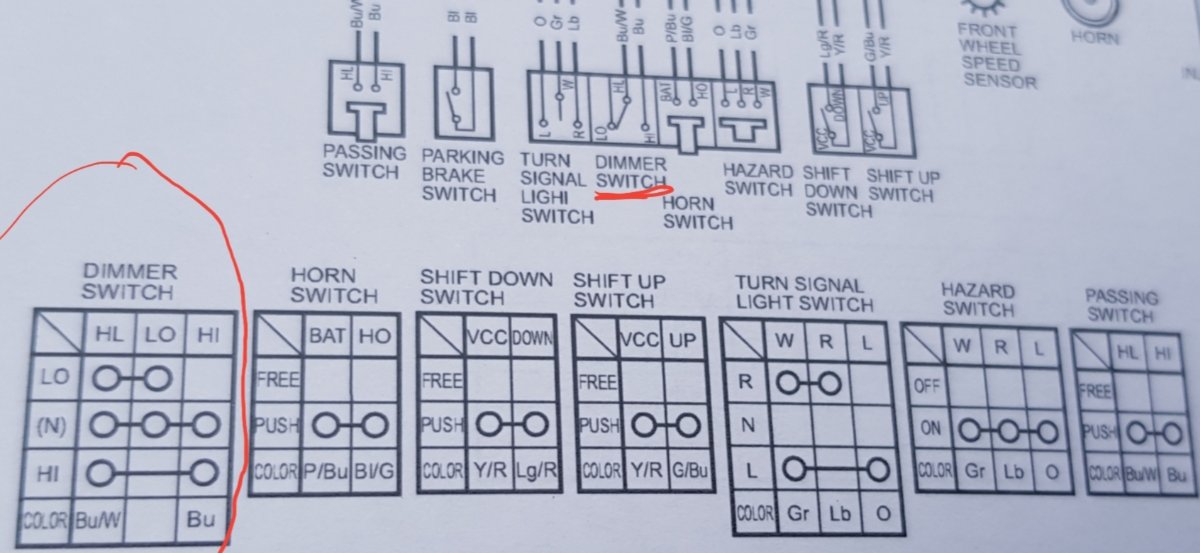
1. Blue/white - lights on high beam and goes to low beam once the handlebar switch is on high beam
2. Blue - lights on low beam and no reaction to the handlebar switch.
I've also noticed that when on low beam the lights flickers unless I twist the throttle.
On the attached photo are Denali connectors and wires (white - looking for ignition on signal and blue - looking for high beam signal)
Edit
If I connect both - white and blue from Denali to brown ones from the sub-harness then lights are on high beam and there's no reaction to the switch.
They don't flicker on low beam unless I fire the bike up though.
Edit2
I've found some help on another forum. In essence, it is impossible to control these lights with Honda handlebar switchgear - it requires additional switch from Denali (awaiting for it). Otherwise, the lights will be high beam only.
The only thing I don't know is, why they flicker on idle and stop flickering after revving a bit? I'd like to use them as a running lights, but I can't because they flicker! Any help, please?
-
Hi, let me copy my post from another forum in order to get more chances for solutions
 :
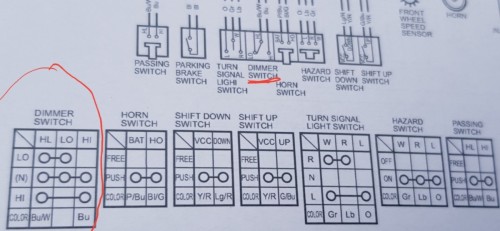
: I try to connect an accessory lights from Denali. I'd like to operate them with factory fitted low/high beam switch. The set contains a pair of lights, harness, datadim dual intensity controller and eliminator plug - all from Denali. I've connected lights to the battery and have picked 12V+ ignition on from Honda sub-harness I installed three other day. I'm not sure where to get high beam signal? Allegedly, it can be picked up from the same harness (blue wire), but there's aproblem with LED lights, as they don't sometimes send a clear signal. So I've try to pick it from a connector under LHS firing (a loop running from switches on handlebar down under the firing). According to shop manual the signal should be on Bu/W and there is, but... The lights are on high beam once the ignition is on, and switches to low beam when I flip the switch to high beam. Clearly I'm doing something wrong, but what?
Please help!
-
During winter months, on my daily early morning half an hour commute to work, I had heated grips on 75% most of the time. And I wore winter gloves.
-
Please add me to the challenge:
okupant -33
thx
-
It was a happy morning for me - I have passed a Mod 2 exam

The insurance company informed (no change to premium though), L-plates got rid off.
I hope, in few months time, to buy a Suzuki V-strom 650.
Thank you all for the support and advice!
Seb

-
I pass today with 2 minors.
Thank you all for advice. Mod 2 on Friday morning.

Seb
-
Buzz, that's what I do.
Speedy23, I'm working on it as well.
I feel more confident now then on the exam. My instructor is happy too, so there's an improvement
Once again, thank you all.
Seb
-
I'd like to thank everyone of you for the opinion/advise.
I'm at work Wed and Thu, but on Fri I'm back on training. The exam is not a difficult one, I know. I'll pass it sooner or later. But better sooner, because it is very expensive - £145.5 each time

Once again, thank you
Seb
-
All went ok until emergency braking - got that very bad habit to press a clutch lever. !@#$% Blocked back wheel and failed.
Please advise, how to get rid if that habit, I've got time till Monday midday
Practise only and think every time until it become a babit?Thanks
Seb
Denali DR1, Honda NC750X 2017 and high beam issue
in Clothing, Luggage, Accessories and Security
Posted
I have fitted a homemade, braided extension to the sub-harness (connectors are .110 Sumitomo aka Hitachi). On the photo attached is a spare one with black wire instead of blue one as I did not have the latter while making the extension.
Today I've fitted the Denali low/off/high switch and the lights switch as intended. However, there is an issue: on low, they flicker and stop flickering once I start revving harder. How to resolve it? BTW, they do not flicker on high, even on idle.
I wanted to be able to access and operate the switch on LHS and as close to the handlebar switchgear as possible. The switch does not interfere with anything and I'm happy to leave it there. I know it does not look pretty, but hey! - it is practical