wollyjumperuk
-
Posts
85 -
Joined
-
Last visited
Content Type
Profiles
Forums
Events
Store
Gallery
Community Map
Everything posted by wollyjumperuk
-
BMW K75RT Ultima Restoration
wollyjumperuk replied to wollyjumperuk's topic in Old Motorbikes, Projects and Restorations
The engine and gearbox were cleaned up with Muc-Off motorcycle cleaner, elbow grease and a fair amount of soaking time! On further research, it looks like the oil seen leaking from the clutch pushrod boot was to be expected when the plunger is removed. But that leak and the weep seen on the input side... ... coupled with the greasy residue in the clutch housing as well as the oily residue on the underside of the clutch housing seen during disassembly, I decided a new input shaft and clutch pushrod seal would be worth fitting as I was here anyway. The input seal replacement was fairly straightforward (if long winded), consisting of popping the front cover, remembering to remove the neutral bolt, spring and ball bearing, and levering out the old seal... ... drifting out the seal plug for the neutral are and using an M8 bolt in the seal plug hole to hold this back, cleaning up and smearing a small amount of gasket sealant on the mating faces, ensuring all the shims are aligned and easing the cover back onto the locating pins and tapping into place with a mallet, before removing the M8 bolt to allow the neutral arm to return, refitting the ball bearing, spring and bolt ... ... and easing the new input seal over the input shaft and using a socket to seat this flush with the cover. The clutch pushrod seal at the rear of the gearbox was a little more awkward, being a case of the seal that doesn't want to shift. I started with a small dentist style tool to get behind the seal, but this wouldn't budge (after an hour or so of gentle coaxing). While scratching my head, I decided on folding the metal part of the seal inward and across the hole for the pushrod. With that done, the pushrod was reinserted and gently tapped with a mallet, drifted the seal out. The outside of the gearbox was given a stiff wire brushing, a wipe down to remove the loose stuff and a coat of engine paint (as it was the best match for the original I had)... While I had the paint out, I thought I'd get the engine block ready for reassembly, with the areas needing attention were cleaned up with a wire brush and cellulose thinners before 2 coats of the engine enamel paint were applied and left to cure for 2 weeks (while I jumped on my Triumph and disappeared to Scotland... Well, it'd be rude to stand and stare at drying paint). Once cured (and after the holiday), the clutch pushrod seal needed to be fitted, the gearbox was sat input side down, chocked up on wooden blocks, with the pushrod installed and the seal slid onto the pushrod and a deep 10mm socket used, with a rubber mallet, to push the seal into place. As I was trying to be gentle, drifting the seal in did take some time. With all that done, it was time to mate the two parts! The pushrod was used as a guide to slide the gearbox into place, before the lugs were used to locate the gearbox and the bolts installed and torqued down. As I was here, I took the opportunity to install the stands... ... ready for the assembly to be flipped over so the engine casings can be worked on. As always, if you'd like further details, please see https://motorcycleprojects.wordpress.com/ -
BMW K75RT Ultima Restoration
wollyjumperuk replied to wollyjumperuk's topic in Old Motorbikes, Projects and Restorations
The stand assembly was clamped in the vice ready for the disassembly. Everything was undone and disassembled, the stubborn bolt was lubricated and heated and pressure kept on the bolt until it released. All the loose bits were put in a bucket, part cleaner added and diluted and left the soak overnight. After soaking the water was definitely dirty and the parts vaguely cleaner! With everything taken apart and spread out to check everything is here... ... and any parts damaged beyond use or repair were replaced. The side stand - clutch interlock was particularly caked in road crud, so it went from fresh off the bike (top left) to being soaked in Muc-Off cleaner and being scrubbed (bottom left) degreased (bottom right) and polished up using Autosol Metal Polish, fine wire wool, soft cloth and a polishing mop on a drill (top right)... ... this was also done to the other required non-painted parts. The stand mounting bracket and both stands were stripped back with a wire brush drill attachment removing all the old paint and corrosion before masking up, spring holders masked by using o-rings (as the springs will kill the paint anyway) and priming with 2 coats of Autotek Etch Primer, followed by 2 coats of Halfords Gloss Black Enamel (typically running out of paint half way through, so had to run and get some more) and finally 2 coats of Halfords Clear Enamel Lacquer. With 24 hours left between each change in paint and everything left to completely cure for a further week once completed. Once cured, all the parts were pulled together and the stand assembly rebuilt... ... ready to be bolted back onto the gearbox. N. B. The springs will be added once the stands are on the engine/transmission assembly for ease of leverage. -
BMW K75RT Ultima Restoration
wollyjumperuk replied to wollyjumperuk's topic in Old Motorbikes, Projects and Restorations
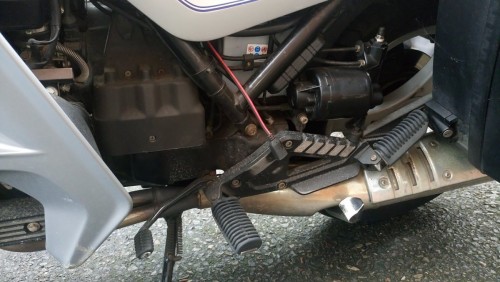
The starting point was removal of the rear wheel and draining the oil out of the rear bevel box as I am going to change it anyway – I might as well get it as light to handle as possible! And it was just as well, as the oil that came out did look a little past it’s best. Following this the rear bevel box was unbolted and eased off the end of the swingarm and the drive shaft connector, bearing and smooth operation checked and all found to be very good with no play, so no further disassembly at this time here. Following the bevel box, the next component forward was the swing arm, the 2 stub axles were removed and this was eased away from the gearbox and slid off the drive shaft. The swingarm needs a good clean before an inspection can be properly done, so that’s for later. With the removal of the swingarm, support of the motor was somewhat lacking, so a few wooded chocks were put in to aid the bottle jack and the main stand to maintain stability … … this support would later be supplemented with a ratchet strap over the garage roof beam to give a little reassurance. Looking toward removing the gearbox unit, it was clear the only other parts needing removing at this time was the alternator and the starter motor. These were both unbolted and eased out leaving a small pile of worn-off alternator cush drive rubber, so this goes on the replacement list too. The remainder of the wiring loom, coil packs, airbox assembly and throttle bodies were taken off with little effort, leaving the injectors to be eased out followed by the manifold stubs and coolant post. Unfortunately, both the front manifold stub and coolant post had seized bolts, 3 in total one sheered stud could be wound out by locking 2 nuts together on the stud (thankfully the thread was OK), and the stud wound out after some gentle heating and constant, steady application of pressure on the lower nut against the lock nut … … I was not quite so lucky with the other 2 studs. Here starts on-off work on these over a 2 week period. After many attempts to remove, , these were ground flush, drilled and tapped before the replacement bolt was run into the hole – success! With the inlet manifold done, it was time to move onto extracting the gearbox. As this would mean turning the engine onto it’s leading face, the oil filter was drained (by punching 2 holes in it so it could drain) and the engine flipped the stands removed and the gearbox bolts undone. To aid things, a ratchet strap was threaded through the swingarm mounting holes and the slack taken up. The gearbox was tapped round with a rubber mallet to get it moving before the ratchet was used… … to lift the gearbox away. The last part of the disassembly was the removal of the exhaust headers. So the engine was rolled so it was upside-down and the exhaust header studs given a coat of PlusGas and left to soak overnight. Once soaked, the nuts were heated up to expand them off the studs but they won’t budge and we’re rounded due to corrosion. A nut splitter was used to deform the nuts and provide something to grip on and an easy out socket used this worked with just a few nuts having to be beaten round. With that done, the major disassembly is complete… time to start the process of rebuilding! -
BMW K75RT Ultima Restoration
wollyjumperuk replied to wollyjumperuk's topic in Old Motorbikes, Projects and Restorations
With it clear that the frame of the bike was fairly corroded, it needed to come off to be sorted, so began the parting of the engine and the frame. It started with an emptying of the coolant by disconnecting the hose at the lowest point and letting it drain before removing the radiator to reveal ... ... the corrosion at the front of the frame was worse than seen on the rest of the frame - supporting the decision to remove and treat the frame. The brake system was bled down and the lines disconnected where they pass though the frame before the engine block was supported in preparation. The front wheel was dropped out and the frame unbolted to allow the frame and forks to be removed in one section ... ... leaving the engine and transmission standing ... ... to be tackled next, alongside an oil leak from the rear of the gearbox, discovered just after the frame was released and removed. For more information, please take a look at my blog at https://motorcycleprojects.wordpress.com/ -
BMW K75RT Ultima Restoration
wollyjumperuk replied to wollyjumperuk's topic in Old Motorbikes, Projects and Restorations
With the bike safely in the garage and up on the ramp, it was time to remove the bodywork to see how bad the corrosion was on the frame, so see how far I'd have to get into the bike. Starting from the back, all the parts were removed from the frame methodically, with all of the bolts replaced in the threads they came from ... ... all electrical connections marked before disconnection and photos taken of all the cable runs to ensure re-build as close as possible to original. During the strip down only 2 fixings were so corroded that they had seized, unsurprisingly both of these were at the rear of the from, where these are directly exposed to the elements ... ... using PlusGas disassembly penetrant, a heat gun and (briefly) an impact driver, these were coaxed out - I can't stand sheered bolts and studs, so I tend to spend the time trying to coax these out. As you can see from the picture the corrosion to the back end of the frame was extensive, so I decided to remove the front fairings to see how far forward it goes and if I'd need to take the frame off the engine to sort the corrosion to my satisfaction. The only challenge to removing the front fairing was getting the mirrors off the fairing. I did a fair amount of research into mirror removal, as the method to get these off seemed a bit brutal - at effectively hitting these with your palm from below, as hard as you can, to get these to 'pop off' ... ... in the end I used a large flat head screw-driver between the fairing and the mirror to 'pop' these off, fitting by fitting. Following this the front end was pretty straight forward with all the fixings coming off cleanly, with no seized items at all and even a spare key fount cable-tied inside the front fairing! The nose fairing came off with the 6 bolts and the electrical connections were labelled and section taken off. I was expecting the corrosion to the rear, as the frame is really not protected from the dirt the rear wheel flings up, but there is evidence of corrosion all the way up to the front fairing sub-frame, not as bad as the rear of the bike, but enough to require the frame to come off of the engine to get it sorted. For more information, please take a look at my blog at https://motorcycleprojects.wordpress.com/ -
BMW K75RT Ultima Restoration
wollyjumperuk replied to wollyjumperuk's topic in Old Motorbikes, Projects and Restorations
They are good solid bikes, even riding it on the way home from picking it up I can see why people like them for touring and they can carry some fair speed with comfort too - probably why the police liked them so much. -
BMW K75RT Ultima Restoration
wollyjumperuk replied to wollyjumperuk's topic in Old Motorbikes, Projects and Restorations
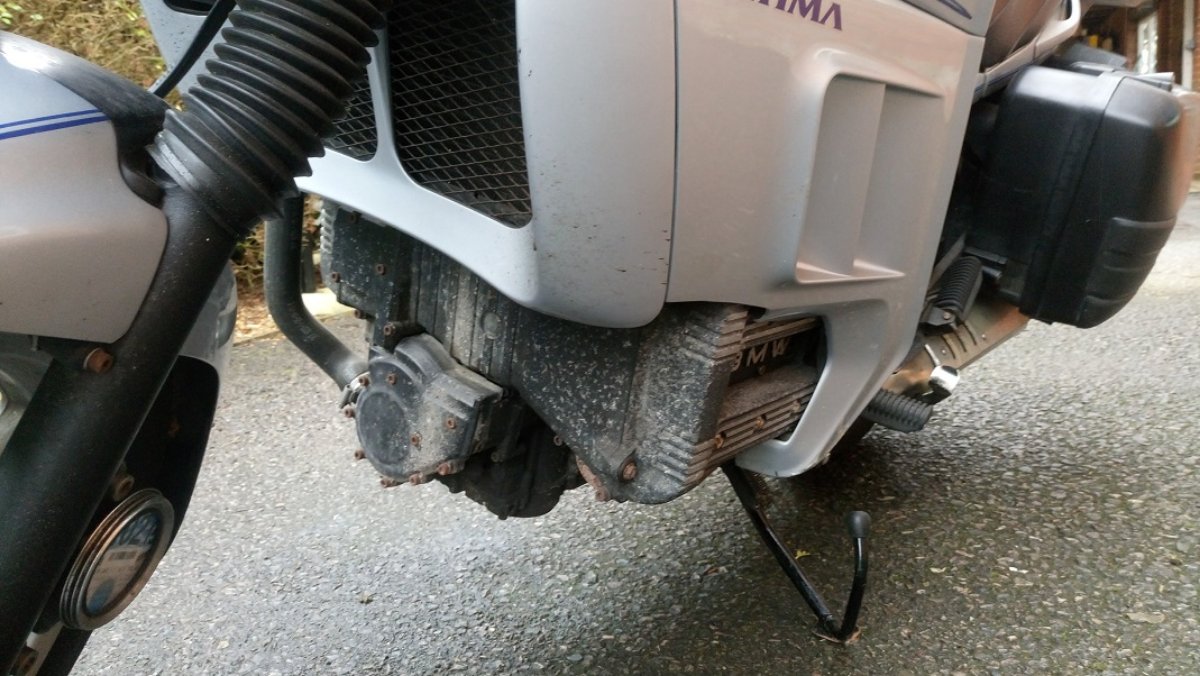
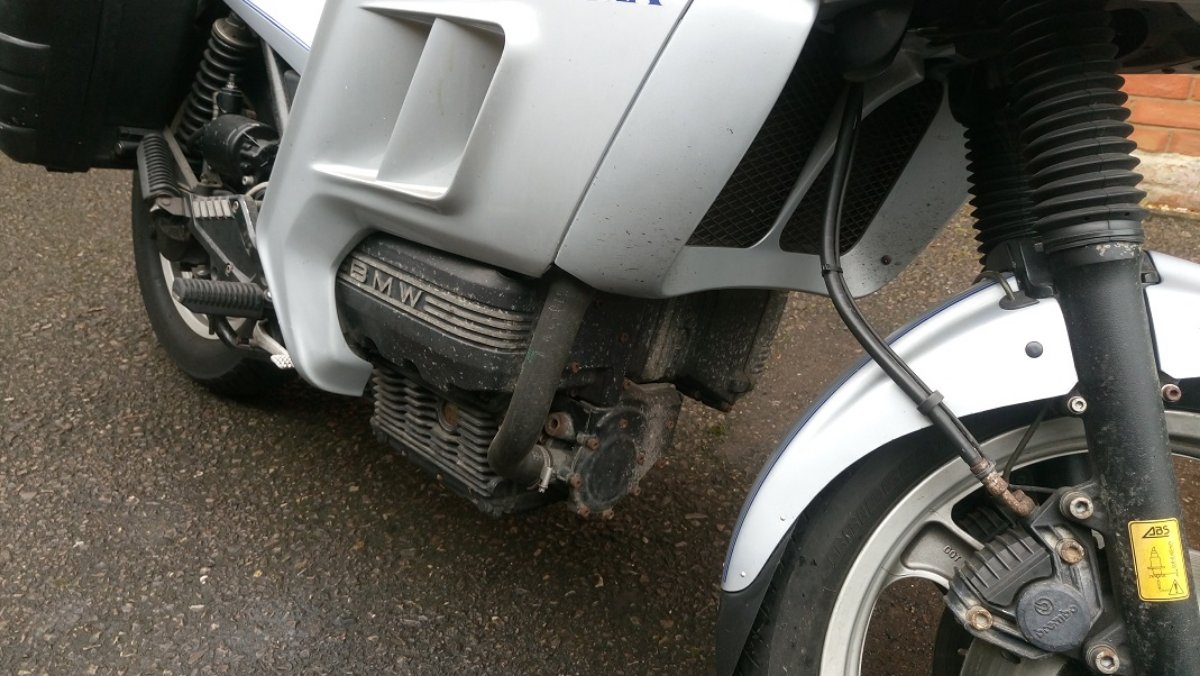
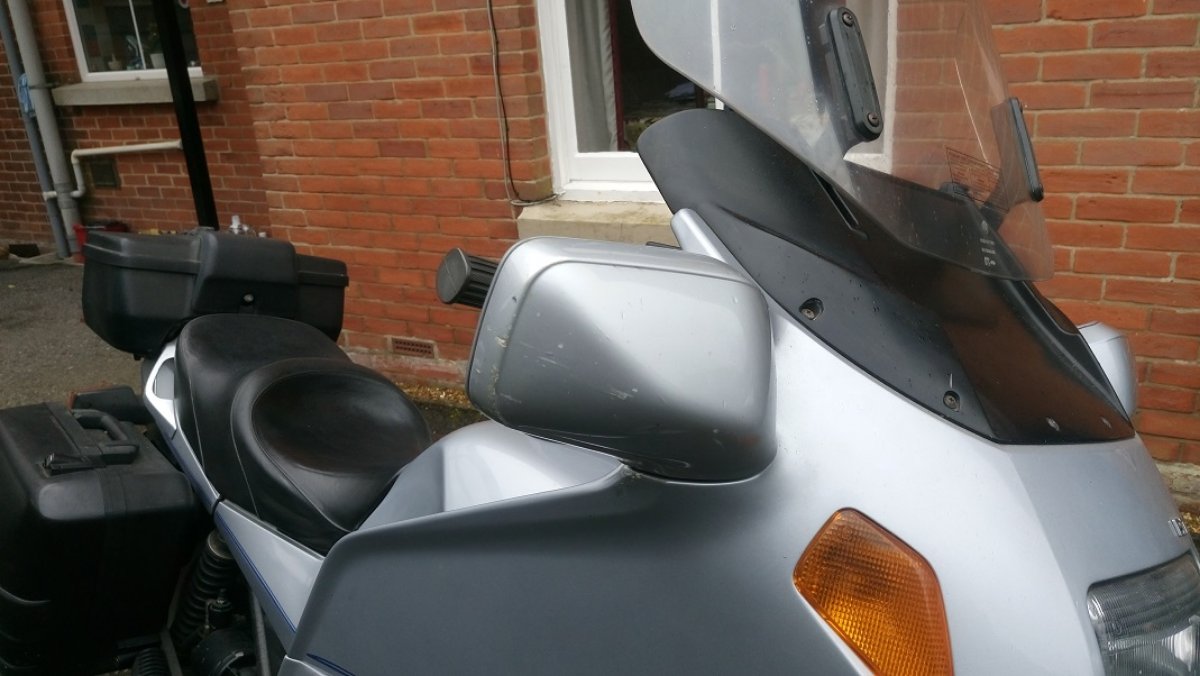
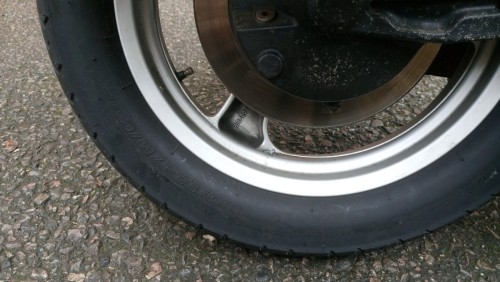
With the YBR 125 Custom off to a good home and the garage cleaned down after the wood work, it was time to look at the next project. The father of a good friend has been considering selling his bike for a while and wanted to ensure it would go to someone who appreciated it. After a few cups of coffee and conversations about the bike over more than a year, and knowing the bike is pretty much there mechanically, it felt right to buy the bike and bring it back up to 100% cosmetically. After getting the bike home, the bike had the once over to see what needed doing. After going through the history of the bike, it looks like the bike has always had genuine parts, so this will be continued as much as possible. The initial to do list consists of: >Sticky Rear Brake Light Switch >Pannier Hinges Cracked >Dashboard Light >Corroded Brake Line Fittings >Paint Damage on Engine, Gearbox, Frame, Fork Stantion and Bevel Box >Paint Damage on Rear Wheel >Paint Damage on Bodywork >Bubbling RHS Fairing Pocket Cover >Corroded Nuts & Bolts I try to take my time over projects, with these usually taking 18 months plus - so please watch this space for updates.


-
BMW K75RT Ultima Restoration
wollyjumperuk replied to wollyjumperuk's topic in Old Motorbikes, Projects and Restorations
Cheers for the hand -
BMW K75RT Ultima Restoration
wollyjumperuk replied to wollyjumperuk's topic in Old Motorbikes, Projects and Restorations
Forgive me, I didn't know how to link, but thanks for the advice, I have googled how to do it and here it goes ... http://motorcycleprojects.wordpress.com and updated the title post with this for ease I'd prefer not to repost everything on here from the blog, as that keeps it all in one place. -
Greetings all, I have just moved on my last project (Yamaha YBR125 Custom) and I would like to share with all of you my next project - a BMW K75RT Ultima. As you may know, the Ultima is the final addition of these 3 cylinder engined motorbikes so beloved by police across the UK and Europe. I picked this up from the father of a good friend, so I know the history and I know mechanically the bike is solid, so it is mainly cosmetic work I'm undertaking on this one. For those of you interested, you can follow the progress of the restoration via https://motorcycleprojects.wordpress.com/