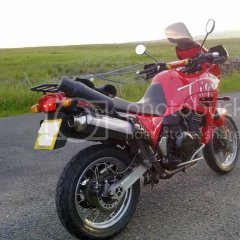
Mk5Centurion Posted January 17, 2010 Share Posted January 17, 2010 (edited) Ok folks, its only fair that since i've been posting a wee bit in here recently that you should see how things are going with my old bus. This poor old thing has been kicking around for years generally being neglected, so this winter i've been trying to sort out a few bits and bobs with her - i only hope the pictures upload ok.The general state of things just now (also got a new garage to play in as well! )http://i942.photobucket.com/albums/ad266/samcrow_photo/th_Photo007.jpgSome scabby painthttp://i942.photobucket.com/albums/ad266/samcrow_photo/th_Photo008.jpgNewly painted subframehttp://i942.photobucket.com/albums/ad266/samcrow_photo/th_Photo0041.jpgGot some new bodywork - my brother has been painting it up for me and has finished the belly pan (not best picture though)http://i942.photobucket.com/albums/ad266/samcrow_photo/th_Photo002.jpgThe carbs are totally gummed up (most likely) so i bought some off evilbay and set about stripping and cleaning them, once the old ones are off and the new ones fitted i'll clean the old ones and flog 'emBeforehttp://i942.photobucket.com/albums/ad266/samcrow_photo/th_Photo001.jpgAfterhttp://i942.photobucket.com/albums/ad266/samcrow_photo/th_Photo004.jpgA popular mod amongst ZZR owners is to junk the rotten o/e calipers and replace them with Honda Nissins; I got a set from a 1995 Fireblade (RRS) and got the master cylinder and assorted gubbins too - they require a wee bit of modification, if anyone is interested i can post a link to the forum where i got the gen from.All the gubbinshttp://i942.photobucket.com/albums/ad266/samcrow_photo/th_Photo005.jpgChecking the holes line up (btw, i'm geting the M8 Honda holes drilled out and re-tapped at M10 to fit the o/e mounting bolts)http://i942.photobucket.com/albums/ad266/samcrow_photo/th_Photo006.jpgMy little helperhttp://i942.photobucket.com/albums/ad266/samcrow_photo/th_Photo0038-1.jpgThats it for the moment, in rebuilding the calipers just now; have split them and left them soaking overnight to de-grease them but i think i'll give them a coat of matt black high temperature paint before i rebuild them with new seals etc. Edited February 7, 2010 by Mk5Centurion Quote Link to comment Share on other sites More sharing options...
Mk5Centurion Posted January 30, 2010 Author Share Posted January 30, 2010 Just a quick update:Caliper fronts are away with my brother just now to have the mounting holes enlarged and the rear halves that i've still got have been rebuilt with new seals.Spent yesterday afternoon (in a freezing cold garage!) taking the old carbs off and putting the new ones on - had to disassemble the throttle set up to get some slack in the cables but got there in the end. New ones were popped in place and airbox put back on and thats where i left it 'cos it was getting dark and i wanted my tea! This morning: New plugs fitted and cables (ignition coils etc) tidied up, fuel and breather pipes connected to tank and fresh fuel lobbed into tank as well, freshly charged new battery fitted - hey presto and the old girl is living and breathing again after being sat for almost 3 years!!!!!!!! Am well chuffed (and ahead of schedule too)Will get some of the scabby frame and chassis parts cleaned up later and maybe treat the old bus to an oil change too.Also have plans to install a heated grip and accessory circuit as well - watch this space!Big thankyou to WalneyFrankie and Colin and everyone else who reponded to my other questions - cheers! Quote Link to comment Share on other sites More sharing options...
Guest Posted January 30, 2010 Share Posted January 30, 2010 Just a quick update:Also have plans to install a heated grip and accessory circuit as well - watch this space!Big thankyou to WalneyFrankie and Colin and everyone else who reponded to my other questions - cheers! might help with your wiring ....... Quote Link to comment Share on other sites More sharing options...
Mk5Centurion Posted February 7, 2010 Author Share Posted February 7, 2010 Cheers WF - i've got a similar installation planned when i get all my painting done.Whilst i'm waiting for bodywork and caliper work (hurry UP Ewan!), i've been tackling some frame bits.When i first started the zed project i began stripping the scabby painted frame parts; first a couple of coats of NitroMors and then a wash down. After that i used successively finer grade wet and dry to sand the metal down - one side:http://i942.photobucket.com/albums/ad266/samcrow_photo/th_Photo016.jpgThe other side is much the same!Added 8 coats of primer (from a can) and then left for 48hrs and then smoothed down with 1200 grit, this is during the primer process:http://i942.photobucket.com/albums/ad266/samcrow_photo/th_Photo019.jpgI wanted a dark grey metallic finish, so i'm using Ford Mercury Grey Metallic. I've built up 6 coats so far (almost the whole can!) but i might do a couple more. This was done yesterday morning so its has 24hrs to dry....i'll check it later on and see if its worth throwing on another couple of coats - after 3 coats:http://i942.photobucket.com/albums/ad266/samcrow_photo/th_Photo025.jpgI've taken the rear caliper apart - all the bits came from Wemoto yesterday to sort it out, its in the most god awful condition:http://i942.photobucket.com/albums/ad266/samcrow_photo/th_Photo024.jpgWas going to tackle it last night but my sister and brother in law landed round so i'll get round to it tonight. I was going to paint the front calipers and changed my mind....till i saw the nick of the finish on the rear - a nice gold should look nice?!Thats it just now Quote Link to comment Share on other sites More sharing options...
urbanmark Posted February 7, 2010 Share Posted February 7, 2010 Your frame is going to look the nuts in that colour! Quote Link to comment Share on other sites More sharing options...
Mk5Centurion Posted February 7, 2010 Author Share Posted February 7, 2010 I will be doing the swingarm the same colour Daz mate, but for the sake of getting the bike on the road i'll get one from a scrappy and take my time painting it over the summer and fit it next winter (assuming i keep it that long!).Just discovered that there was only 1 seal per pot in the rear caliper instead of 2....and they are full of shite!Currently soaking all the parts....... Quote Link to comment Share on other sites More sharing options...
Mk5Centurion Posted February 22, 2010 Author Share Posted February 22, 2010 Just a wee quick update on the rebuild; still painting at a rate of about 2 coats a night which is about all the time i can spare just now. I wish now that i'd masked the whole bike and not just one side (i'd be finished now ), although to be fair i ran out of stuff to finish the masking and i couldn't be ar**d going and getting more (garage is at the top of my street).Anyway - this is the finished side:http://i942.photobucket.com/albums/ad266/samcrow_photo/th_Photo036.jpgProcess - 8 coats of grey primer, flatted back with 1200 grit wet and dry, 6 coats of paint, 6 coats of clear lacquer and then 3 coats of petrol resistant lacquer (you can see that its taking a while doing 2 coats a day......)I've been at it so long i'm morphing into something from Altern8 (as your big brother....)http://i942.photobucket.com/albums/ad266/samcrow_photo/th_Photo031.jpgPrimer on the other side:http://i942.photobucket.com/albums/ad266/samcrow_photo/th_Photo033.jpgStarted the paint tonight.Cleaned the pitting off the stancheons:http://i942.photobucket.com/albums/ad266/samcrow_photo/th_Photo035.jpgWell pleased with this - looks smashing in gold (4 coats of lacquher so far!):http://i942.photobucket.com/albums/ad266/samcrow_photo/th_Photo032.jpgThats it so far - more pictures when i (eventually) get my bodywork back, the good news is my brother started in it at the weekend - brakes, bodywork, MOT - easy! Quote Link to comment Share on other sites More sharing options...
GazzyG Posted February 23, 2010 Share Posted February 23, 2010 Keep up the good work, mate!Wish I had the space/skills to do something like that; both my bikes are old and could do with sprucing up.Hopefully will have my apartment in a coupla months, which has a nice big courtyard, so might get my spanners dirty hehe. Quote Link to comment Share on other sites More sharing options...
Mk5Centurion Posted March 14, 2010 Author Share Posted March 14, 2010 Another wee update folks:Thats the frame finished now and here's what we have - i like how the lower painted bit "flows" up to match the paint on the seat unithttp://i942.photobucket.com/albums/ad266/samcrow_photo/th_Photo044.jpgPretty pleased all things considered.Started on painting the Nissin'shttp://i942.photobucket.com/albums/ad266/samcrow_photo/th_Photo037.jpghttp://i942.photobucket.com/albums/ad266/samcrow_photo/th_Photo038.jpgThe newly refurbished rear caliper (new seals, bleed nipples and banjo) and before anyone points it out i know that the pad is on the wrong side of the bracket!http://i942.photobucket.com/albums/ad266/samcrow_photo/th_Photo042.jpgGot a new mount for the heated grips controller, starting on the accessory circuit just now as well.http://i942.photobucket.com/albums/ad266/samcrow_photo/th_Photo045.jpg12v Marine Sockethttp://i942.photobucket.com/albums/ad266/samcrow_photo/th_Photo014.jpgWill get on with the rest of the wiring shortly (relay etc); not sure whether to go with a HID kit or not.....still undecidedMore soon Quote Link to comment Share on other sites More sharing options...
Guest Posted March 14, 2010 Share Posted March 14, 2010 Looking good, always enjoy a rebuild like this, me thinks the Retro could do with some fresh paint at the end of the year...been looking at the Wes Cooley Gs1000, and Freddie Spencer reps.. Quote Link to comment Share on other sites More sharing options...

Recommended Posts
Join the conversation
You can post now and register later. If you have an account, sign in now to post with your account.
Note: Your post will require moderator approval before it will be visible.