kingmunky
-
Posts
99 -
Joined
-
Last visited
kingmunky's Achievements
0
Reputation
-
Yep, check the wiring and then if the problem persists, take the control unit apart and see if theres moisture in there.
-
I think if the battery is on the way out, depending on the way they are wired up, the grips would just not turn on or repeatedly turn on/off if the voltage was poor. How are they wired to the bike? Direct to the battery or via a fused connection? It is quite common for the control units to suffer from water ingress and corrosion to develop on the contacts inside, usually a replacement controller does the trick, or a good clean-up of all the corroded bits and silicone sealant all over the control unit afterwards. You don't say how old the grips are, if they're not years old it might be worth an email to Oxford complaining, they posted me a new control unit when that happened to me.
-

The English term for Simmerring / Gabeldichtringe?
kingmunky replied to hashamyim's topic in Motorbike Chat
A lot of people seem to be oversimplifying this IMO, especially if OP hasn't attempted forks seals before. I've written out a rough guide below, please quote/add information where you think I've missed something and I'll edit my post.... - Before you do anything, loosen all the relevant bolts on the forks/calipers - just enough to loosen so that you don't take a fork leg off then find it's impossible to torque a bolt. For me, this meant loosening the axle pinch bolt, axle, caliper mount bolts, mudguard, dont forget the fork caps etc. They just need to be 'cracked' open and slightly tightened again so you can remove them easily when they the bike. Get the bike up on a stand so that you have the front wheel off the ground. At this point, I usually use a trolley jack to support the bike just under the front of the engine, but depending on your bike that might not be possible - alternative is to strap the handlebars to something above like a roof truss etc. Now you're ready to work. - Remove the front wheel completely including the calipers/mudguard and anything attached to your forks. Screw your preload all the way down which puts the most pressure possible on the damper rod bolts so it's easier to 'crack' them and nip up again. Undo the triple clamp bolts enough to let the fork leg slide out. - Back off all the preload tension now that you've loosened the damper rod bolt. Unscrew the fork cap (keeping a tight grip on it) and carefully drain out the the oil and catch the internals in the same container. Pump the fork a few times to make sure it's empty, remove the damper rod bolt and the damper rod can be released from the fork. Clean and inspect all the internals before reassembly. - With all the guts out, you can pry up the dust seal with a screwdriver (careful not to scratch the stanchion), remove the compression ring over the oil seal - there will be some spacers/bushings that may need replacing. Remove oil seal and then install new seals - you can use a socket large enough to go over the stanchion, but small enough to fit inside the lower portion of the leg, but I find nothing beats a fork seal driver. - When re-filling the fork oil, fill it a bit at at time and pump the fork to force oil past the damper and get all the air out of the bottom of the fork. - I usually leave 5-6" clear air at the top of the fork when refilling, but that'll be dependent on your bike. Once the oil is in, re-assemble the guts in order and extend the fork slider fully before compressing the spring etc with the fork cap and hand tighten the cap. - Reassemble in reverse order and torque all of the bolts from top to bottom as you go. It helps to tighten the triple clamp bolts in order on both sides - i.e. top R, mid R, bot R then top L, mid L, bot L and repeat as the bolts can loosen as you tighten their neighbour. All based on my V-strom, other bikes will have their own wee variations. -
Wish.com app has a lot of...'alternative' versions of these for around £30-40. Wasn't sure about the quality, and haven't been able to compare to a genuine one, but I've been happy with mine so far. Seems well made, strong, the straps are solid. The only thing is, I'm not sure if it's waterproof at all because it came with a waterproof cover to go over the top and because I carry my laptop in it, there's no way I'm chancing it to find out.
-
Yeah that’s not actually a bad idea, or something along those lines, worth sketching out anyway.
-
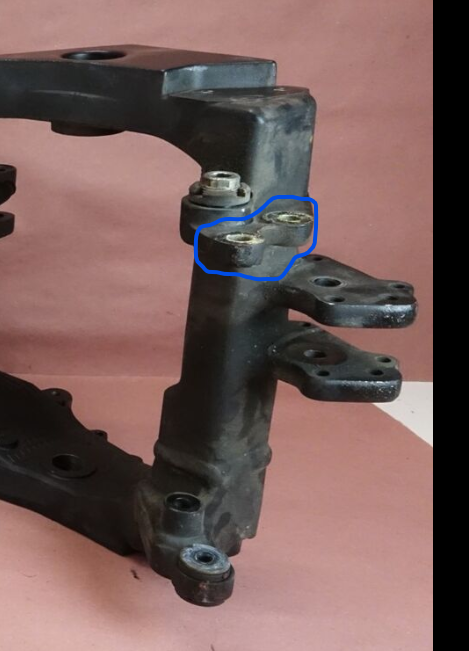
That’s the lower engine mount.
-
I like [mention]MarkW[/mention]’s suggestion! I know I can just use the c/s but it’s not as convenient and a bit of a faff always using the c/s. It’s a bit seized anyway so I’d planned on stripping and lubing it but that’s just been made much harder.
-
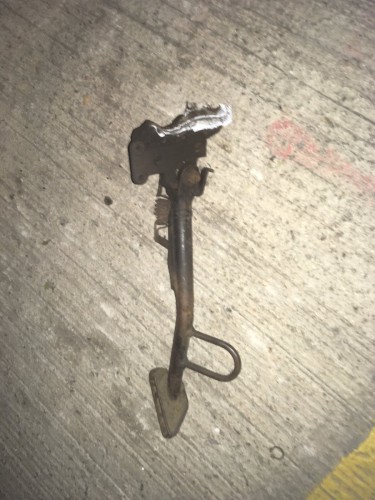
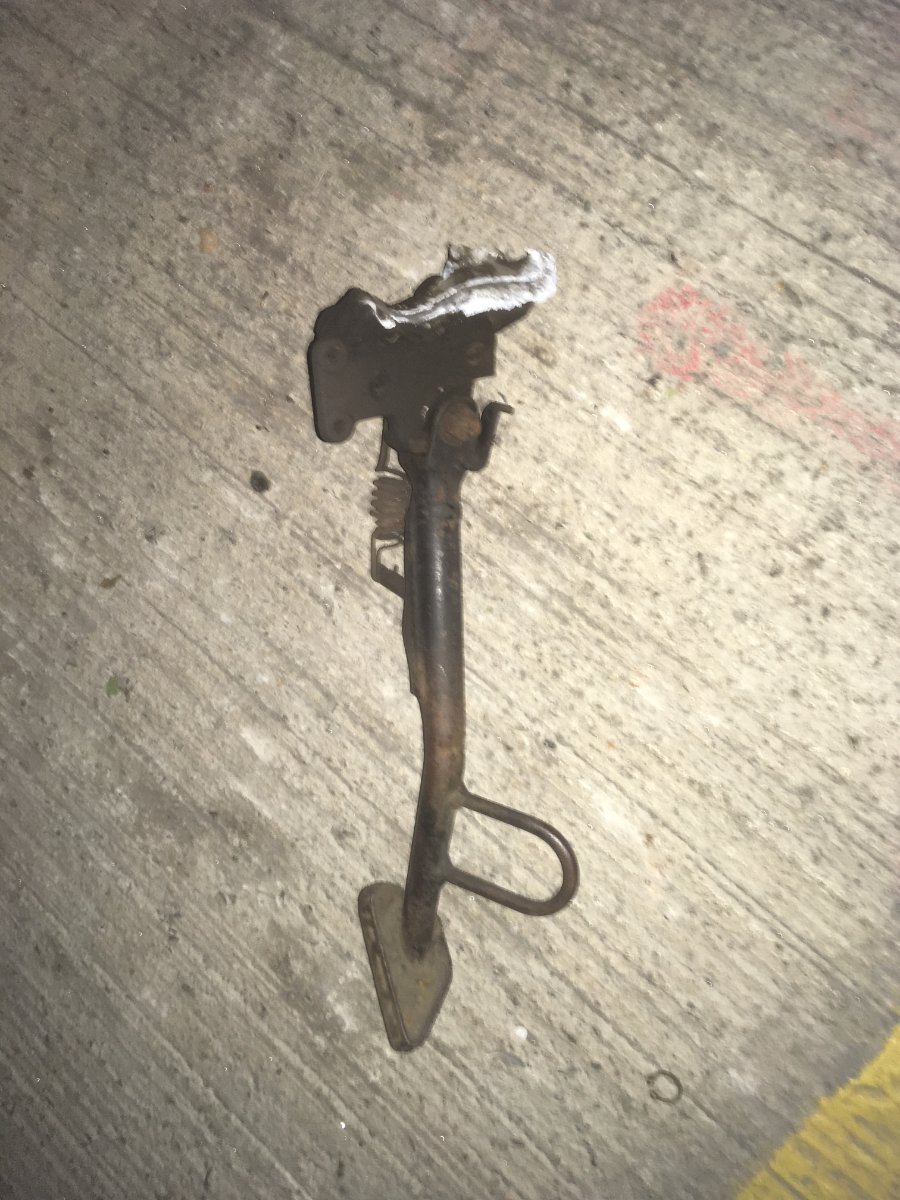
That’s the centre stand and bracket.
-
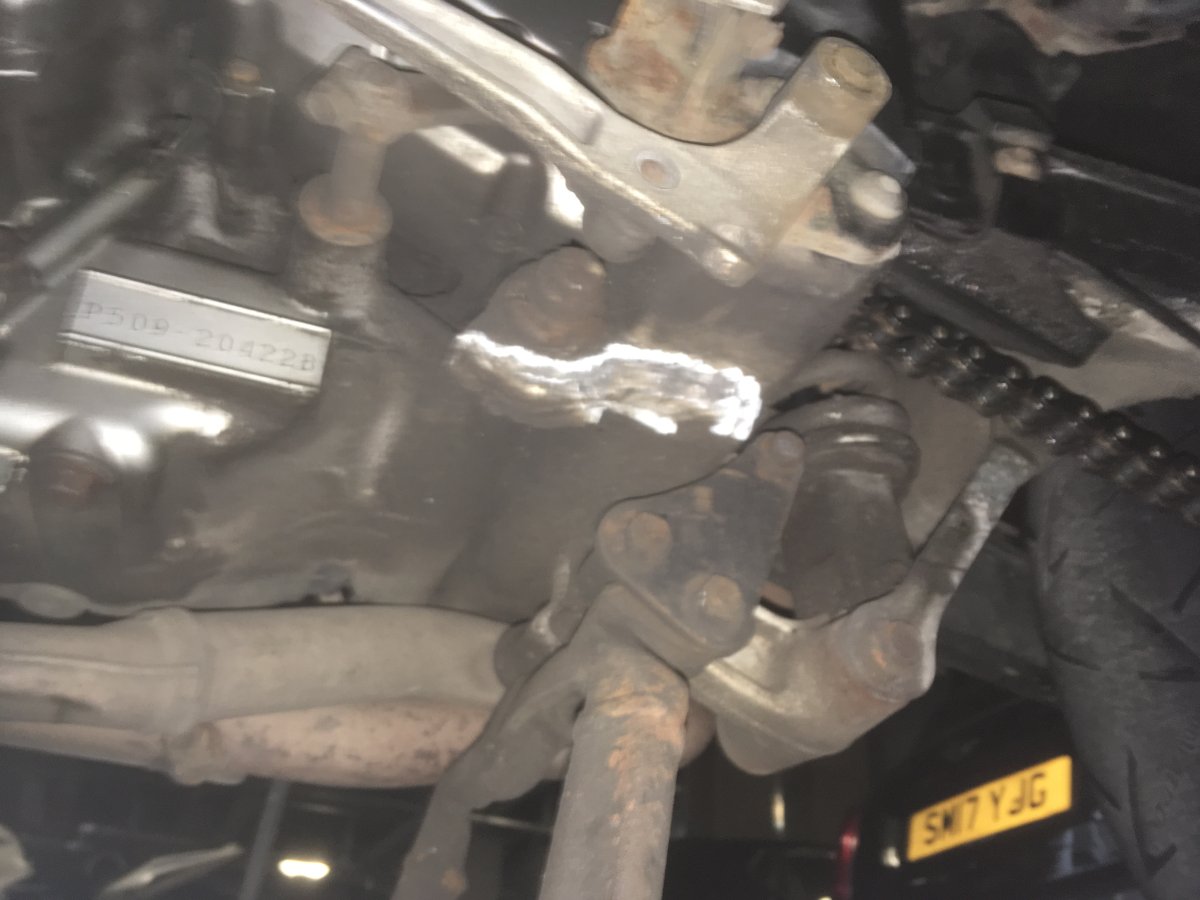
Good idea, but until I go back and have a proper look I'm not too sure that'll be feasible here. Doesn't look like there's anything for a clamp to bit onto. It's not a tubular section of the frame, and the engine is a tight fit on the inside face. Pic below shows the bit that has sheared.

-
Suzuki suggested the only 'repair' they would do if it arrived in their workshop would be to replace the frame as they couldn't guarantee a weld being successful long-term.
-
That's not a bad idea, could get a plate fabricated with mount points and use 2 or 3 of the main stand bolts to hold it into place. Beats the suggestion of the fabricators I talked to - strip it down completely, bring us the frame and the part and we'll weld it, but no guarantee it would hold long-term.
-
So I took it over to my usual mechanic who told me that basically, it's f**ked. It'd be an utter bitch to even try and weld it, even if the weld took well he reckons it would snap again straight away. .. Next suggestion?
-
I've not checked anything with Suzuki, but that's not a bad idea, see if they can recommend an appropriate repair.
-
Yeah it is cast. My mate said the same thing about getting it to take a weld.
-
Right, so this morning I went to park my V-Strom, put it on the side stand and just moved the handlebars to get the steering lock on when the side stand broke clean off the bike. It's not even the stand itself, or part of the mount, but the section of the frame that the stand is mounted to. No idea how I go about fixing this, would it be possible to weld this together? Would it be likely to take the weight of the bike again if it was welded? Hopefully the pics have attached properly.