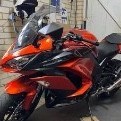
Hairsy Posted November 11, 2024 Posted November 11, 2024 (edited) After many weeks of searching, I've finally found this winter's project bike - a 1998 Ducati ST2. I've always fancied a Ducati and it's the right colour. The ST2 is definitely not the most exciting model ever but hopefully it will have led an easier than average life. I think in my list of learnings from my last project, I included "Don't buy a bike unseen again". You'll never guess what I've done ... However I've exchanged messages and spoken with the owner and concluded, like last time, that he sounds genuine. Time will tell - but the parts value should be at least a much as I've paid if the worst comes to the worst. The good parts: - it's only done just over 13,000 miles - the bodywork looks reasonably OK in the pictures but I know it has some scruffiness - It looks all original The bad parts: - it theoretically runs but not well enough to ride - it hasn't had an MoT since online records began - therefore, I'm expecting lots of age / lack of use deterioration in brakes / bearings / forks / etc As for my last thread, I'll be looking to produce a safe bike which looks good but won't be seeking perfection. It'll obviously be getting all its service parts, cam belts, etc as a bare minimum but I have realistic expectations and am pretty certain it's going to need somewhat more than that. I pick up the bike on Thursday and will record my honest experiences on this thread - good and bad. The thread will inevitably reveal incidents of incompetence and desperation - be kind please. Hopefully it will also include some good days. As before, I hope that some of you enjoy sharing the experience. All I ask in return is for you to be gentle and nice with me. I'm a true amateur. I'll always be cost constrained and I may choose to do something different to what others would advise - that doesn't mean I don't appreciate the input. Edited November 17, 2024 by Hairsy 8 Quote
Egon247 Posted November 13, 2024 Posted November 13, 2024 (edited) Have you got it yet? Have you got it yet? Have you? Huh? Sorry, just excited at other people's projects... Just realised it's wednesday. Lol. That's shift work for you. Sorry. Edited November 13, 2024 by Egon247 Quote
Hairsy Posted November 13, 2024 Author Posted November 13, 2024 49 minutes ago, Egon247 said: Have you got it yet? Have you got it yet? Have you? Huh? Sorry, just excited at other people's projects... Just realised it's wednesday. Lol. That's shift work for you. Sorry. Sadly not - I collect tomorrow evening! 1 Quote
Hairsy Posted November 14, 2024 Author Posted November 14, 2024 Well today was the day. From a distance it looks OK. Close up though, it becomes very apparent that it's spent half of its 26 year life sitting around doing nothing. 13,000 miles is a nice number but the lack of use is going to present its challenges. The previous owner had replaced clutch slave and master cylinder, the factory alarm, mirrors and tank. The original tank was included but has a small dent and some mild corrosion in it. It's also had a new reg/rec and second hand stator although I suspect the original stator was fine and it was the reg/rec. I'm told the battery charges. I can't tell because the battery is dead so it won't start. It's had new cam belts in the last couple of years I believe but there's no receipts to prove it and belts don't like to sit for months on end without moving so I'll be replacing those. The chap I bought it from had three bikes in his garage - and he doesn't have a licence. He works in the tool industry and hears about garage / barn finds. The bodywork has some scratches and the tank has at least one very small dent. Bodywork definitely isn't my thing. Best guess at the moment is that I'll have a go with touch up paint and see if I'm satisfied. If I can get the engine running without much expense then perhaps I can afford a little professional intervention on the bodywork. Plan for tomorrow is to give it an initial checkover and maybe a wash. Then put the battery on charge. At that point I expect I'll have quite a long initial list of what needs doing. And I know very well that the list will grow as I start taking it apart. I expect to be busy until spring ... 8 Quote
Hairsy Posted November 15, 2024 Author Posted November 15, 2024 (edited) First day on a project is always a little bit of a downer. Especially when you've never seen the bike before. You start with excitement and then spend the day finding the problems. Although, to be realistic, the first 75% of the project is like that. And, actually, it's solving problems that makes projects fun. I started off getting the bike outside and having a look at it - first time I've seen it in the light. First thoughts - it looks nice. Then I look a bit closer and the lack of love & use starts to become visible. The wheels are filthy and everything has a film of ... I don't know what but something dirty and sticky. I think it's called 'age'. And, as with every bike I've ever owned, there are missing fairing fixings. Why does this happen? I know I'm a bit OCD but surely anyone who cares even a little about their bike will realise that they've got some bits left over after reinstalling fairings - and will then go back and find out where those bits should go? Clearly not! Oh, and I also found the screen is cracked in two places. I went over the bike to check for leaking shocks (no leaks), brake condition (good with no binding but will give the calipers & pistons a good clean as a minimum), clutch effectiveness (heavy but works), tyre condition (poor and manufactured 24 years ago!), chain & sprockets (good condition with far less rust on the chain than my last project). Overall this was quite encouraging. Next step was to get the initial layer of grime off the bike. This is mainly to just make it nicer to work on but it's also a good step when you've just started seeing all the work that you're going to have to do. I removed the panniers after cleaning as they just make the limited space in my garage even smaller. Then the sun came out for the camera and, looking at the pics, I think she came up OK. Initially I thought there were missing fixings for the indicators but, later, I removed the front fairings and it became apparent that both of the fixing tabs on both indicators have broken off - almost certainly due to screws being overtightened. The broken bits are still screwed to the fairings but the indicators are floating around. Unlike my last CBR600 project, there aren't dozens of these being broken up so sourcing replacements won't be easy and good one won't be cheap. There's one set on eBay for £60 but they're ropey. So I'm going to see if I can repair the current ones with some epoxy. If there's room inside the fairing, then I may be able to build up the repair with fibreglasss - but the tabs are pretty small and so I don't hold out huge hope. But I've got absolutely nothing to lose so I'll give it a go. I'm going to decide what to do about bodywork later - it will all depend on the expense involved in getting the mechanicals sorted out. If mechanicals aren't too expensive then there may be enough value in the bike for some good quality paint work. In the short term, I thought I'd have a go at polishing up the mirrors and they came out really nicely. I did find a broken plastic 'stalk' on one of them but I was pleased to find that in the box of spares from the previous owner, there were a pair of these stalks. I was able to swap it over and the mirrors look great. If only I could believe that the rest of the bike would be this easy. I'm not sure whether the quality of pics on here shows it but there was quite an improvement in both mirrors. That's about it for today. Front fairings are off and the battery's on charge. I'm hoping to try a start tomorrow but have absolutely no idea how that might go. One other thing I'm pondering is that the tank has a fair few scratches & chips but is very clean inside. This is a replacement tank and the original was included in the sale. The original has a small dent but other than that the paint is in slightly better condition. However, it does have some light spots of surface rust inside that would need to be sorted out. So - ADVICE REQUEST! Does anyone has recommendations of an easy way to deal with internal surface rust on a tank? I don't yet know whether I'll consider switching back to the original tank but it would be nice to have that option open to me. As she stands right now ... Edited November 15, 2024 by Hairsy 7 Quote
Simon Davey Posted November 15, 2024 Posted November 15, 2024 She looks to be in pretty darned good condition, I really, really hope she starts for you. Maybe that dent in the original tank can be popped out? As for the corrosion, I'm sure I read a thread where it was a matter of rinsing it with something, may have been on YouTube.... Quote
Hairsy Posted November 15, 2024 Author Posted November 15, 2024 Thanks Simon - I hope so too! The dent won't pop out - it's not that kind of dent! But a bit of beating and then filling should do the job. I'm not sure either tank is better cosmetically - it's just different kinds of problems on the two. And, yes, I think I've seen a rinsing kind of thing but can't remember where. And I'd want to be certain that it's truly a solution and not a YouTube concoction for views. 1 Quote
Old-codger Posted November 15, 2024 Posted November 15, 2024 It looks like a good project should keep you busy in the garage over winter. Have a look at Evapo-rust it is a water based solution just pour it in and swill it around occasionally and let it do its work. Good thing about it is you drain it out and its reusable. It is a good rust remover. 1 Quote
Hairsy Posted November 15, 2024 Author Posted November 15, 2024 1 hour ago, Old-codger said: It looks like a good project should keep you busy in the garage over winter. Have a look at Evapo-rust it is a water based solution just pour it in and swill it around occasionally and let it do its work. Good thing about it is you drain it out and its reusable. It is a good rust remover. Thank you - that rings a bell. I think it may be the one I previously heard of. At the moment the old tank has no cap and a massive hole in the bottom where the fuel pump assembly bolts in - I'm assuming I'd need to seal the tank up when this sort of solution is sitting inside but I'm not sure how I'd do that without probably sacrificing a fuel pump. Anyone got any ideas how this works? Do I need to make up some plugs for the openings? Quote
Simon Davey Posted November 15, 2024 Posted November 15, 2024 Fuel cap on, then turn it upside down? 1 Quote
Old-codger Posted November 15, 2024 Posted November 15, 2024 (edited) Make up a metal plate to bolt into the pump hole and if you havnt got the fuel cap a suitable rubber ball nicked off the dog and pushed in place or I have got brought rubber bungs before to block up tanks. A good material for making blanking plates or spacers and loads of other things is cheap nylon chopping boards. Dead easy to cut drill and mould to shape if needed. Cost from a quid up and they come in various thicknesses. Edited November 15, 2024 by Old-codger Updated info 4 Quote
Ian Frog Posted November 16, 2024 Posted November 16, 2024 Just a thought for you before you attempt any start up. You said you believe the belts were changed but it is possible the bike has stood for a couple of years. I would strongly suggest you change the belts prior to any start up as a snapped belt could have major consequences to the viability of the whole project, belts as you rightly said earlier don1t like being left standing. Good luck Cheers Ian 3 Quote
Nick the wanderer Posted November 16, 2024 Posted November 16, 2024 As above. These are an interference fit engine, if the belts snap you'll be regretting it. You could try turning it over by hand a few times nice and gently, give you a real good look at the belts and get a feel for it first. 1 Quote
Egon247 Posted November 16, 2024 Posted November 16, 2024 She's perrrrrrrrrrrrrrrrty... Gotta love an italian. My moniker with my alfa is this: "its like marrying a supermodel, 80% of the time its amazing, 10% of the time its trying to bankrupt you and the other 10% its trying to kill you". 1 Quote
Hairsy Posted November 16, 2024 Author Posted November 16, 2024 You're doing a lot better with your Alfa than I managed if you're getting 80% pleasure! I had a Sprint 1.5 Cloverleaf at the end of the '80s and then a 33 1.7 4WD Cloverleaf a couple of years later. Loved and hated them both. 1 Quote
Hairsy Posted November 16, 2024 Author Posted November 16, 2024 Nothing photogenic in today's update. The battery had been on charge all night. The first thing I wanted to do was to check all the lights but as soon as I tried turning the headlights on, the dashlights all went dim. Checking voltage, the overnight charge had got the battery to 10v. Not a huge surprise I guess but I've had luck with old batteries in the past. For the check of a electrics, I connected jump leads to an old car battery that's sitting in my garage and, to my delight, everything works. Next was to take the timing belt covers off which was pretty simple - remove the battery and battery tray and then you can get to them. The removed tray was cleaned but it was just removal of dirt and not really restoration so I didn't bother with pictures. The previous owner told me that he'd changed the belts a couple of years ago but, in the absence of any receipts or other evidence, I was a little sceptical. I shouldn't have doubted him though - the belts are spotlessly clean and unmarked. The chap said that he did have the bike running up and down his driveway after he'd done the belts but that when he tried it again 6 months later it wouldn't run. So far, everything that he's told me has been reflected in what I've found and the state of the timing belts is no different. What that in mind, I'm happy to leave the current belts in place while initially trying to get the bike running. I will still replace them though when the bike is running OK. The tank is really easy to lift on these bikes and even has a little stay rod, like a car bonnet. I checked the air filter and it's far from new but not catastrophic so should be fine for initial testing. Then I took a look at the engine oil - there's plenty of it but it's not a pleasant colour. I'm not going to change it for the initial test but I definitely won't be going out for rides until there's fresh oil in there. Next I quickly checked all the fuses - I didn't want the first start to be hampered by something silly like that. The bike was very low on fuel but I siphoned out what I could. I siphoned some of it into a can and the rest onto my garage floor due to being focussed on the tank end of the jiggle hose and not the fuel can end. I then put 5 litres of fresh fuel in there. I noticed that the LCD fuel gauge didn't change when I added these 5 litres. It could just be a rubbish fuel gauge that runs down to zero before the tank is empty. Or it could be that it doesn't work. Investigation of this is now on the list for later. Quite a lot later. At which point I was finally ready to try to fire her up. I hooked up the car battery to the leads on the bike, switched on the ignition, set the cold start lever and ... She cranked - but way too slowly. With all my focus on the bike, I completely forgot that my spare car battery (a) was removed from a car because it wasn't in its prime any more and (b) has been sitting around for at least 6 months not being used. It has more power in it than the bike battery has but its not enough to start the bike. So, today ended with the car battery on charge and a new bike battery ordered. If the car battery can take enough juice then I'll have another go later today or tomorrow. The positives today are that electrics all work, belts are OK and the engine cranks (and sounds fine). 3 Quote
Hairsy Posted November 16, 2024 Author Posted November 16, 2024 Very quick update. Although the car battery clearly needed charging, I thought it would be a good idea to clean all the main electrical connections - particularly as they're relatively accessible right now after removing the battery tray. So I took apart and cleaned the connections at the battery, chassis earth, starter solenoid and starter motor. The last one was particularly bad. Even though the battery's still charging, I thought I'd have one more go at seeing if she'd start and ... the result made me rather happy. I literally just allowed it to tickover for 10 seconds and gave it a tiny rev but everything sounded as it's supposed to. Including the dry clutch making typical dry clutchy noises which may be apparent on the clip below. There are aftermarket solutions to reduce that noise but it's not on my mind at all right now. So some expense today with a new battery ordered but great news that she at least starts. 6 Quote
Simon Davey Posted November 16, 2024 Posted November 16, 2024 Brilliant, that's a major concern quashed. Quote
Nick the wanderer Posted November 17, 2024 Posted November 17, 2024 Good stuff. Carrying on from the cleaning thread are the bars and yoke painted/lacquered? Quote
Hairsy Posted November 17, 2024 Author Posted November 17, 2024 4 hours ago, Nick the wanderer said: Good stuff. Carrying on from the cleaning thread are the bars and yoke painted/lacquered? I think they're probably lacquered and that the tarnishing is actually damaged lacquer. Which makes it quite difficult to decide what to do. I think I'll probably just clean them and then leave the finish as-is for now. If they're letting the bike down at the end then I may consider doing something more. I did have a go at one of the silencers with some WD40 and cloth and it actually did a really good job. As I was on a roll, I gently used WD40 on some scotchbrite to deal with a couple of more stubborn marks and that worked well. Probably not as perfect a finish as metal polish but I much prefer the end result, retaining the satin look. I'll take before and after photos when I do the other one and post here. 3 Quote
Hairsy Posted November 18, 2024 Author Posted November 18, 2024 (edited) Not quite sure what to think of today. Started OK with cleaning of the silencers (covered in another thread). These came up really nicely. Couple of pictures here just so they're in this diary. Next was to try running the bike up to temperature to see how it runs. Saturday had just been a quick start - nothing more. The new battery hasn't arrived yet so I moved the bike outside and once again hooked it up to a car battery. Bike started fine and with fast idle set, it was fine running at around 2,500 revs. The bike has a very basic electronic injection system but includes a manual choke style lever that increases idle. I don't think it does anything more than that - but may need to check. As the bike was coming up to temperature, it started randomly seeming to misfire and, with the tickover low'ish, it would stop. It would start again but continued with a lumpy idle with misfiring. It sounded like a spark issue but could equally have been an injector stopping. I took the bike back inside and pulled the plugs. They indicated rich running. However, I'm a little sceptical about drawing full conclusions from plugs of unknown age that, I expect, have been in situ for 13+ years. I gave them a clean up and returned them to the bike as I don't currently have spares. Given the nature of the problem, I then pulled and contact cleaned as many connectors as were easily accessible - low and high tension sides of both coils, crank position sensor, engine temperature and the main ECU connector. None of them looked bad. I then ran a compression test. I have a fairly cheap & nasty compression tester so I'm not 100% confident in the actual reading so I was more looking to see if one of the cylinders was lower than the other. Both came out at the same figure (125 psi). Given that they came out consistent with each other and the bike has only done 13,000 miles, I'm comfortable with this. I have a friend who's a tool supplier so I'll try to borrow a compression tester from him to give myself additional comfort (and enable to me to confirm what my gauge actually means when it says 125psi). I then had another go at starting and she ran better. Not perfect but better. She got up to full operating temperature but would only idle smoothly at around 2,000 rpm. Below that was lumpy and she would die - but not quite the same 'abrupt stopping' that I'd had before. When revving, the revs would hold high for a while before dropping. Just like a carb bike that needs balancing. I had a quick look underneath and I could see some water seeping from a hose to the horizontal cylinder and also some oil seeping where the generator cable exits the housing. The previous owner had replaced the coil so I suspect he disturbed this and didn't renew the o-ring. Both of these problems have been added to my list but they're for when the bike is running better. So I'm now at a point where I need to think carefully about the next step. I've had a look at the manual to see what it says about throttle body balancing. In summary, it says that throttle body balancing, mixtures and idle speeds are all very closely interlinked and it talks about multiple special and expensive tools being needed - probably with a dose of experience that I don't have. My first next step will be to replace the plugs - it would be silly not to do this. I then see a couple of options. 1) I can connect up a balancer and see how the balance is looking. If it's out of balance then I could just adjust the balance, keeping a careful note of what I'm doing in case it doesn't work - that way I can return it back to where it was. 2) The bike has an OBD port and with an adapter and some software, I could get some insight into what the ECU is seeing, which that might point me in the right direction to avoid me clutching at straws. There's a 3rd option which I would probably try if I'd done the recommissioning of brakes and had some decent tyres - a good old Italian tuneup. I do wonder whether that could help with a bike that's been sat doing nothing. It might help to clear things out and solve the problem - or it might make the problem more obvious. However, this really isn't an option because I'm not prepared to ride it at the moment. For now, I'll order some plugs and then use the time I spend waiting for them to consider my next steps - probably 1 and 2 in that order but happy to take suggestions. And, a couple of positives - moving the bike kicked the fuel gauge into action and it seems to be working fine. And, having got it up to temperature, the fan works as it should at maintains the right temperature at idle. Edited November 19, 2024 by Hairsy 4 Quote
Hairsy Posted November 18, 2024 Author Posted November 18, 2024 (edited) Brain now engaged a little - I haven't had the airbox off. This kind of thing can easily be a loose or split hose. Plugs are ordered but tomorrow (hopefully), I'll take a look under the airbox and see what I can see. It's funny how we neglect the obvious steps sometimes. Edited November 18, 2024 by Hairsy 1 Quote
Hairsy Posted November 19, 2024 Author Posted November 19, 2024 (edited) I officially hate the bike today. I took the airbox off. It was really tight but it came off. Sadly I didn't find anything obviously wrong. There's very little in the way of vacuum pipes and what there was seemed fine. A couple of jubilee clips on boots were a little looser than they should be but not enough that it makes me thing I've solved the problem. I did take the opportunity to clean the throttle linkage, including the twist grip mechanism and this has left me with a much better throttle return. The hatred came next - the airbox simply can't be fitted with the rubber boots in place that connect the airbox to the intakes. Specifically, the boot for the vertical cylinder. I'm not sure whether my description will make any sense but I'll have a go. The boots are a tight fit into the airbox and then they should slide over the intake and a jubilee clip secures then. The problem is that they are very fiddly to connect to the airbox and then when you try to fit the airbox, the injector fuel lines are right in the way. You have to deform the rubber boots to get the airbox past these fuel lines and then they pop out of the airbox. I've tried again and again and succeeded only in scratching up my hands. I've also tried putting the airbox in place without the rubber boot and then feeding it through from the inside of the airbox. I just can't make this work either - the way it locates in the airbox is just too tight to be able to do it when its in place. I've given up for today. Just one of those days. Good news is that the new battery arrived. I've just put it on charge for now. I suspect it's going to have to work quite hard in the days ahead! Couple of quick pics of it without airbox, just in case anyone is interested. I kind of wish I hadn't bothered. Although I know I'll want to get it off again later for some comprehensive cleaning so I guess I've just brought forward the need to solve this problem. Edited November 20, 2024 by Hairsy 1 Quote

Recommended Posts
Join the conversation
You can post now and register later. If you have an account, sign in now to post with your account.
Note: Your post will require moderator approval before it will be visible.