
Horseynat30101
-
Posts
759 -
Joined
-
Last visited
Content Type
Profiles
Forums
Events
Store
Gallery
Community Map
Posts posted by Horseynat30101
-
-
Can you post pix of the bits you need? I may know someone with some spares???

Oops yep pics of course. Im going to the garage tonight so will take loads of pics for you. The only hit i need at the mo are: downpipes and left hand fairing. Needs to be off a H model though. Twin headlight model
-
Well a little update. Not been upto much as me and sam bag been busy with work and i was at a rally this weekend.
Managed to get the pistons out of the front calipers, going to clean them up and get pics tonight.
Sadly the fairing i bought is for the L model not my H model
 so will have to send it back, bought it off egay so dont know how hard its going to be sending it back and getting a refund : the biggest kick in the teeth is im sendig all the fairing to a friend of mine tommorow to be sprayed (he's done it in the past for a living) so think ill get everything sprayed and when i get the left fairing just send it down to him to spray. Ill just have to ride it without fairing for now.... well when its ready anyway!
Dont know how long its going to take to source the left side fairing as there are none on egay or anywhere else i can see.... found 2 H models being broken on the internet but as its a bank holiday no one is answering so will have to wait until tommorow
-
Using a mates trade number (you need them with you) I got 5 litres of oil, a battery and a set of 4 spark plugs for £38.
Hence why for everyone else its wise to call them "Halfrauds"

I also have use of one of these
 two headlight bulbs- £11.98. With card- £2.98
 -
Can you post some more pix please Nat?
of course i shall get more for you tommorow

-
If you spray direct onto alluminium, you need to use an etch primer to get the paint to stick. I did and it still falls off. Powder coating won't fall off and probably won't chip. Paint scheme sounds interesting. Wonder if someone could photoshop it for you???
Ah right, i will do, whoever painted it red this time round did a good job, its bloody stuck well on there!
and its a dark red (almost maroon) that the frame and that it, check the pics
-
Black and gold?
Black fairing, with metallic red frame, swingarm, hangers and stuff
Powercoating is a no no, £150 plus VAT for frame, swingarm and wheels. Not too bad but i guess i could DIY.
-
Right i shall be ringing a few powdercoaters tommorow and get some quotes, anything over £120 and im not bothering. Will be done in the garage.
Now what to do about the fairing?
-
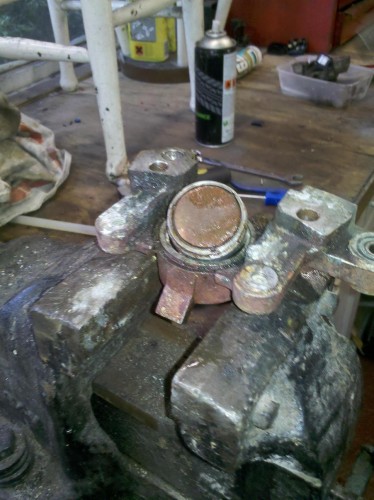
Lol megawatt you can see it the pics, its the browny coloured stuff in the middle of the piston. The rear is the same, we did try to get it out but it seems its meant to be there.
Fozzie- i like the idea of powder coating and not bothered about cost but matching the red will be very very hard. Hmmm... maybe i could send the lot? Frame, swingarm, wheels and hangers....... orrrrrrr we could DIY the lot ourselves?
-
Are you painting the wheels as well?
You'll have people asking what it is all the time with that scheme I reckon
We had that with the old GPX as it was just black with an ace cafe sticker, rose a lot of questions which always feels good
Yeh anything not standard looking is good i like being asked about my bikes, got that alot with my aprillia!
Hmm wheels. They're gloss black atm and hadn't thought about painting then as they're in brill condition.... although if bike is going matt then shiney wheels wont work with it???
Megawatt i only just now realised how you meant to get them out lol! The piston is solid as it has this material in it to stop vibration we think so can't get anything "in" the piston.
-
Matte black with the red frame will look nice
What about throwing some small monster decals on there... Dunno why I just think they look cool on Kawasaki's
Matte black it is! Ooooohhhh i love monster!!!! Gunna try find the red monster stickers
just little ones, put them just below the indicators -
Ill try air first, using the compressor.
Got a present today!
well not a present but still was excited to see it lol! http://www.imgur.com/3Emmd.jpg
http://www.imgur.com/P4f6W.jpg
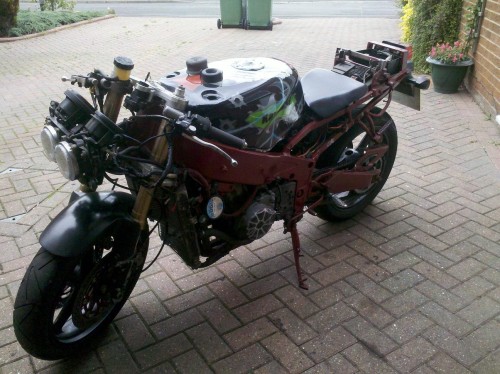
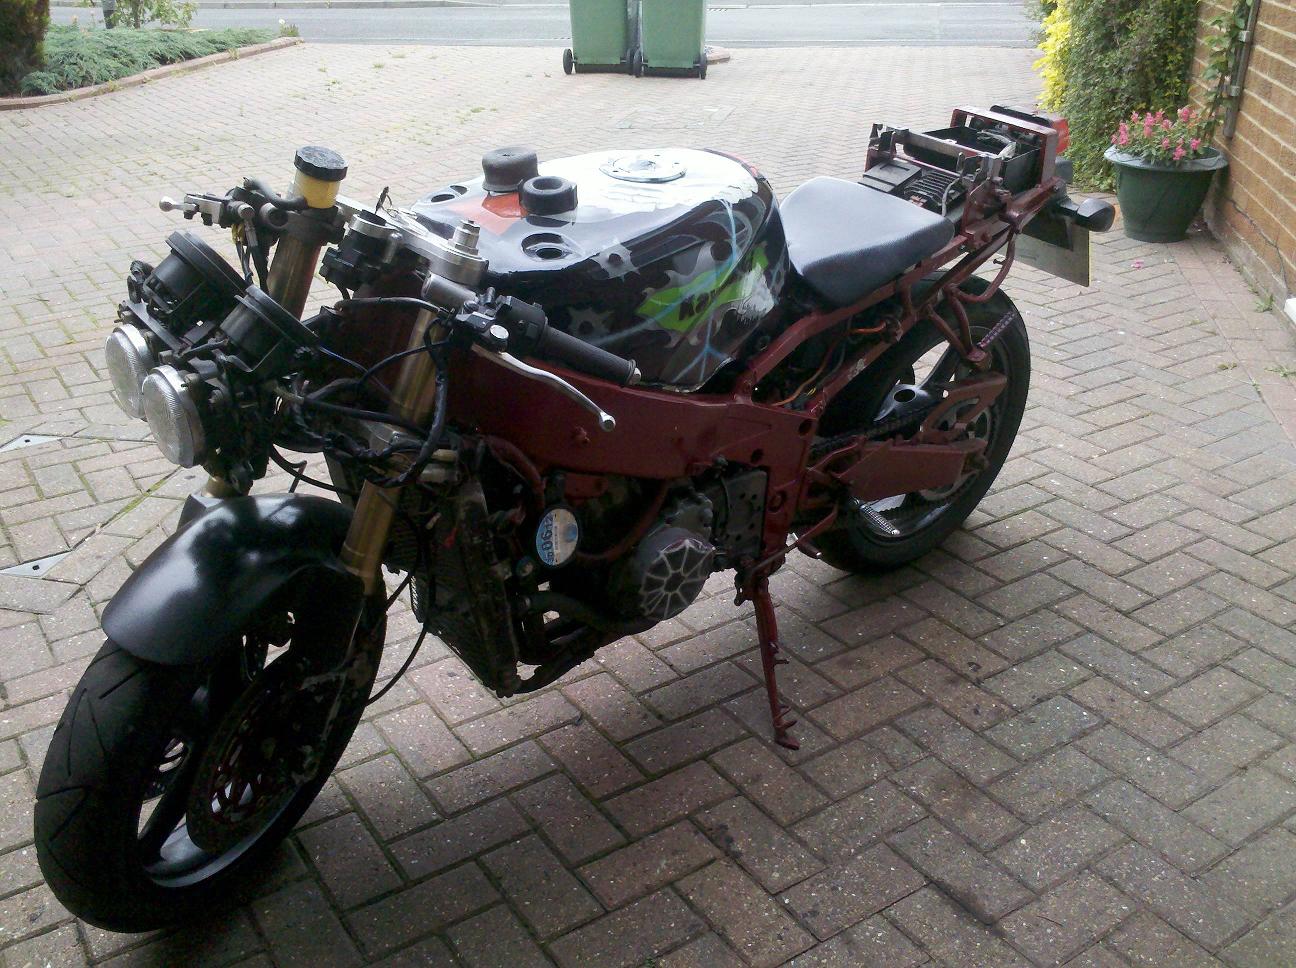
Ta da! Fairing is now complete
not bad for £35 including p&p. Will be sanded down like the rest and getting sprayed black. Seriously considering spraying it matte black but not ratty, properly done and keeping the red frame. What do you think? -
You got a tyre pump or airline, if so connect it to the bleed nipple, just be careful though, they can shoot out like bullets
Ha ha will do!
-
I use a big Rawlbolt to grip the inside of the piston, hold Rawlbolt in a vice while getting caliper very hot with a blowtorch. Tap caliper with a mallet until it turns. When it frees off, spray some WD40 or 3in1 around the piston and gently turn caliper around piston until it's out.
I need the piston in one piece so wouldn't this destroy them? Also we were thinking of putting the two halves together, reattaching the banjo and squeezing the piston out. But most of the brake fluid is out of the line now so dont know if this would work?
-
If all else fails, pop it in the post and I'll have a look at it for ya
Thanks both of you but magic sam fixed it
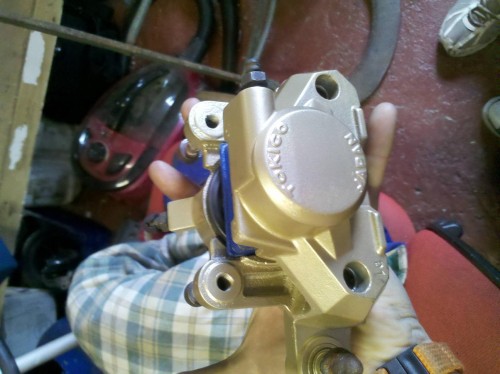
has removed a bit of thread but not enough to cause a problem. Some numnut must've had the calipers apart before because look!
http://www.imgur.com/xLXBU.jpg
Some idiot replaced the allen.bolts with a hex one.... god knows how they go it in! Too small space for socket or spanned so sam used an extractor.
Got both calipers in half:
http://www.imgur.com/davM8.jpg
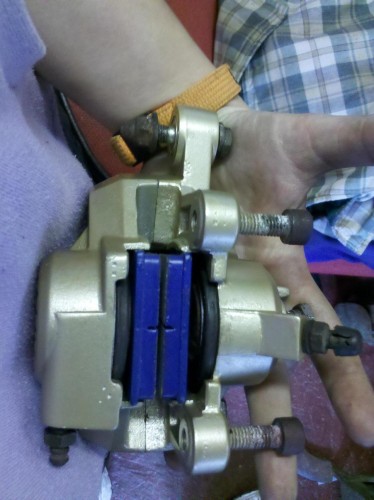
They're in a right sorry state and we need to get the pistons out as i forgot to squeeze them out whilst they were still attached to the lines
 any ideas???
 http://www.imgur.com/NpgJz.jpg
-
Nat, I have a spare front calliper that should be the same size, if yours is buggered, let me know if you want it

Aww cheers
not sure how buggered this one is until sam has a look...... so hopefully i may not require it -
Lol eab! Not sure indy, probs full strip and rebuild and paint apart from the engine as that's sweet.
Bit of an update:
Decided to try and strip one of the front calipers myself...... dont think it was a good idea lmao! Stripped the thread inside where one of the bolts go to hold the two halves together
 i think tbh it was going to happen regardless who had done it! So will get sam to drill it out and rethread it, and replace the bolt as thats fooked too!
I left the other one alone and gave up trying to get the pistons out on the one i partly dismantled as id rather not do more damage. Seriously thinking of paying someone to do it for me haha!!!
-
Ah we used new brake fluid
slid in nice and easy. But if i get some.probs ill know why lol! Oooo headers ey? Ask him how much as mine are blowing and they're literally like hens teeth not wanting to splash out for new ones too : -
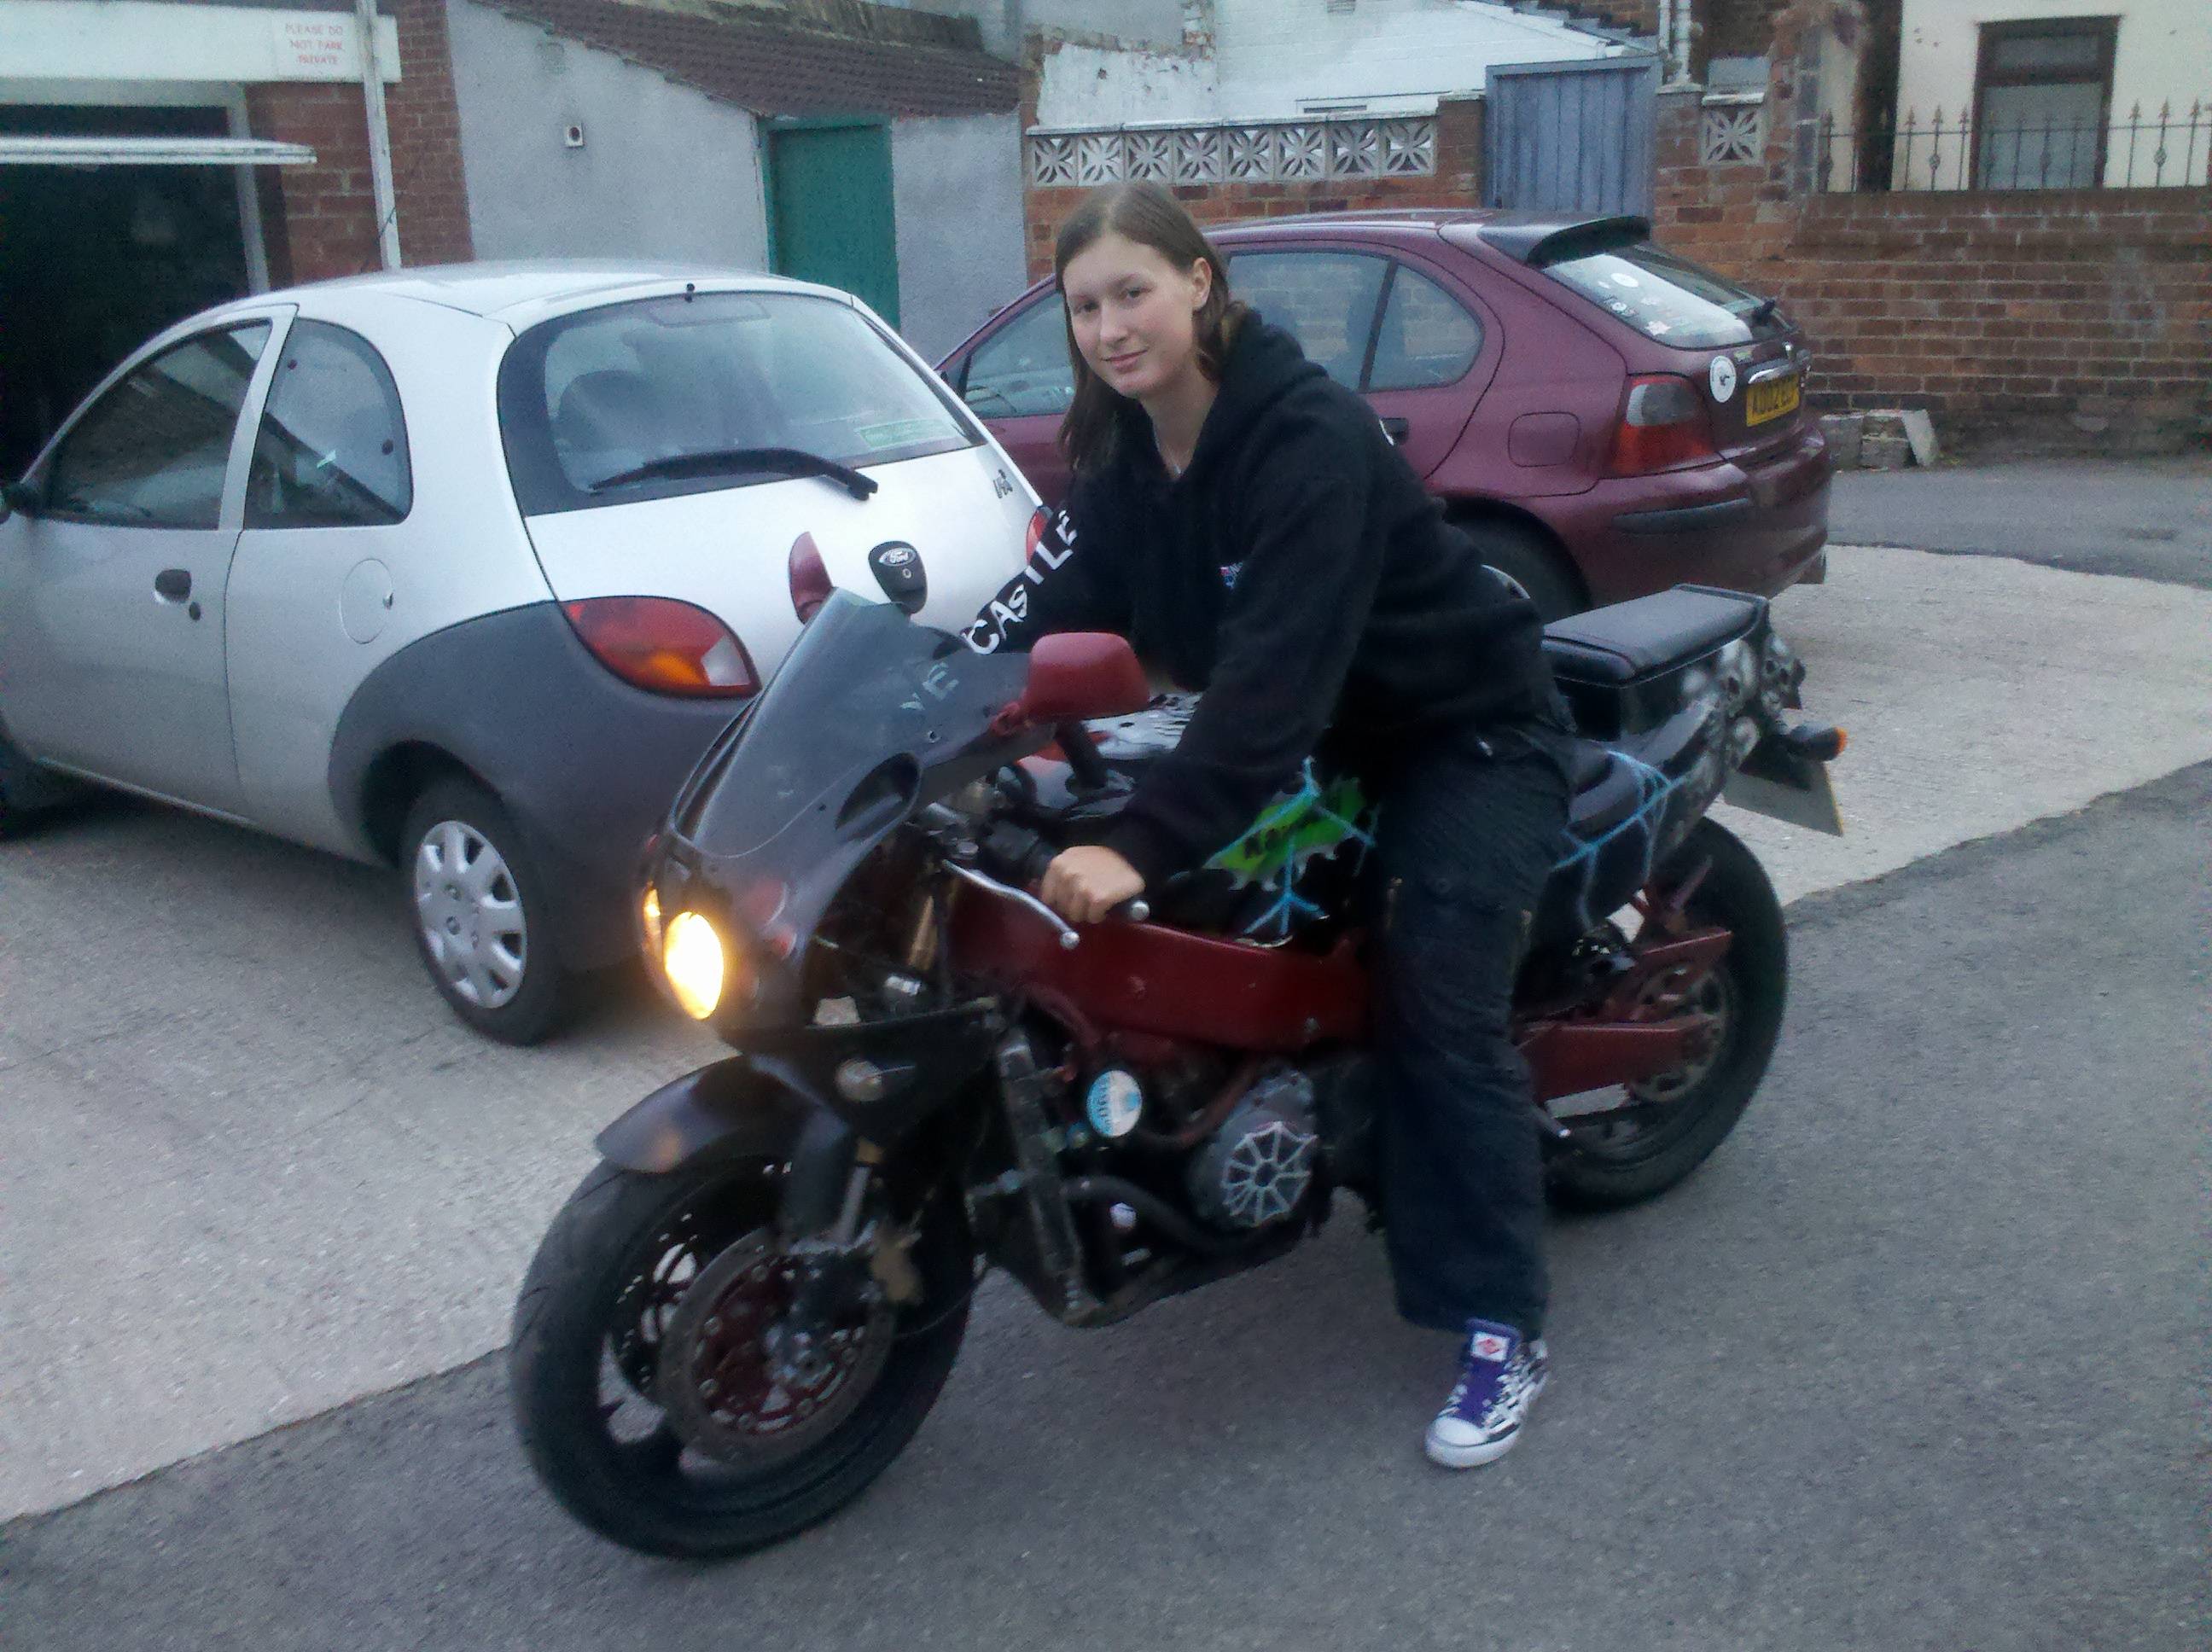
Wow bex ! Can see the difference in your face there!!!
-
Great job on the calipers Nat, but best to smear Red Rubber grease on the seals before refitting the pistons. May safe grief once you've bled the brakes?
Red rubber grease. How come? And thanks
-
The latter.... as long as you dont need to ride/drive to get there!
Rusty nuts haha.... enjoy!
Haha ok
 i do have to drive though i think. Unless i scrounge a lift to work on my mums trike...
Hmmm thinking about it ill get drunk, scrounge a lift and go to work hungover lol!
Rusty nuts, yup all the ralliews round this way have a strange name lmao!
-
Whoops sorry : i am using my phone and imgur app so can't adjust the saize sadly
-
Rallyyyyyyyyy!!!!!!!! Tees Riders- Rusty nuts rally
oh and work so its either not drink much or go to work with a hangover??? -
Helloooo...
So here begins the zxr thread. Managed to get a few things done today
which included:Removed all the fairing.
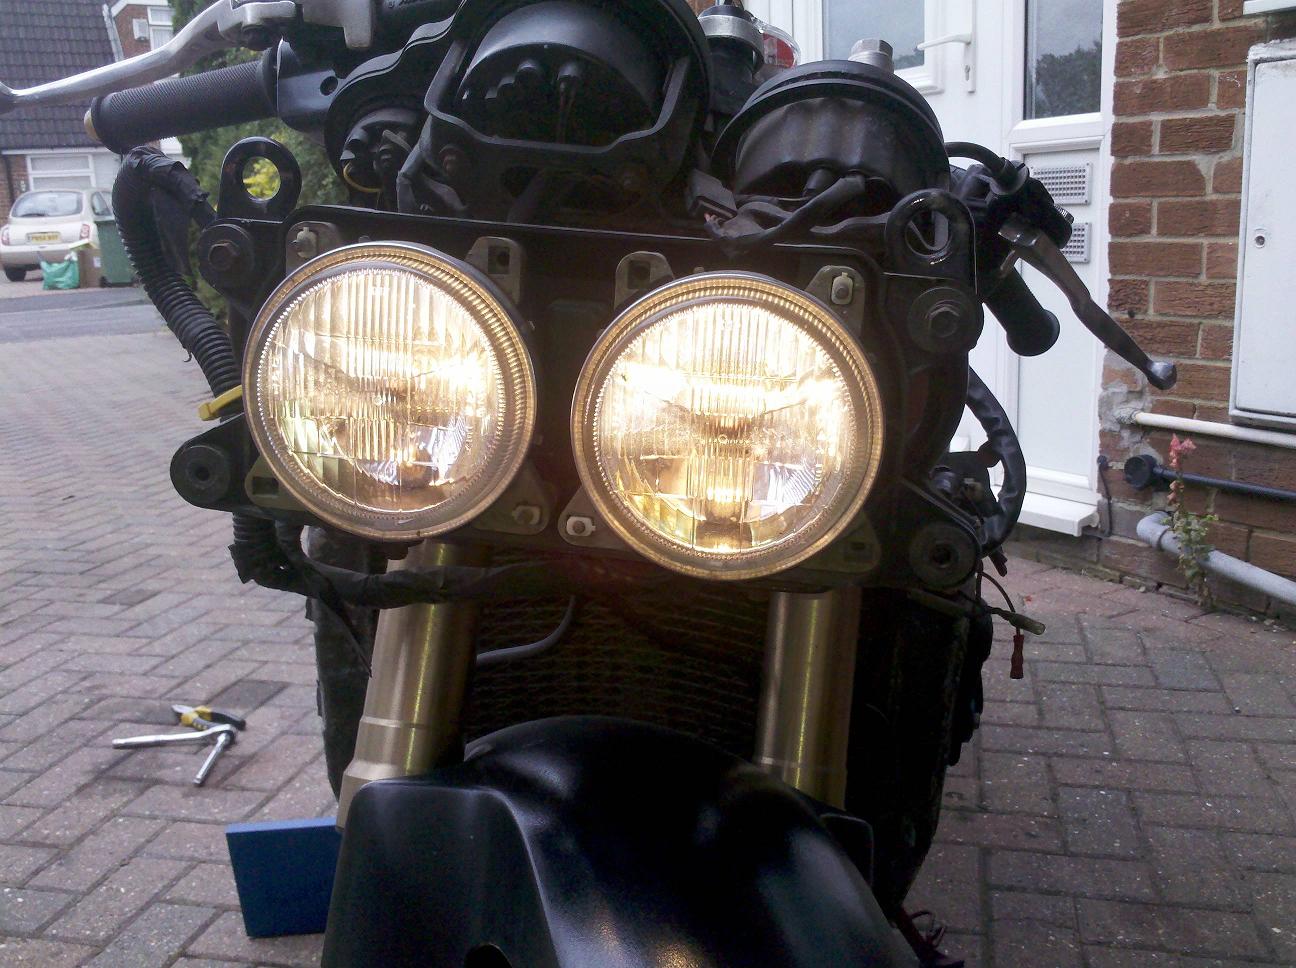
Bought headlights and went to change the bulb that was blown to find the cap on the bulb wasn't on properly so plugged it in and low and behold headlight bulb wasn't blown. Good job i hadn't spent the tag price of £11.89 for two bulbs!! Sam has a trade card for halFRAUDS and we got them for £2.98
would take them back but going to keep them as spares. 
Then the fun part
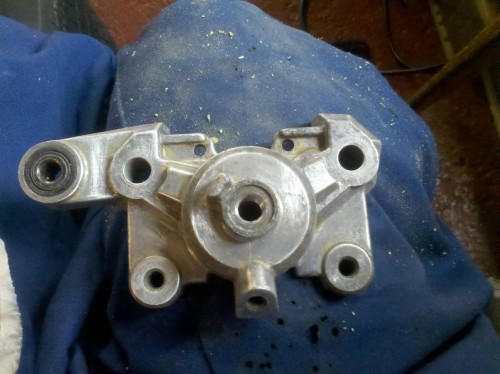
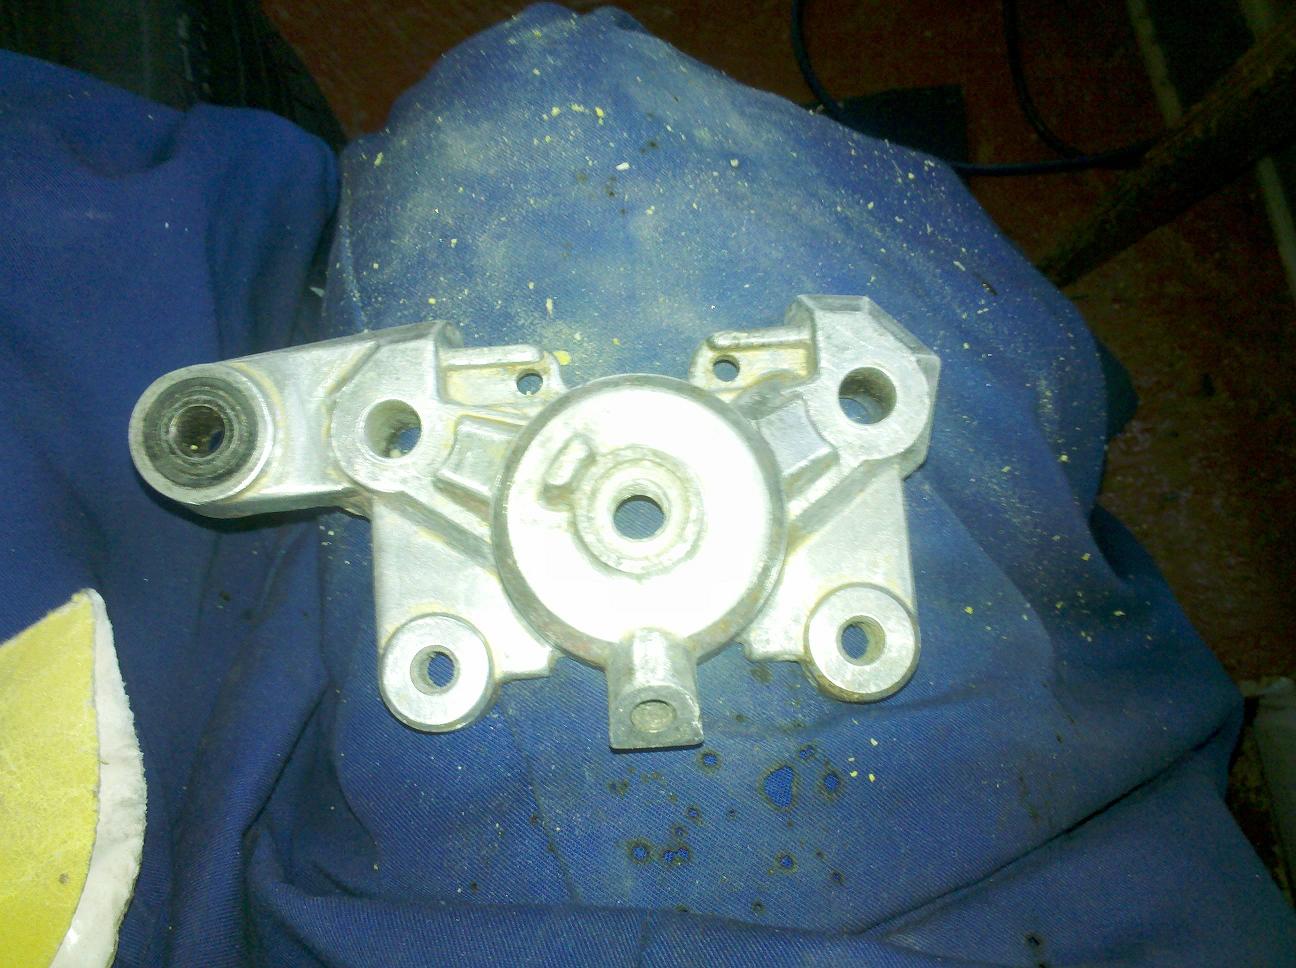
Removing all the callipers to refurb them.... first the back caliper, removed it fairly easily and it was in a GRUBBY state... dont think the 20 years had been good to it tbh. Sadly i dont have pics of the outside before we did it but have this.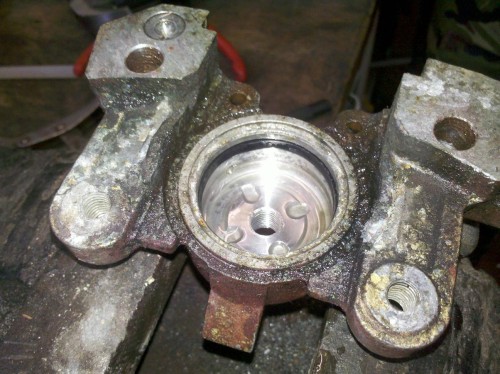
Grubby right? Or is that too clean you think lol! So anyway sam left to take a friend somewhere so i was left to sand them down ready for painting!
what a crappy and boring, tedious job lol!!! Anyway some pics:
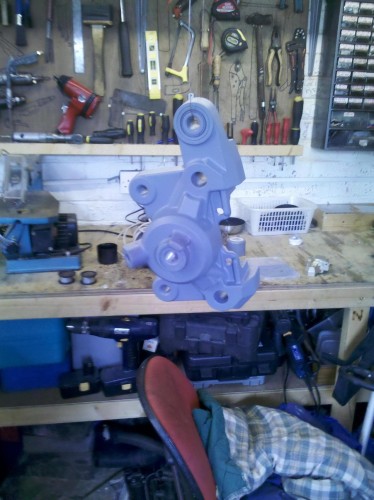
Then we primered them:
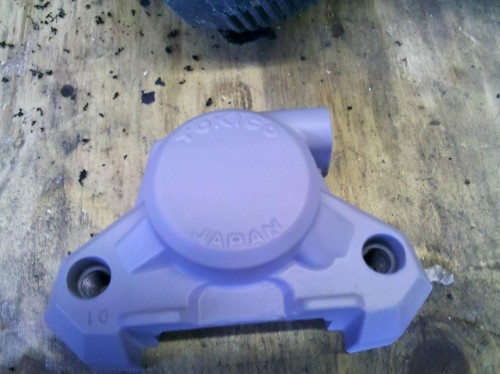
Then went to the nearest auto shop and bought some gold paint, sadly i think its abit silvery for a gold but nevermind, anything would look better to what it looked like before!
Well then i would've fitted the new seals but i got sent the wrong ones
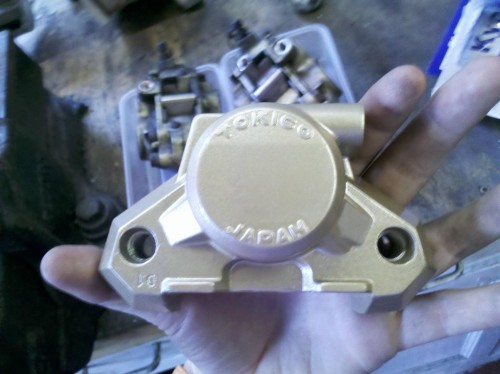
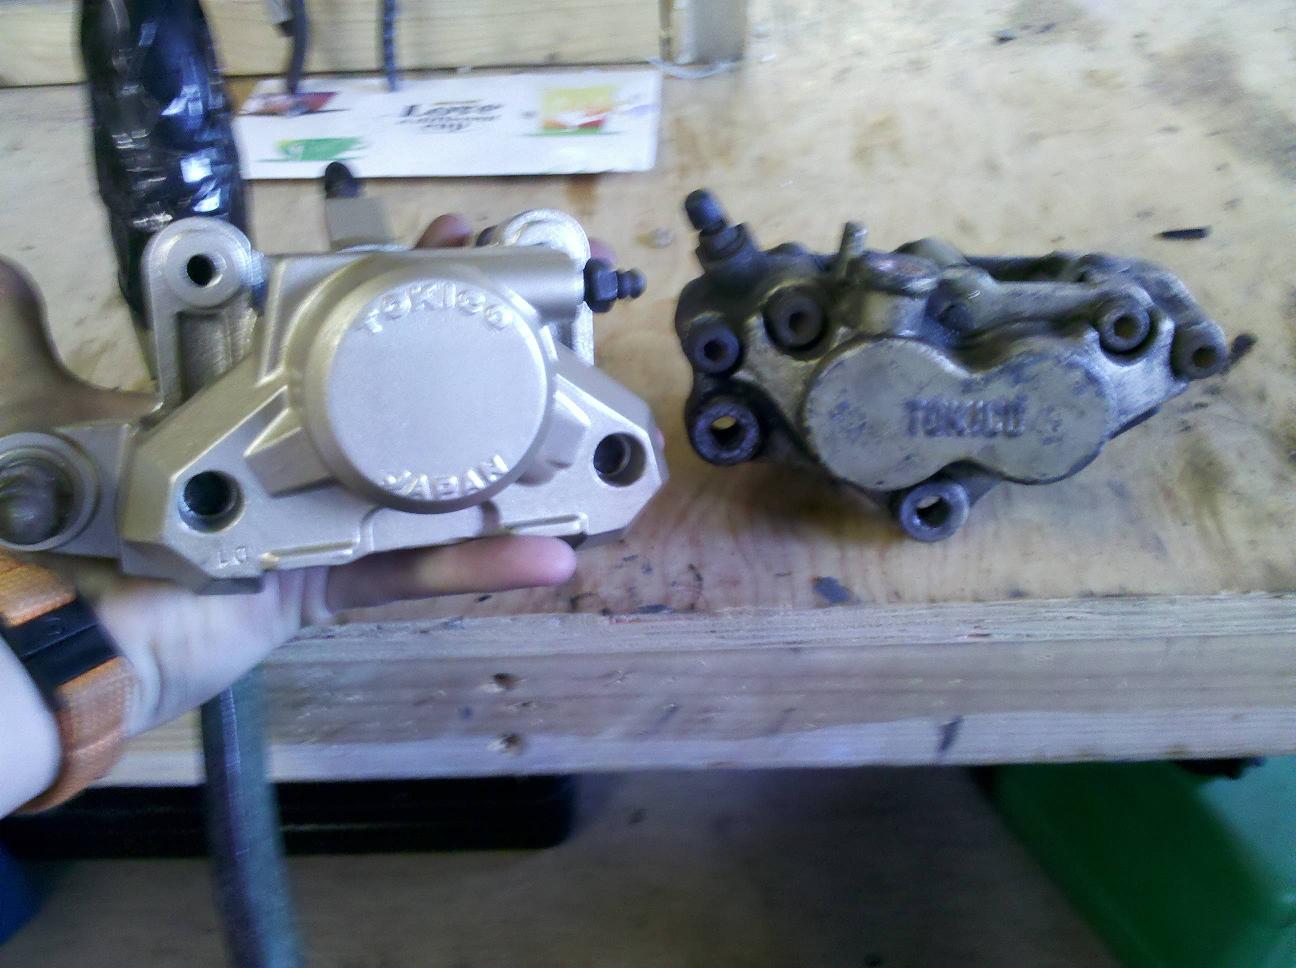
so as the old ones were ok we refitted them and put the new pads in old bolts in sadly and didn't get chance to paint them but going to order some stainless ones Final pics of rear caliper:
And old vs. new:

Hope you've enjoyed reading so far. Hoping to do the fronts tommorow but we will see what happens with sam being at work and i havnt a clue what to do
-
The 3rd one of Ratsers was taken from Kirkstone Inn on the pass.
All my pictures are still in my memory. Am i glad you can't read my mind

Should i be worried?


The ZXR project thread :D
in Old Motorbikes, Projects and Restorations
Posted
Hello, update for you all:
Brakes are still in bits an will be until i get back from hold next friday
But rung the guys up yesterday about them sending me the wrong fairing and they said ring again today so i have and good news, they will be collecting the old one and bringing on that fits my bike hapy days!!! At no extra cost to me too
Very happy with them! And happy that it will all b painted soon