linuxrob
-
Posts
346 -
Joined
-
Last visited
Content Type
Profiles
Forums
Events
Store
Gallery
Community Map
Everything posted by linuxrob
-

Home Zinc plating experiments
linuxrob replied to linuxrob's topic in Old Motorbikes, Projects and Restorations
I know that site very well ta, he is good entertainment Bob. That article by Tom on the Thunderbird forum is a good read, have thought sugar will do the slowing down of the zinc crystal formation. That Karo corn syrup is American only and have worked out it is almost pure glucose so will get down to the body building shop and get some. Anyhoo will have to estimate the surface area of my bolts and give it a go. Rob B -
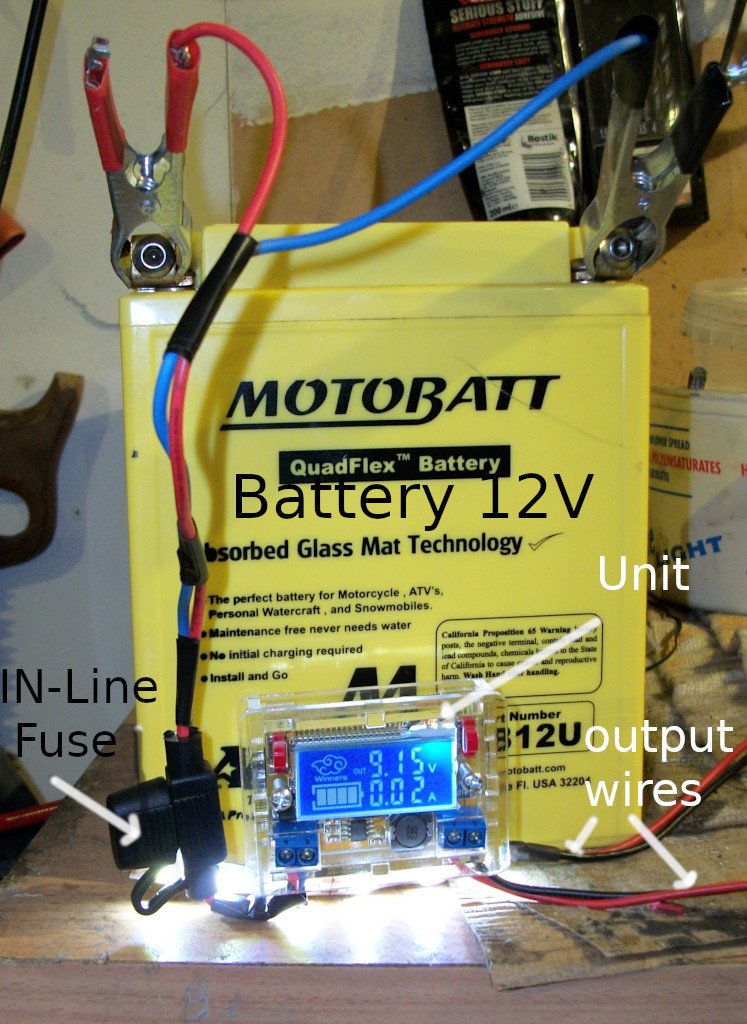
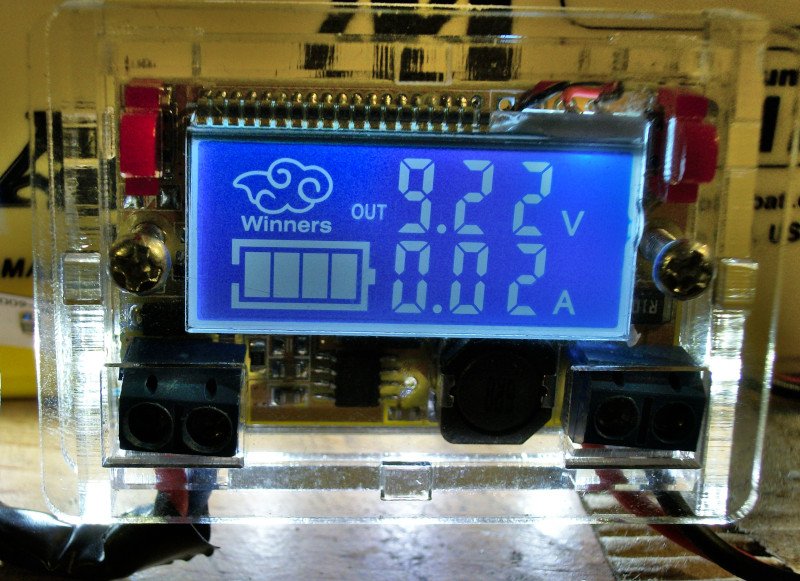
I did try some home plating a lot of years back with Vinegar and Epsom salts with poor results. So I drop off all my parts to the platers. Having read a few bit and bobs on the net I am now going to see what results i can get for little to no layout. Yes I know you can get a plating kit but would like to try a few experiments with what I have already. I used to use 1.5V AA batteries (HP7 in my day) a large margarine tub and solid copper wire, had some zinc plates of unknown purity. What I got was a few small bits covered with a dull grey zinc which polished up to a not so dull grey. Now my plan is to a: clean the parts with de-greaser then wire brush and polish to a near mirror finish. b: use an acid to etch (pickle) the parts prior to placing into the plating solution. c: correctly calculate current required for a specific area of the parts to plate d: regulate the power in the circuit e: keep the electrolyte solution warm (21-25 degrees C) f: use air bubbles to mix the solution. g: plate for no more than 10 minutes, remove rinse with water and light buff with wire wool then back in solution for another 10 minutes. Today I got as far as to get a good power source. From what I remember you only need around 1.5V, it's the current (amps) which need to be in a specific range. When I was looking into putting some LED lights on my bike I wanted a good constant voltage for the LED's as when running the battery voltage varies from 13 to 14.5 V. I go a little bit of kit of ebay that would take an input voltage from 3-23V. You could then dial in the required output voltage, in my case 12V. This will give the LED's a nice stable voltage and hopefully not burn them out. I ended up not using this as the lights i fitted have stood up to 14.5 volt ok so far. this is the unit Will use this as a good 1,5v supply. The battery of the Z500 is big enough to last for ages. Wired to a 12V battery via an inline fuse (5A) and set in this case to 9.12V to just illuminate this small strip of LED's Now have to find the zinc plates for the anode and get some Vinegar and Epson salts to make up the electrolyte. See next post Rob B


-
ER5 Engine Swap / Build
linuxrob replied to fastbob's topic in Old Motorbikes, Projects and Restorations
Good fortune for tomorrows weather Bob. Hope to pop out to the garage myself tomorrow (Friday) find my old zinc anodes and pick up some fresh white vinegar / Epson salts with shopping and try some plating. this time i have plenty of old phone chargers. Rob B -
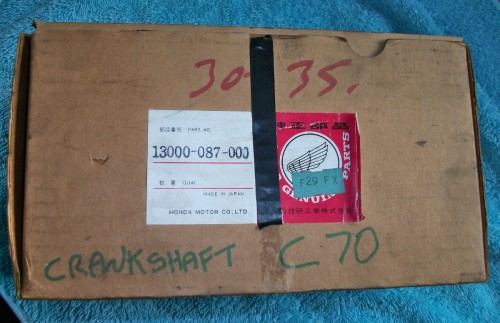
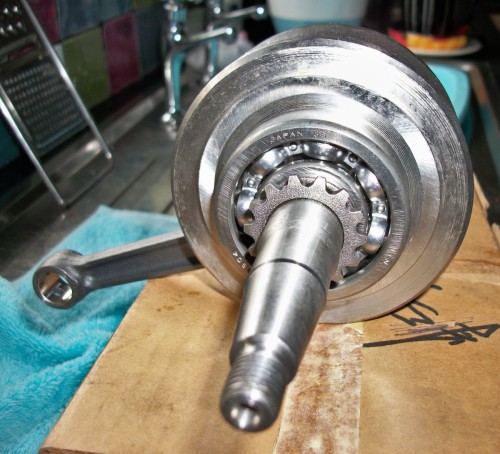
Sorting out the garage and came across a new genuine ~Honda C70 crankshaft complete assembly in it original box and wax paper still mint Have put it on ebay https://www.ebay.co.uk/itm/223221470224 Will take offers Rob B
-
how many people have we got on here from the north east?
linuxrob replied to a topic in North East Rideouts and Meets
Darlington here -
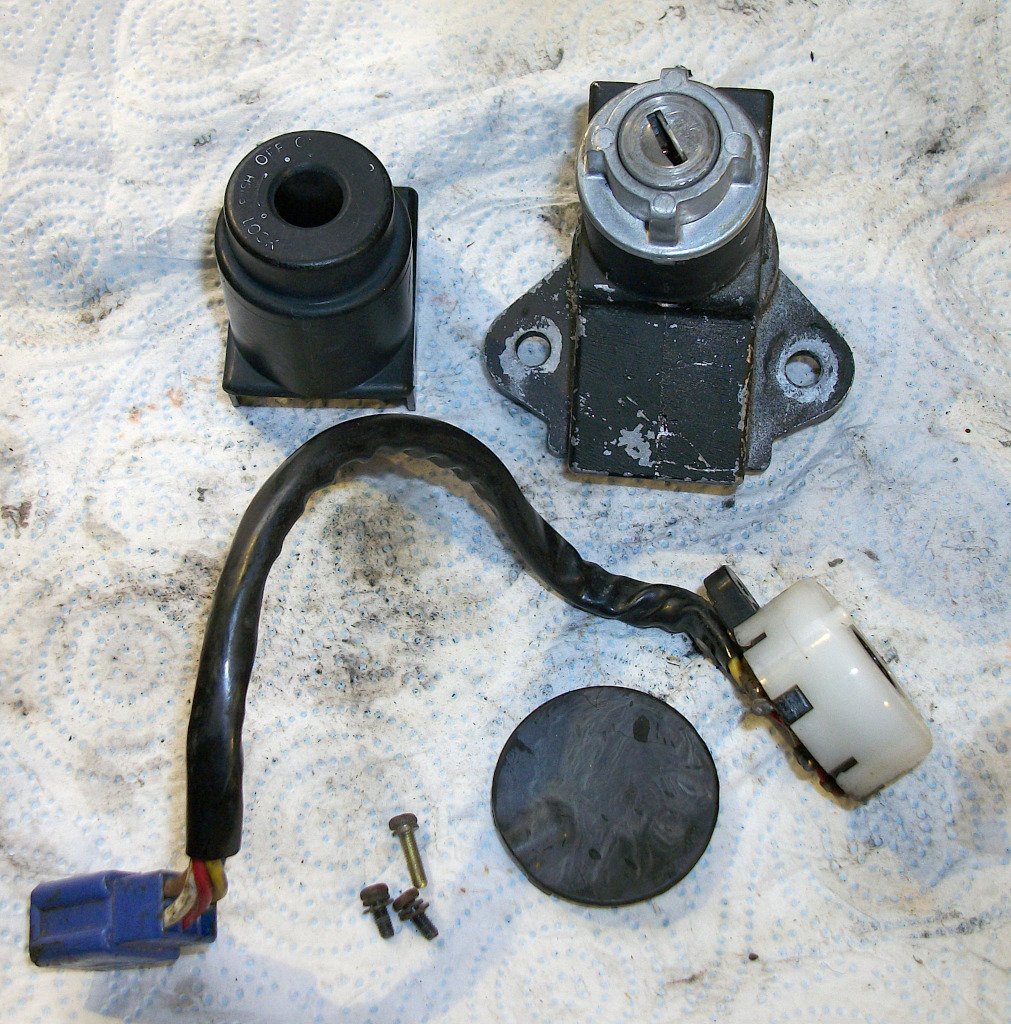
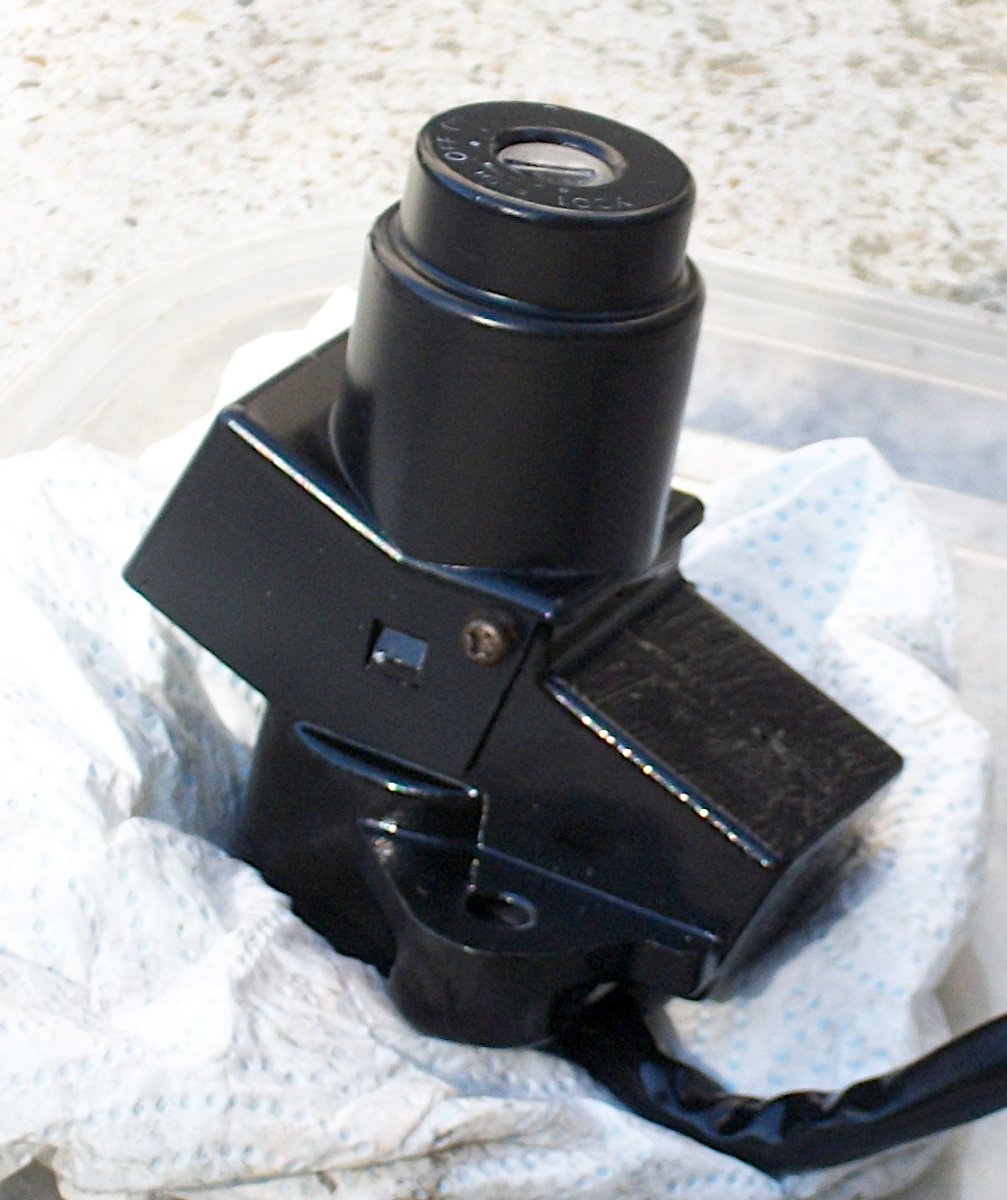
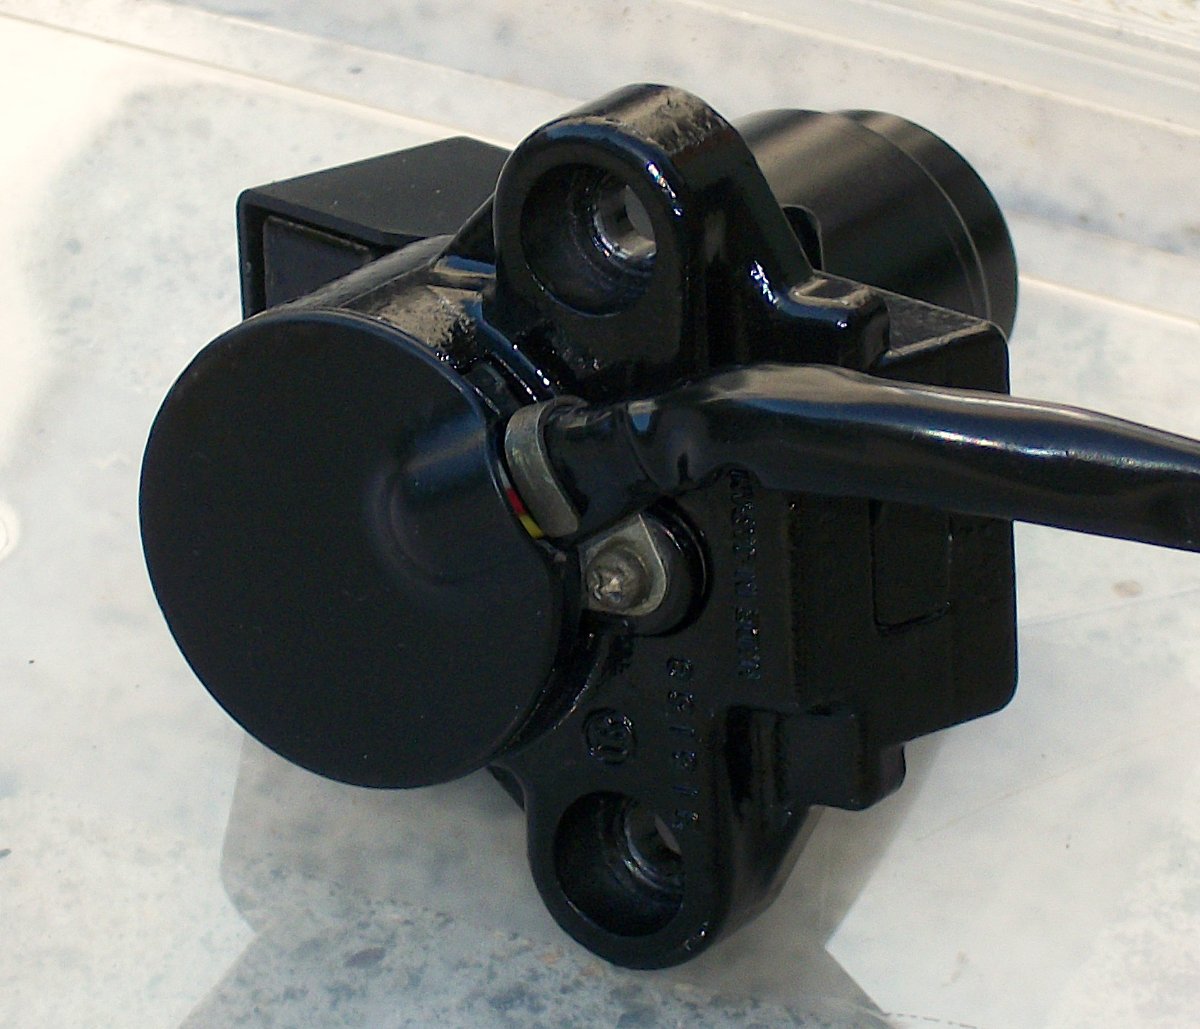
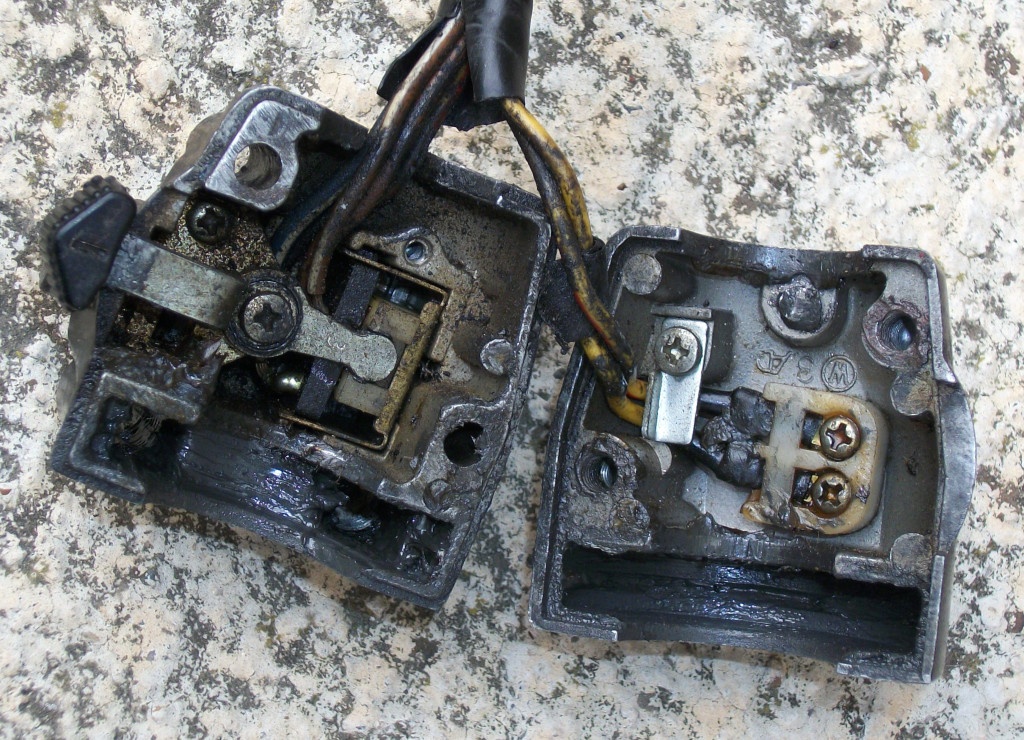
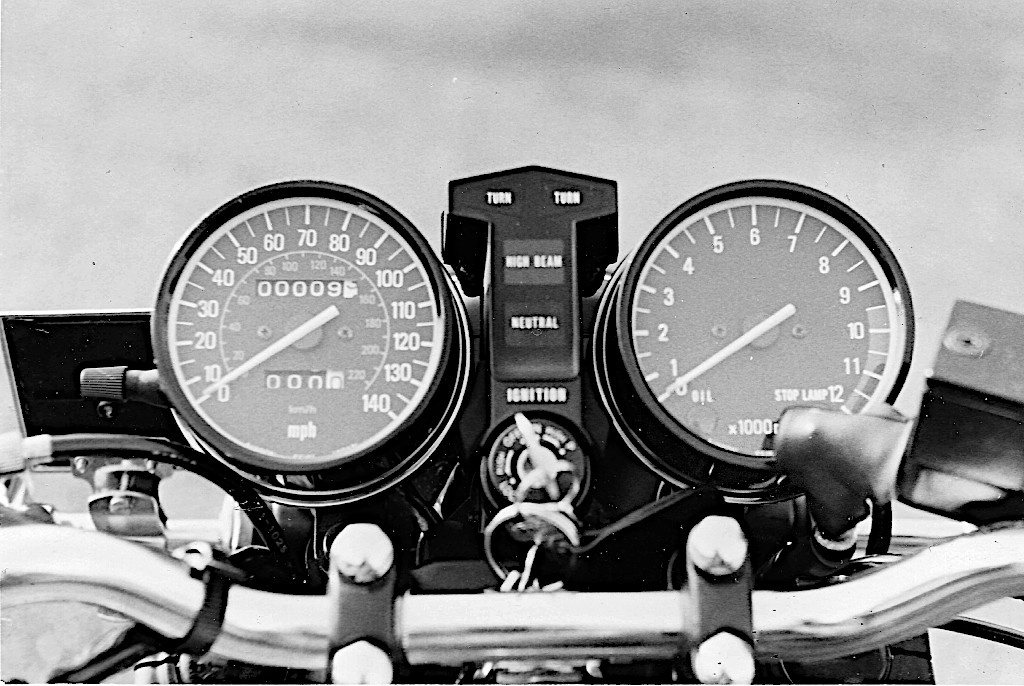
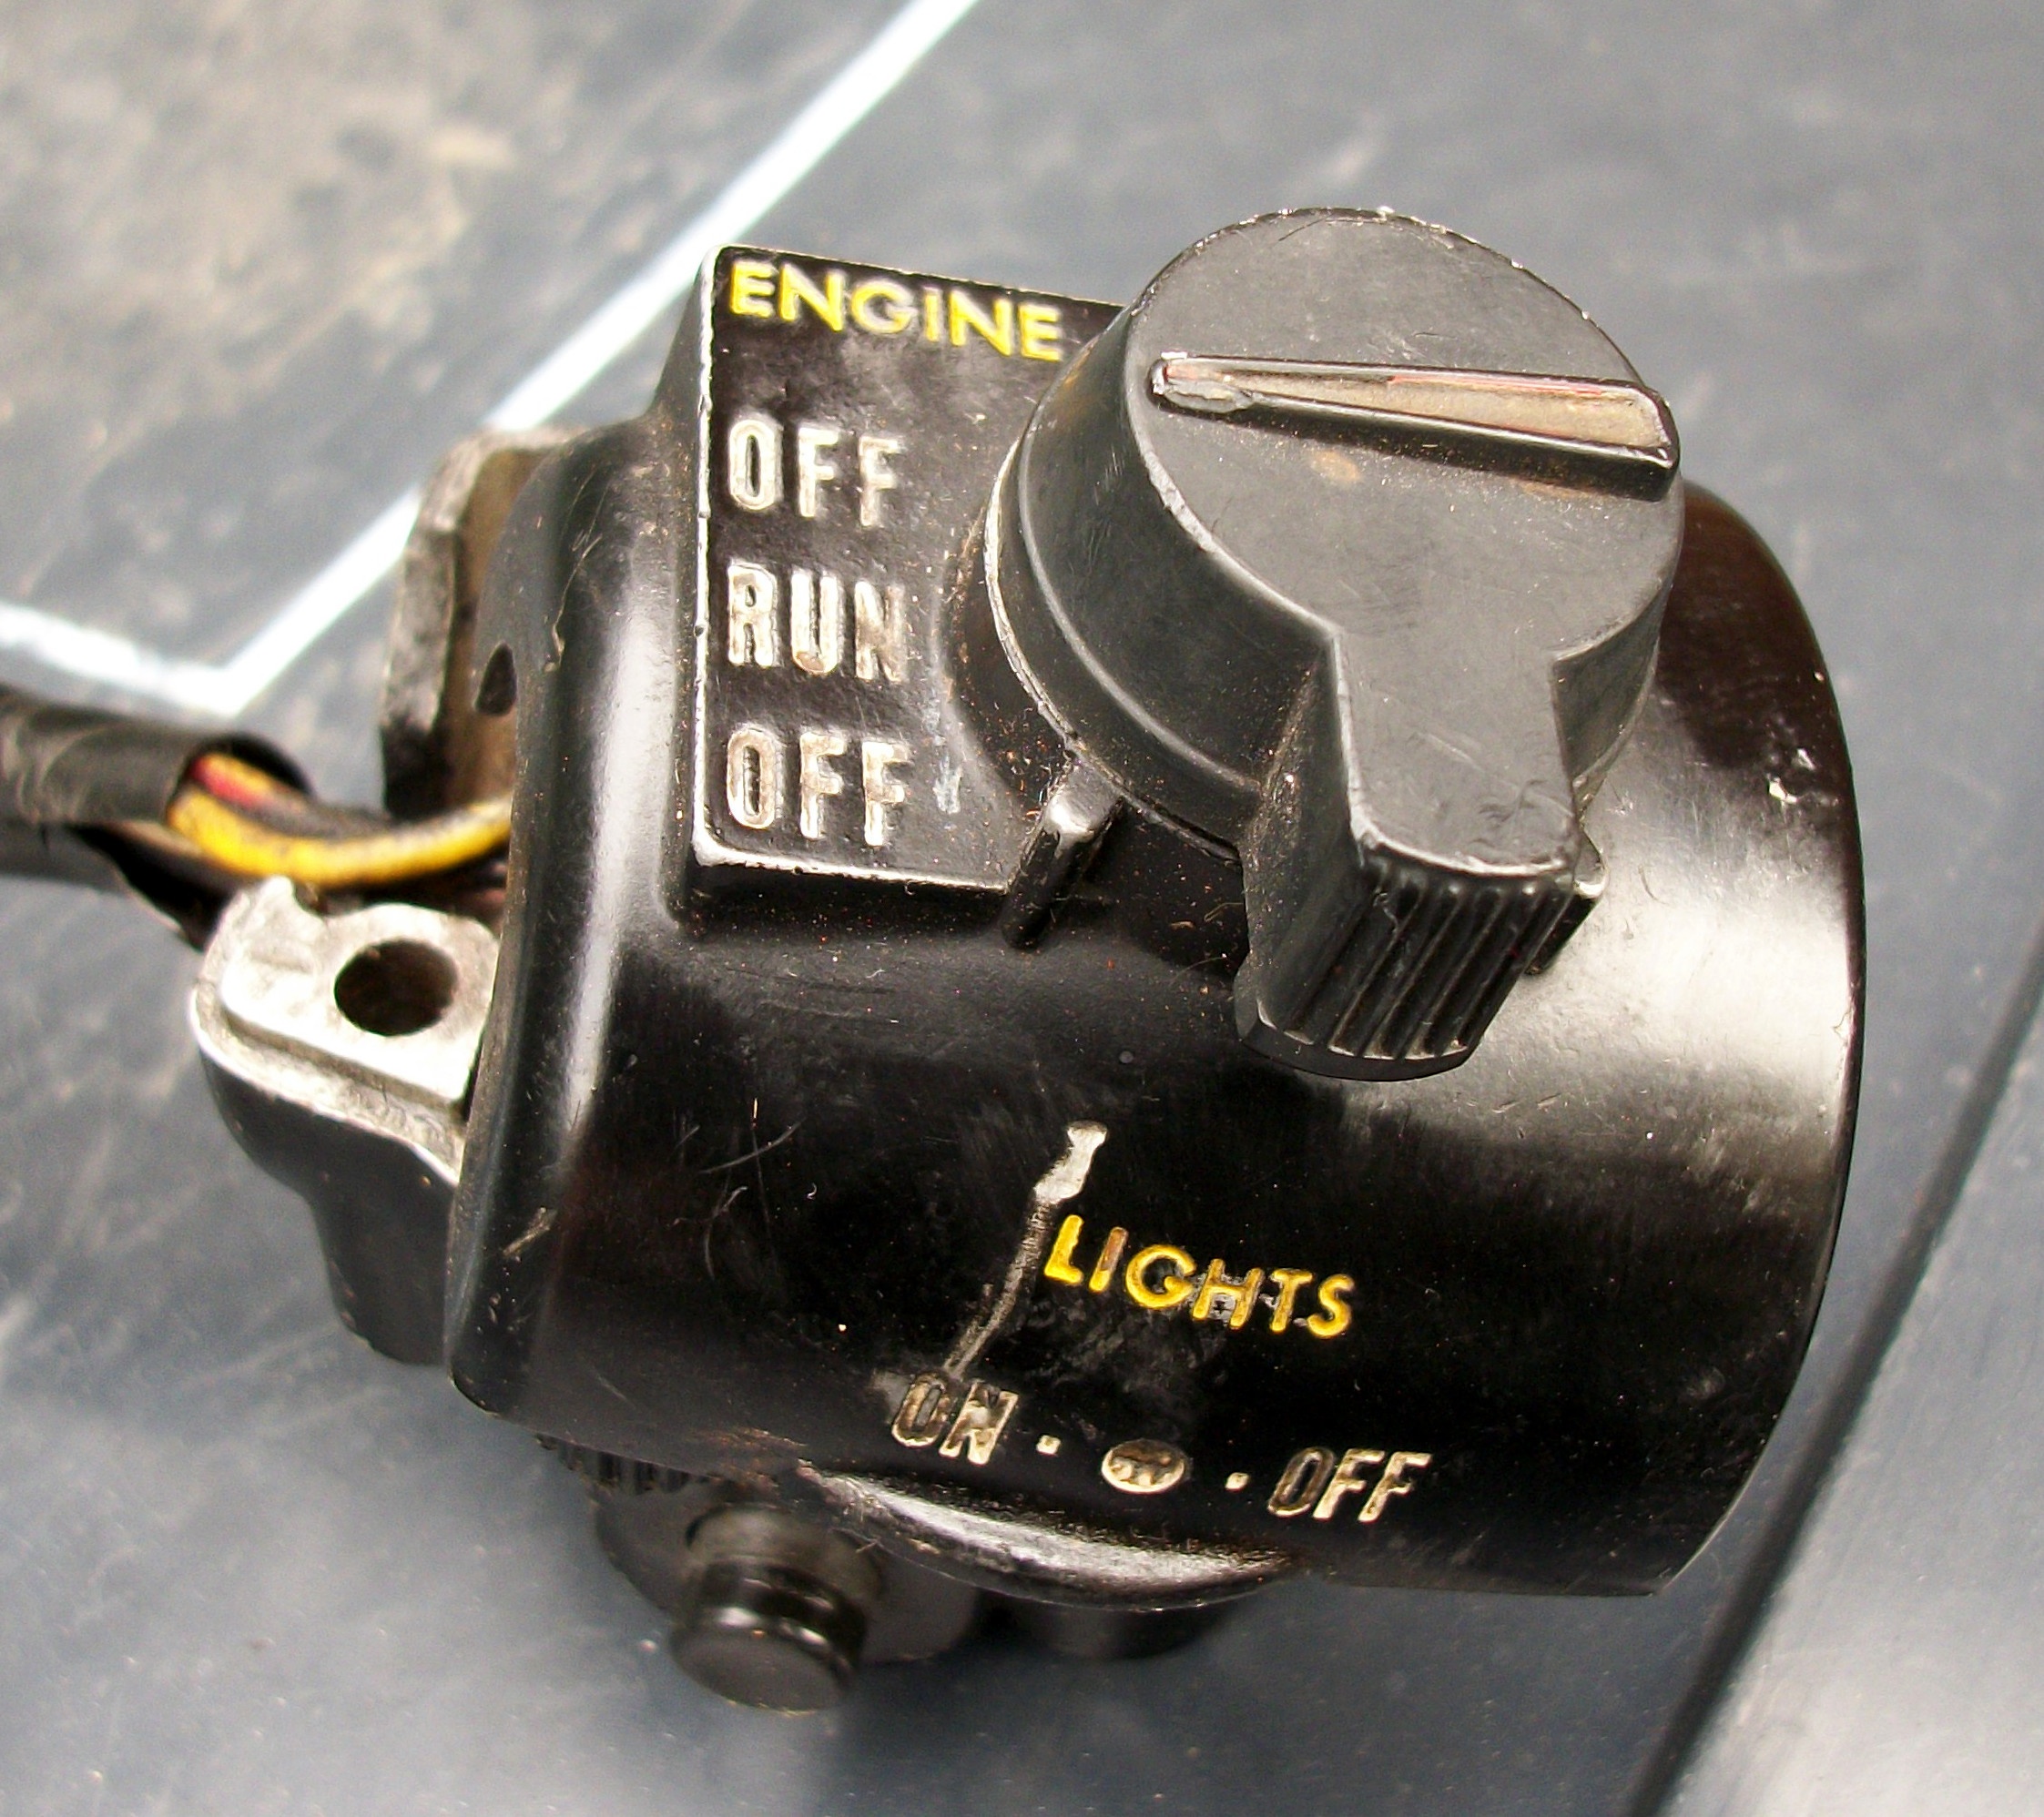
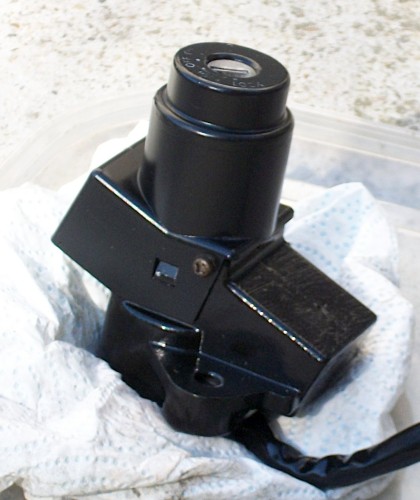
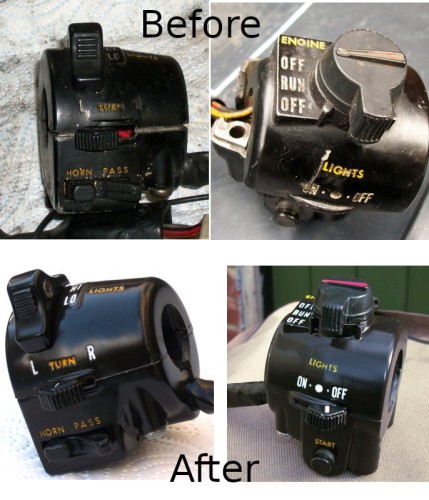
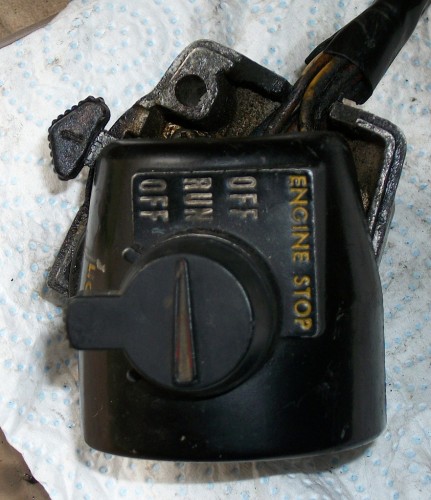
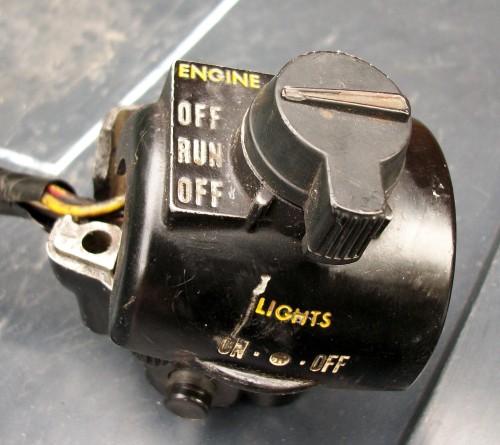
Just a quick one so to speak. Gave the ignition switch a clean and repaint. Before: Out with smaller JIS screwdrivers, clean and strip The contact assembly was fun to do and glad i remembered my dad's advice, "if you strip anything unknown and may have springs and small bits in always take it apart in a box" sure enough BOING when the assembly was removed the small springs made a good bid to escape but were caught in the box Phew!! Cleaned switch body masked and a light and then medium coat of satin black, next day 2 wet coats of satin lacquer. switch assembly carefully assembled and greased, connections cleaned greased and tested in all modes, even the stearing lock works smoother now. Rebuilt Possibly clocks (gauges for our cousins over the pond) next. Rob B


-
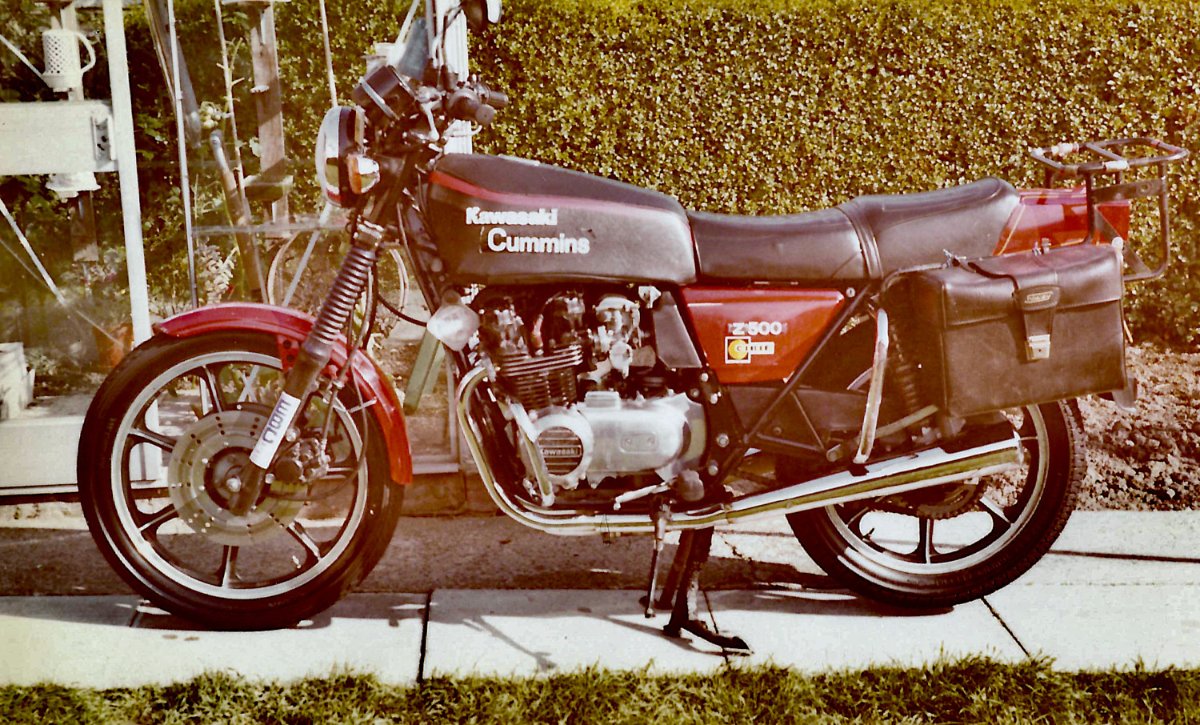
Cheers chaps for your kind words and encouragement. I have lurked here and other forums glued to many a restoration and build thread. The quality of work i have seen from you people is truly amazing and inspirational. This is the first time i have been able to take my time with a full strip and rebuild. Previously I have had work, family and sometimes profit to hurry me up. Done lots of work on my own bikes in the past from the humble SS50 /C100 / C50's through 400/4's, RD's a mighty Z1R (small tank) and even my RE5. Painted stuff like these with aerosol cans, frames, brackets and sometimes bodywork sent stuff of for plating (Cadmium when you could) still do not have compressor or machine tools. Having now more time and a Bandit for sunny days, a GS125 for pottering around in all weathers, I can give my owned from new and well loved Z500 the attention it needs to go from a good condition survivor to a showable ridden classic of it's time. It feel good to have this bike to refurb knowing it's full history as finding a project as complete as this would be hard and cost more than I have to fund it. The Bandit had a good 53000 mile half strip nearly 2 years ago and will hope to post that story here when i get time, and yes i did take a load of before and after shots. As i have said before this is good tidy up and not a restore so will see what can be done using everything from the original bike that's serviceable. Finally here is a pic from July 1981 all shined before my annual hols (where it was hit by a white escort in London, it had done just shy of 15000 miles then. Rob B
-
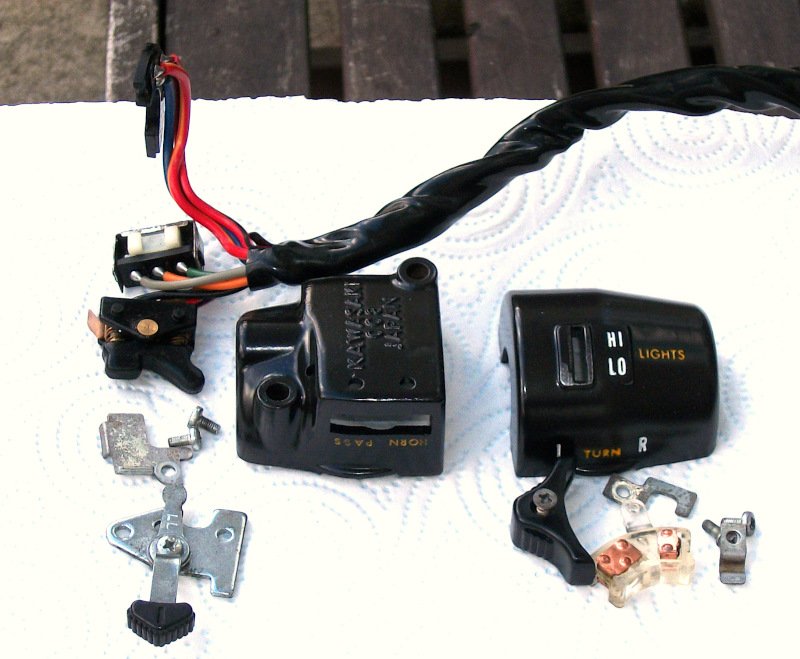
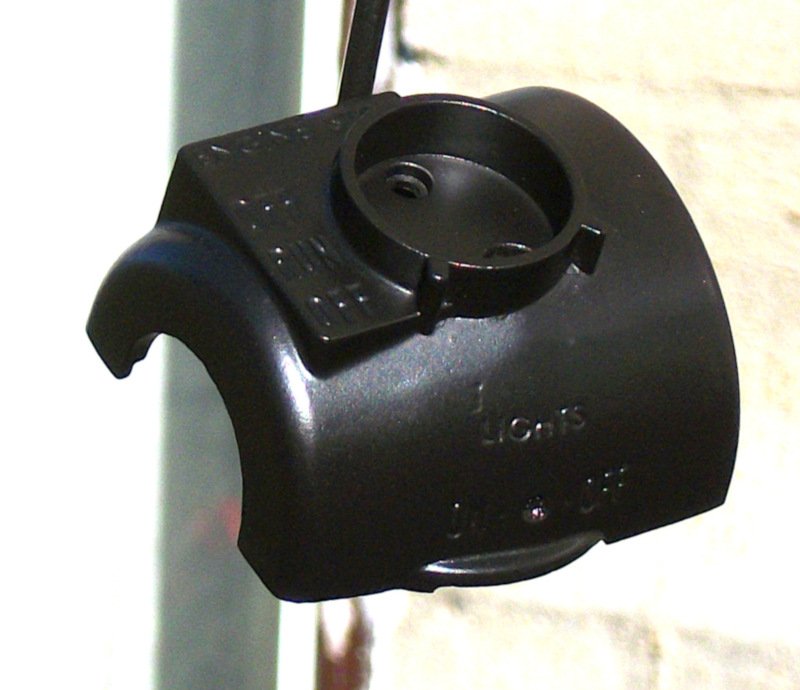
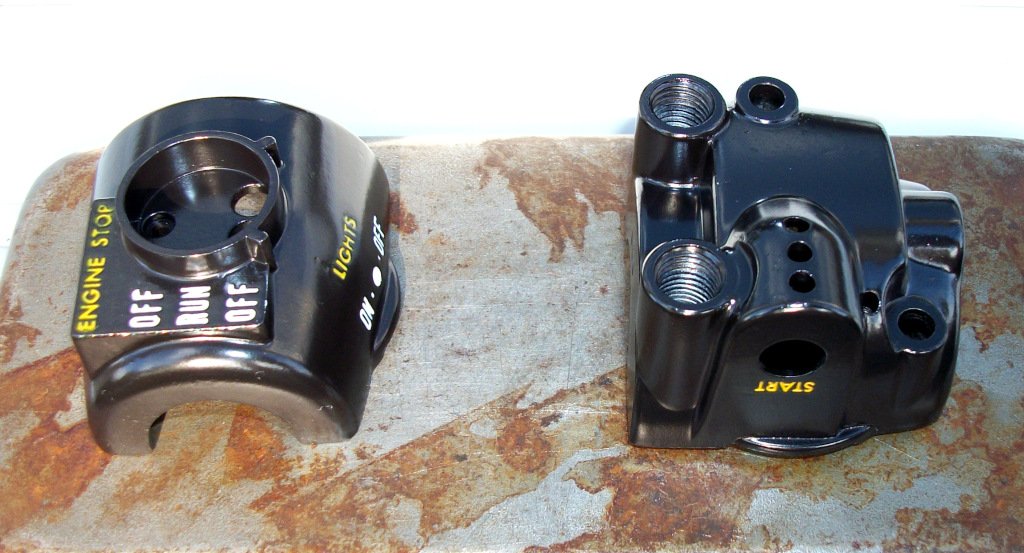
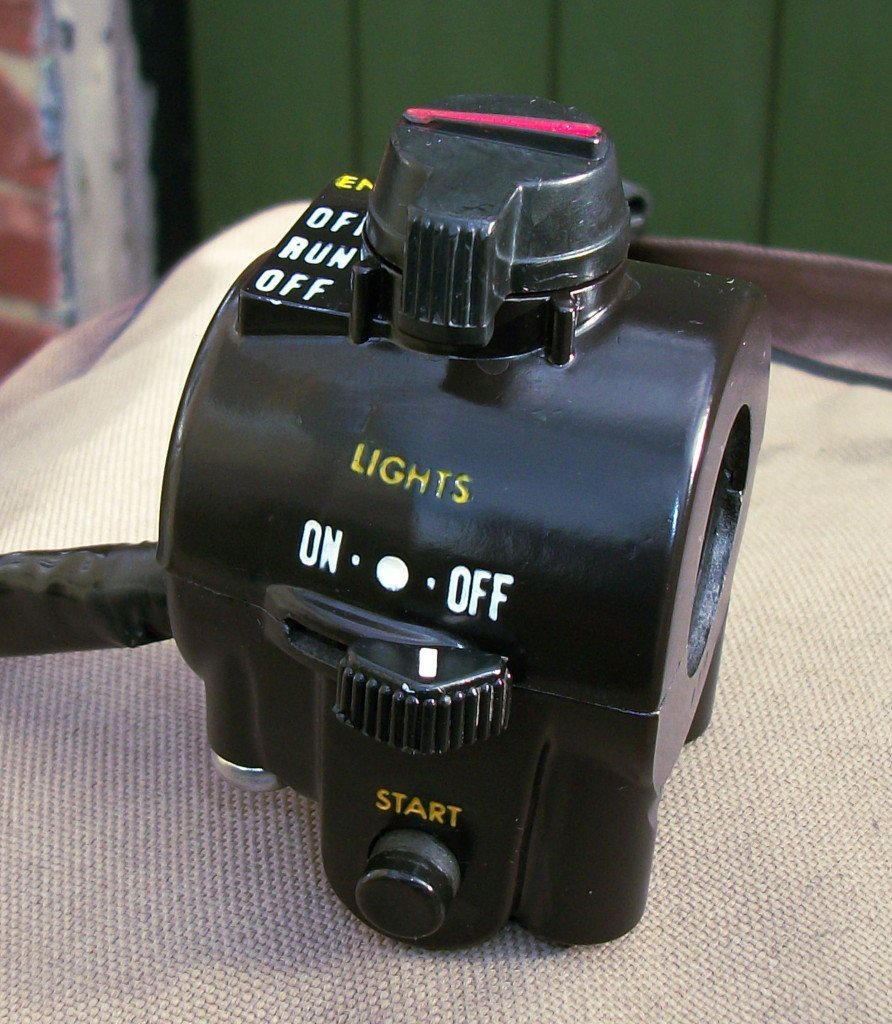
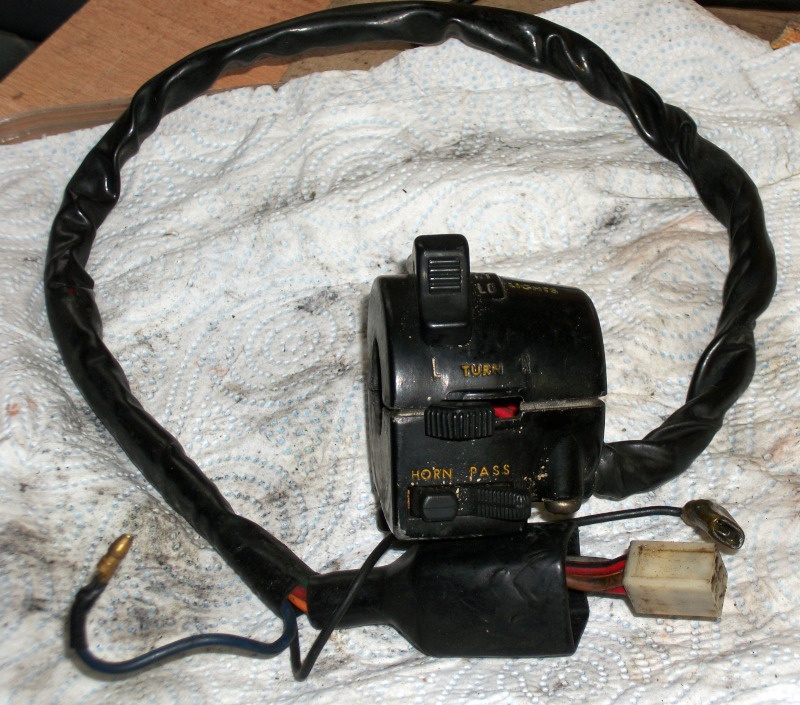
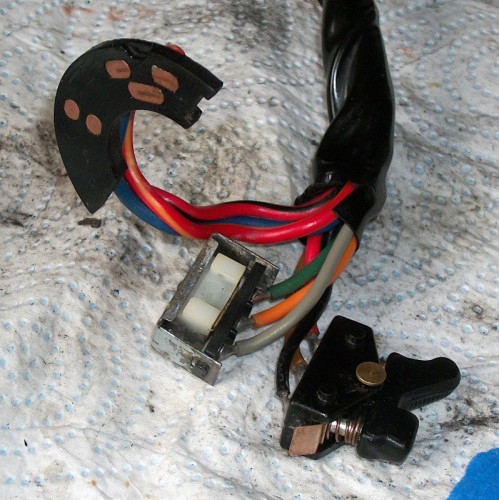
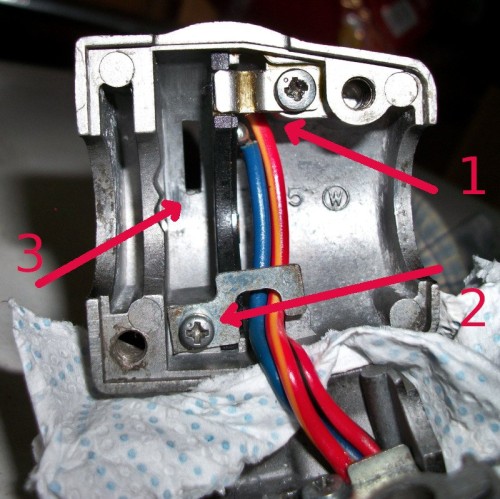
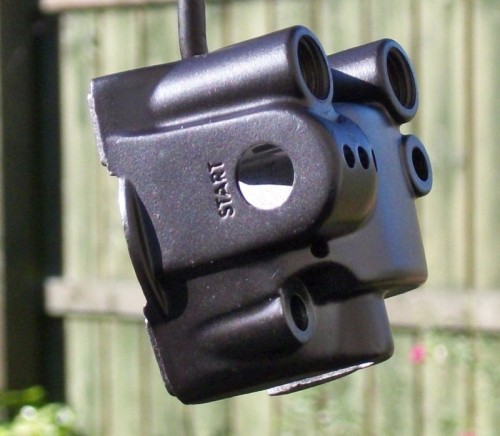
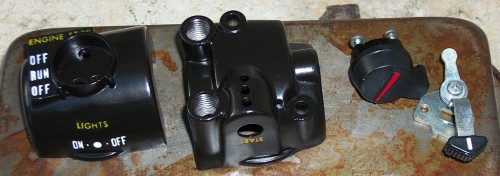
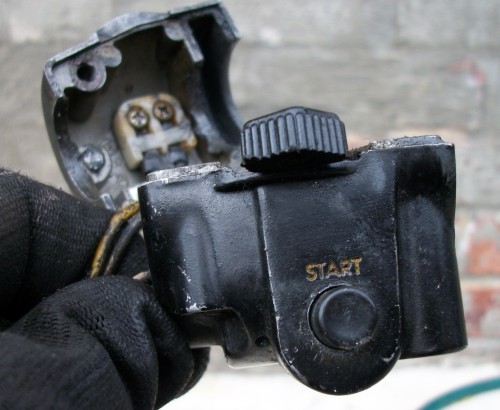
Had a good week so far, LH wiring in very good order and looks good as new after a clean and de-grease. Covers painted Techcote Satin Black, lettering done by my partner Julie then a few coats of Satin Lacquer. Found a great match in the art paint she uses were Gamboge for the yellow and Titanium for the white. lower switch goes together easy but the top half has to be assembled in the right order - Dimmer contact strip first with screw no 1, then wire clamp with screw no 2, finally the moving contact spring loaded popped in (3 ). all tested and back together RH switchgear took a bit more cleaning thanks to the regular greasing the throttle grip got and oil down the cables. Also there is a battle scar near the lights on/off switch which i have mostly polished out, so upper and lower painted Techcote satin black Julie did the lettering again Finally a couple of coats of satin lacquer and ready to assemble. This side goes together really easy Finished RH switch To finish for today a before and after More after the weekend Rob B


-
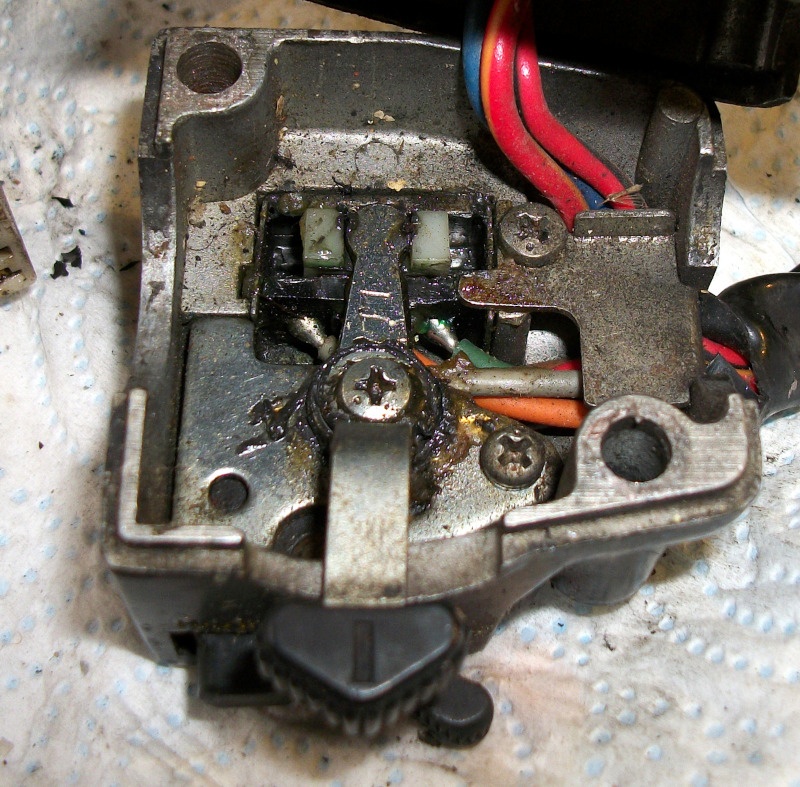
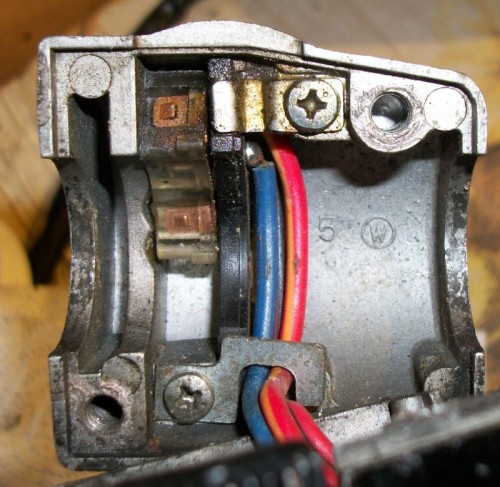
Some do, some just have a countersink in the top so your screwdriver/Allen key can slip out of it at the most inopportune moment. my B1 has these little blighters the B2 does not. Took the LH and RH switchgear to bits and did a clean up, sorted the scratch as best as I could on the RH switch then did a couple of light coats of Techcote Satin Black on them. Will ask SO in the morning if she could use her extensive art skills to repaint the stamped in lettering on the switches before a couple of coats of satin lacquer. Am pleasantly surprised at the state of the switch internals, all work well and positive so just a de-grease and silicon grease injection on assembly. LH lower internals, horn, pass. lower internals, horn, pass. upper internals h/l dimmer all wiring removed RH Lights, start, Engine Run-stop RH upper RH lower RH upper and lower internals Rob B


-
ER5 Engine Swap / Build
linuxrob replied to fastbob's topic in Old Motorbikes, Projects and Restorations
What a fantastic read. Need to think of the best/easiest way to repaint the Z500 motor. Should (I hate that word) get the cases, head, and barrels etc vapour or soda blasted, lots of masking off then paint individually. The ex-rail worker in me says de-grease, brass wire brush, scotch-brite, etch primer then satin black, finally satin lacquer while assembled loosely. Then buff up - re-plate bolts and strip paint off covers. touched up the valve cover a few years ago like this and acetone took the paint off the bolts in a flash. Anyhoo, made a start on the switch gear today, see post on old bikes restoration thread. https://www.themotorbikeforum.co.uk/viewtopic.php?f=87&t=68312 I see your assistant Bob stealing the show again. Rob -
Thanks Muttly will show details of the wear and tear, starting to show it's age now. rob b
-
Would like to know your method, i have had these fork tops off quite a few times now, mainly to change the oil. My method is to soak in wd40 overnight then screw a 12mm fine pitch bolt into the slug, slip a flat bladed screwdriver in and pop the circip out. Mole grips on the 12mm bolt if needed to wiggle the slug out, do this when forks still in yoke and same when assembly. Red rubber grease on the seal and pack before putting the plastic cap back on keeps the worst of the weather out. My fork seals are the originals also the springs, still in spec. When it was new a 20mm spacer was used to preload the front a bit more and 5W oil was perfect for the damping. On the road had fork gaiters most of the time. Have done a few where you have to take fork leg out and use the fork spring to punch the slug out. Cloth over hole obviously. Rob
-
Cheers will have a look later this afternoon after finished the "domestic" bit. rob
-
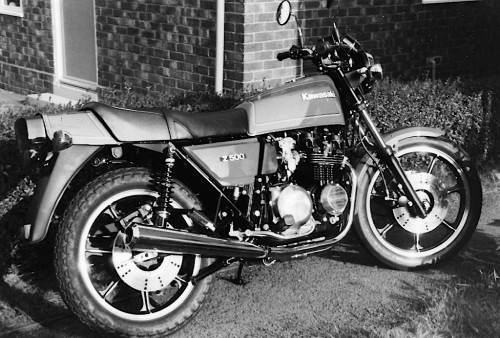
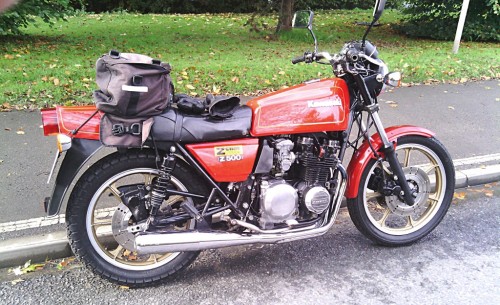
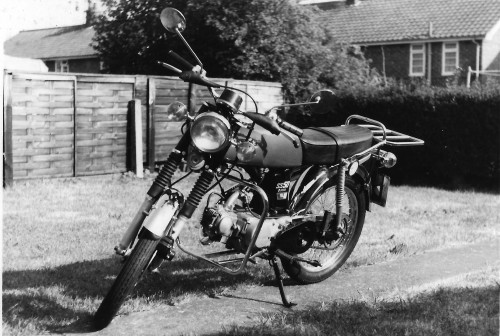
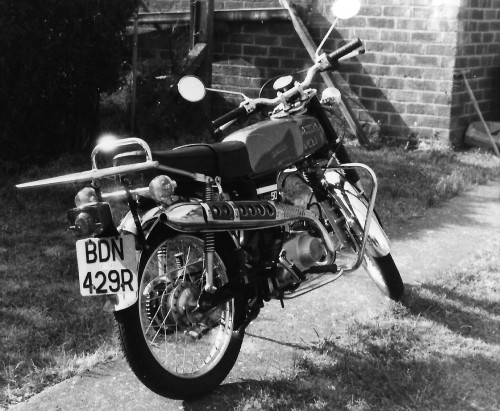
Afternoon all, Having read quite a few project reports on this forum I would like to add my own. Will be posting the refurb on VJMC Kawasaki technical forum too. Now that's out of the way here is a potted history of the bike. Kawasaki Z500 B2 (Firecracker Red) bought new from Bob Fortune M/C Darlington for £1256.00 Out of the crate and rode home on trade plates by me. First registered August 1st 1980 JAJ601W Used For general transport and occasional blasts around Croft circuit till my Terry Beckett tuned RD400C took over. On holiday Aug 1981 hit by White Escort in London. Damaged but rideable. Fixed on return. Nov 1982-April 1983 Had now covered 44000 miles, winter strip. Frame paint, bolts Cadmium plated. New Wheel bearings, new rings and valve stem seals, new clutch plates. Second hand GPZ550H Unitrack STD pipes replaced the now well rotten STD pipes. New Rickman front crashbars. Looked brand new again. July 1983 Hit by Honda Prelude, Major Damage. Wrote off, bought back. Forks and frame straightened, new yokes, new mudguard. New GPZ550H Unitrack STD exhausts. Second set of Rickman front crashbars. Worth their weight these things. Things settled down a bit after this only new chain, sprocket etc and a Motad exhaust changed till now at 78260 miles. This bike has been with me man and boy, done everything asked of it and only let me down once when it kept blowing fuses thanks to me washing it far too often and putting it away with water in the switchgear. I would have loved to show this bike at various events but even now my semi retired part time employment gets in the way at weekends. So I have started the refurb, not a restore as I will keep as much of the original bike as i can and still intend to ride it as much as possible. My plan is to get to 100,000 miles before the bike or I expire. Holidays will be booked in for next years events. Enclosed to start this thread are the only shots I have when I got it home from the dealer before stripping it down to regrease shafts etc, I learned a lot with my SS50, CD175 and 400/4's about Japanese builds. For comparison pics from when it turned 77777 miles in OCT 2015. Will get some before and after shots and text as the jobs get done. Hope you all enjoy this journey as much as I will.This thread may become a bit picture heavy so will post smallish pics. As new 9 miles only as it passed this milestone (77,777miles) full bike Have got the switch gear off so starting small and working my way through LH RH So here goes, this may be a long job and pic heavy. Regards Rob B


-
You are making good progress there. Will be starting a refub thread on my Z500 soon. Though i was the only one to photograph a try of bolts! Rob B
-
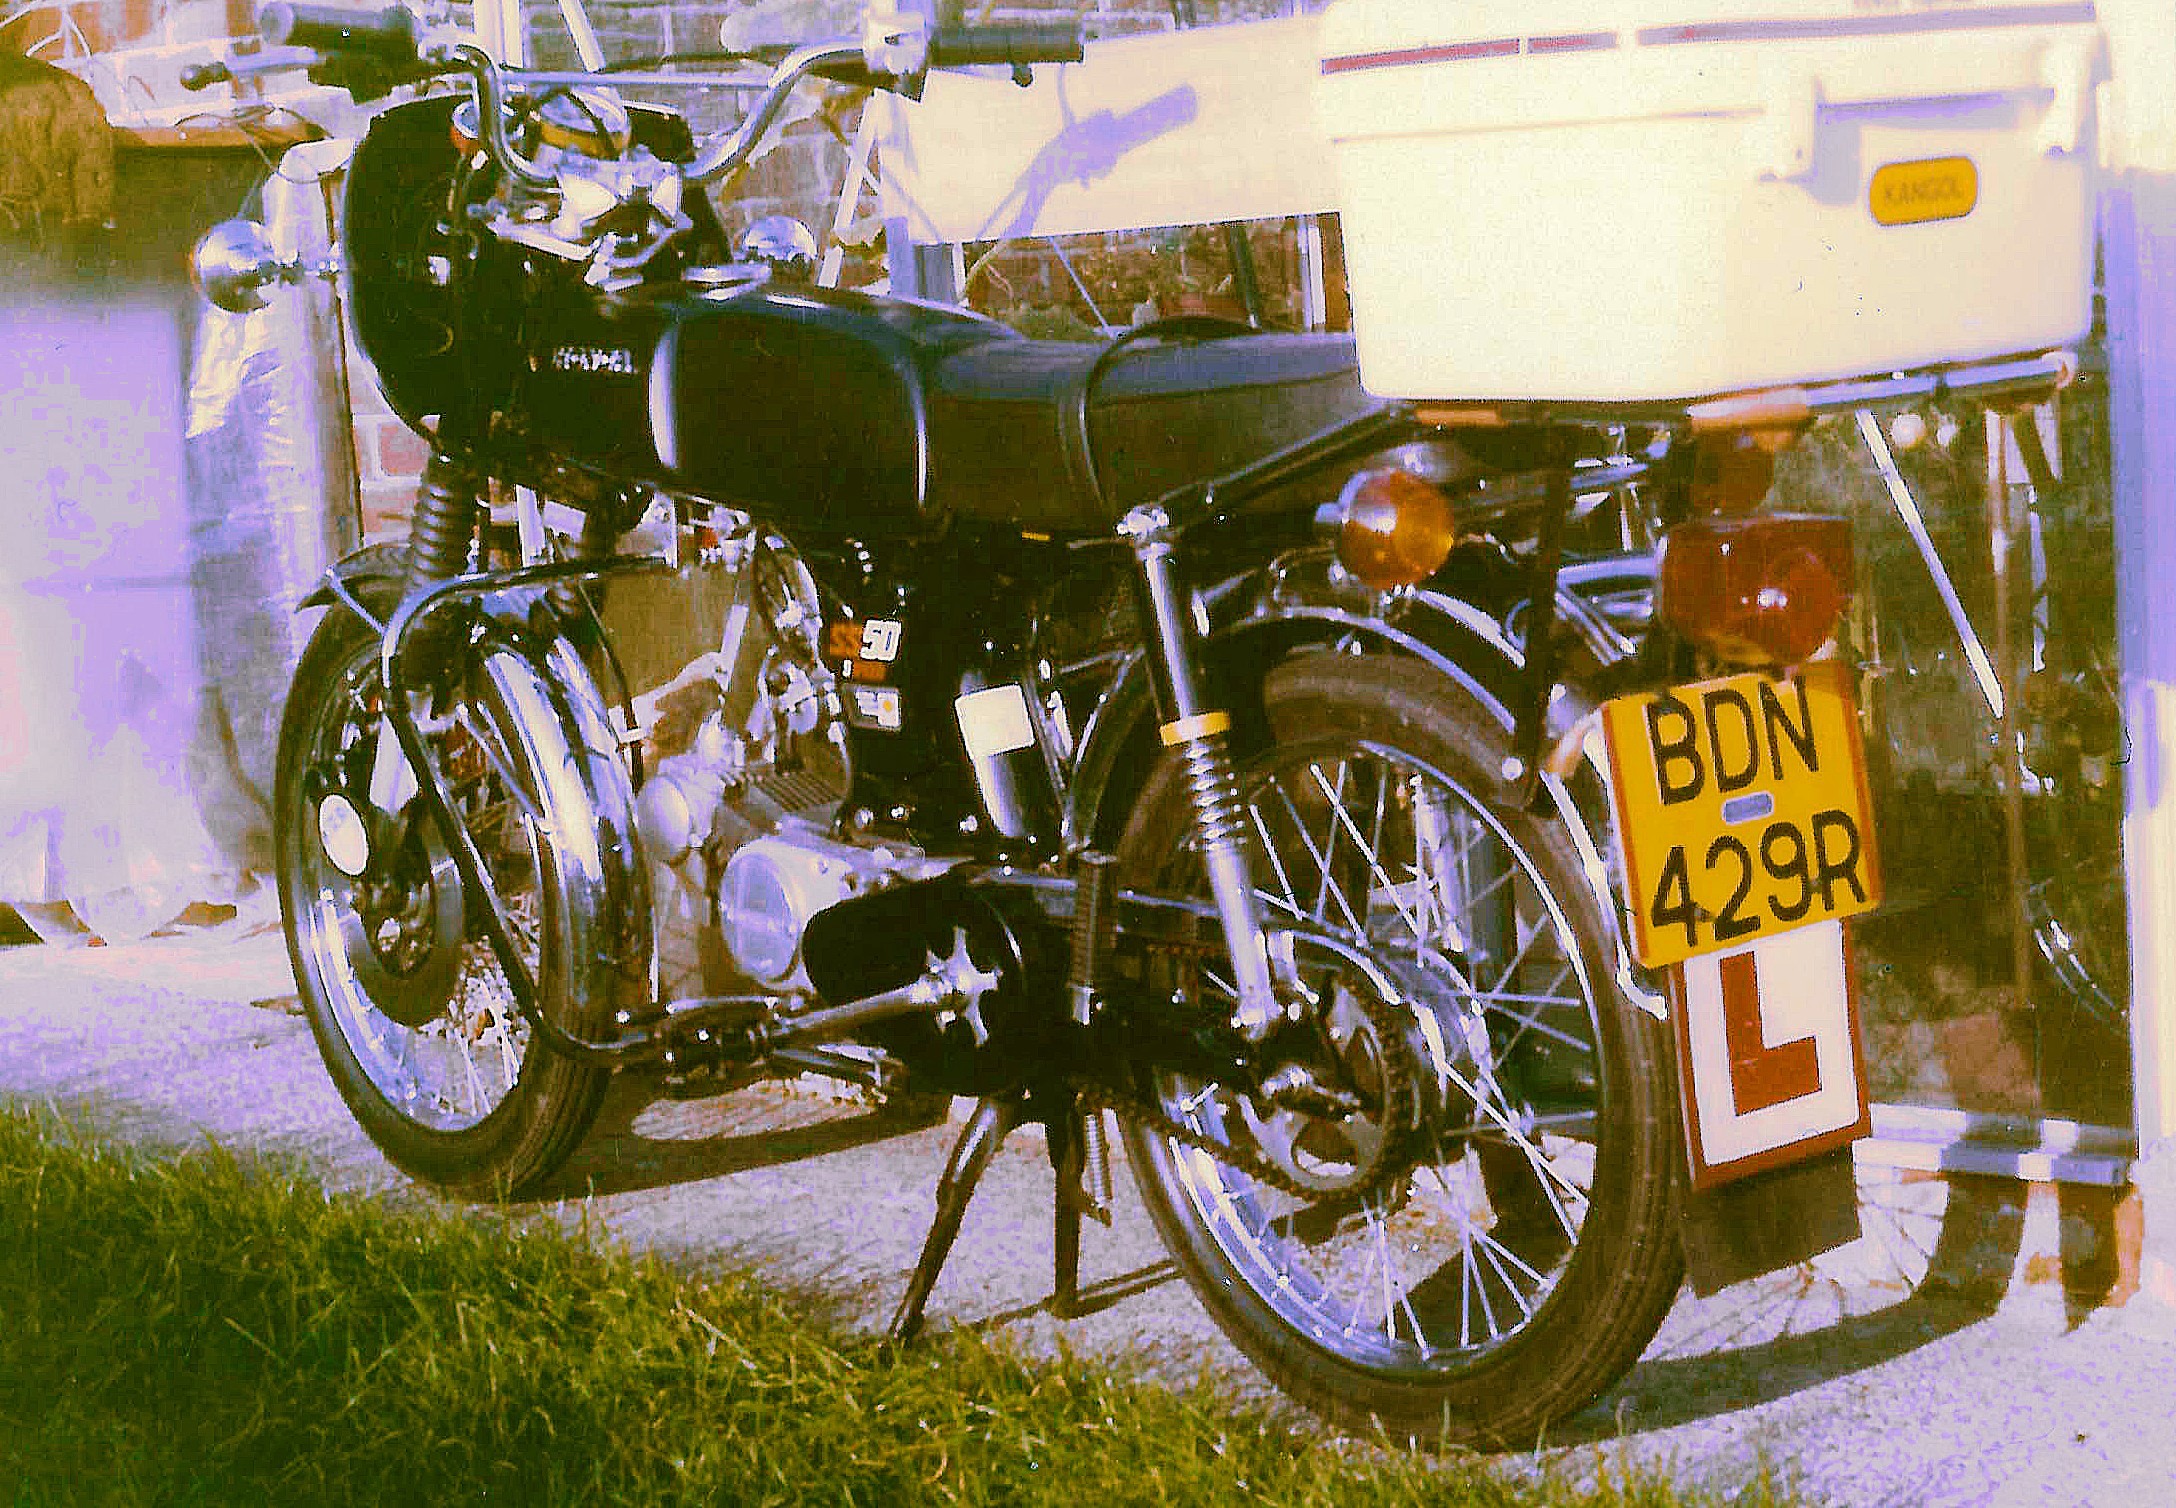
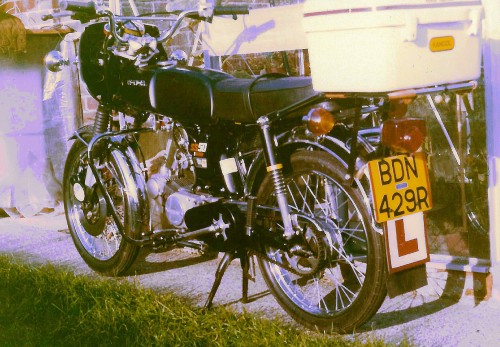
1976 SS50 5 Speed. this one rob B
-
Paint code is sometimes under the tank my bandit has a paper sticker with my 3 letter code. Any pics? regards rob B
-
re air filter: check to see if the snorkel has been fitted right way up, it has "top" on the top but you would be amazed how many folk fit it upside down. Is it a CV or slide carb? Have the service manual if you need any settings like float height, mixture screw settings. Regards Rob B
-
Nice bike. I think you have the rear section of the paddock stand upside down. Rob
-
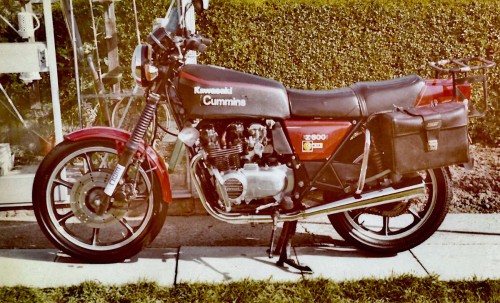
GSF 1200S Bandit 2004 53000 miles, just after it's overhaul. Should post the full refurb in the other section. Winter Bike and fuel saver 1999 Suzuki GS125 bought as a bitsa and done me proud for the last 5 years now. My 1980 Z500 78000 miles and needing an overhaul soon just remembered to take my camera fot this run in 2015 to record this milestone going past Thirsk Rob