Via
-
Posts
792 -
Joined
-
Last visited
Content Type
Profiles
Forums
Events
Store
Gallery
Community Map
Everything posted by Via
-
Moved into this place a few years ago and had a brilliant neighbour (I'm end house so just 1). He selfishly decided to sell at start off the year and move to a bigger place as he is starting a family new family moved in, youngish couple and seemed nice enough. Previous neighbour had a large brick fish pond in garden where he kept koi and new neighbors decided to take it out, all in all that took around 3 months, first they attempted themselves, then they got an absolute bunch of cowboys in before finally getting in some people who appeared to know what they are doing and pulled it up in a day. However a side effect of this is they have damaged the adjoining fence quite badly. Most of the posts are now totally loose and one of the workers has put a boot shaped hole in it (which is annoyingly head height for my dog that has tried to crawl through it to get their cat!) Spoke with them the other weekend and they assured me it would be fixed last week, needless to say this never happened, wind has kicked up this morning and now find fence has totally detached in places but even more annoyingly there is an alleyway at end of gardens and their fence has come down at the end as well but ripped out a panel of my fence with it! Now my garden is totally open (and where 125 is stored) plus I can't just let dog out without putting him on lead or supervising him. Just absolute piss take how long this has been going on.
-
There was a kidnapping at the local school here today. It's ok now though the teacher just shouted really loudly and woke him up.
-
That is ridiculous! (And 4 times what I paid for my whole ER5 ) Engine is looking sweet, good job
-
I think it's great how raw it looks, you can see belts and motors spinning away as things print. Loads on YouTube but feel free to ask away. Lol, luckily have a decent size kitchen so plenty of space left, that's breakfast bar part and I rarely have breakfast but have had so much stuff out recently when working on it I've managed to cover it, but enough space to squeeze dominos box on it
-
Plastic is loaded via a spool, single colour but you can get / modify machines with two or more hot ends, however this is more useful to use a support plastic (normally one dissolved in water) to make more complex prints, I've seen videos of springs being printed using this method. Tbh single colour is fine for me and if I modify mine it would be to use it for support, everything else can be painted afterwards. The plastic I'm using is PLA which is quite strong but not flexible, so will not flex much without breaking. You can print in ABS but main reason for not using that is heating ABS produces fumes so you would need to vent machine / area. There are also lots of other materials you can print with but PLA and ABS are most common.
-
Yeah great innit you can also use them to print parts to make more 3D printers. Have to say totally hooked now, definitely worth it, tbh if I hadn't have thought to try this one and bought one for £200 (budget I was looking at originally) and got this quality I'd have been happy. Can now also print out some spacers for blinds in bedroom so they clear window handles
-
Can now get them wired in and start tidying wiring up.
-
And the final result... Tried printing this at much faster speed and does look messier than other prints I've done but everything fits perfect

-
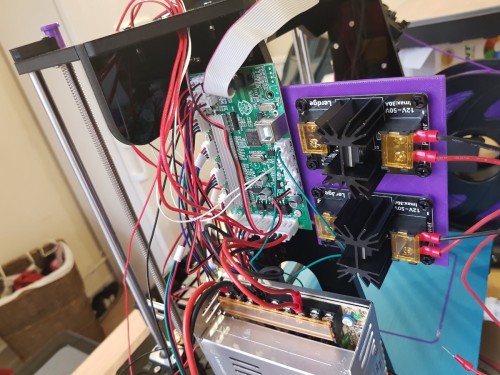
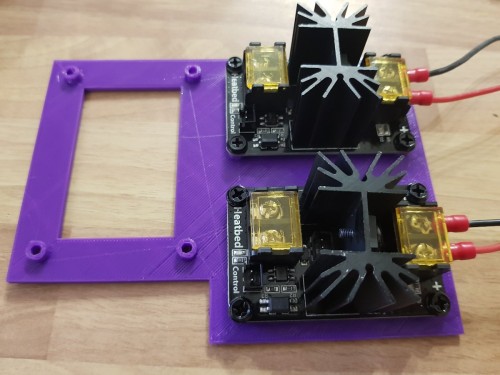
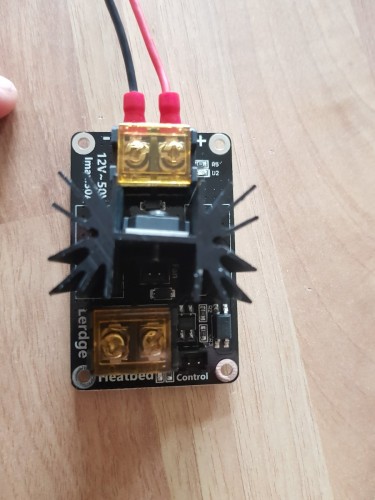
They are as simple as relays... Basically as standard hot end and heat bed will have temp sensors and power supply running to them from plug into motherboard, you cut the power wires and link them into mosfet board (control) you then run a supply from power supply to mosfet (input) and then output to the bed / hot end, then when motherboard goes up supply with power it instead sends power to mosfet which will only take a tiny amount of power and then that sends power from power supply instead. Thanks I probably will when I get started on that.
-
Or just sit on it and then say you thought it would be ok
-
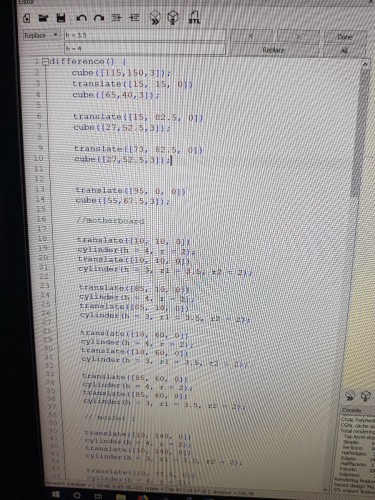
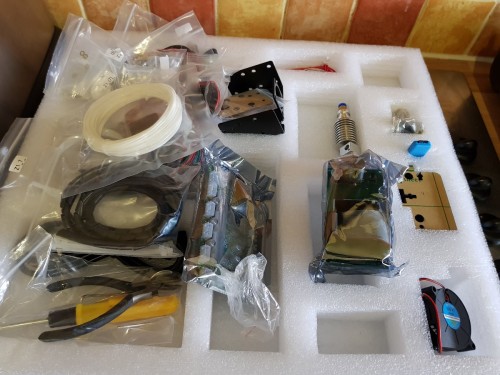
Yeah you can, I've gone with openscad as for me it was simpler for this project, do intend to try something more advanced in autocad next but wishing I paid more attention to cad classes at college now. Got an uprated power supply, always good for something that relies on heat. To go with that 2 mosfets (effectively like a relay) so the bed and hotend pull power straight from power supply and not through board, more a safety / longevity upgrade. Fibreglass reinforced belts... After time the standard ones can stretch and sag. Did get a glass sheet for heat bed, gives better adhesion and smoother first surface but not tried that yet as happy enough with using painter's tape on bed for now. Also got an upgraded fan (to cool once printed) but not fitted that yet and standard one is doing ok so far (but not done anything too complex yet).
-
Did get my first 'plastic jam' earlier and don't think I'll ever moan about normal printers again hehe was a pain to get sorted and being impatient didn't wait for things to cool down and sure enough burnt my finger
-
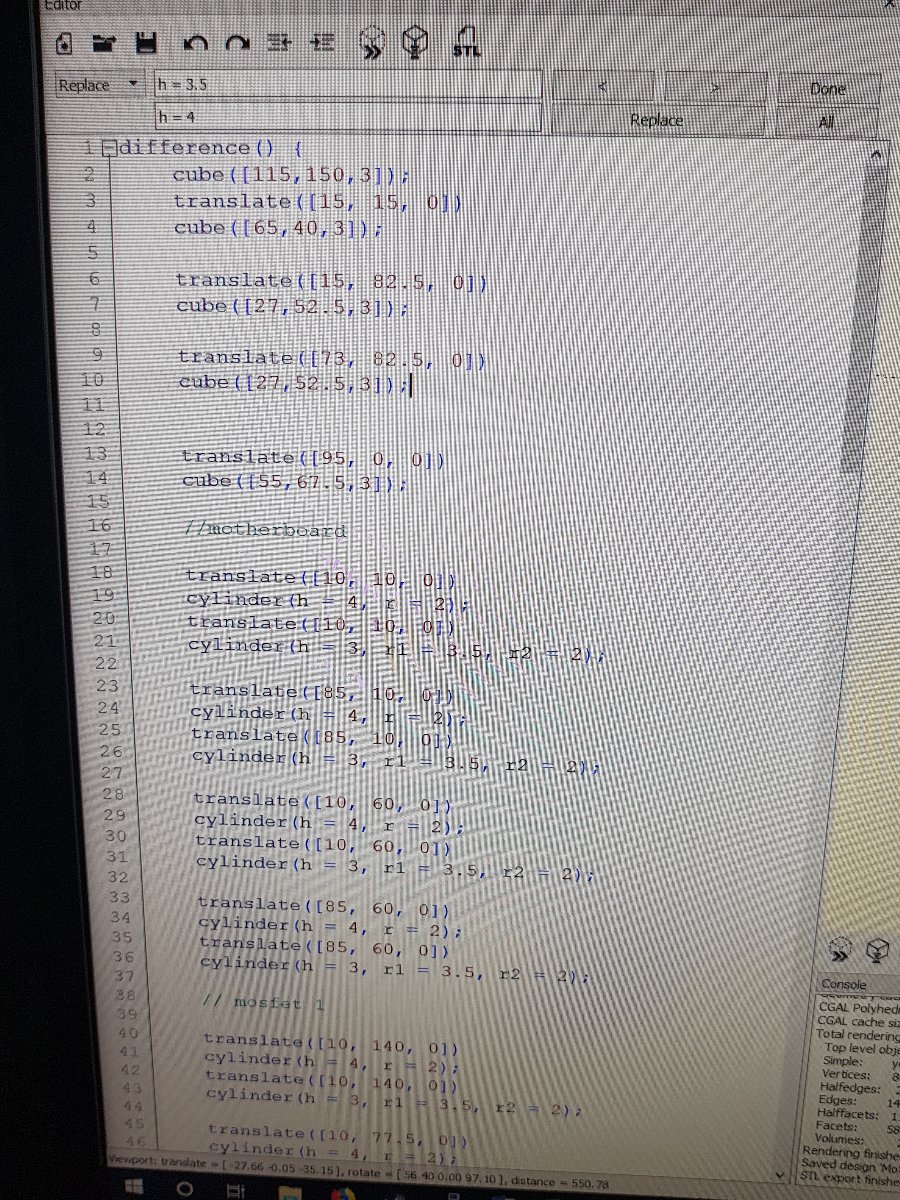
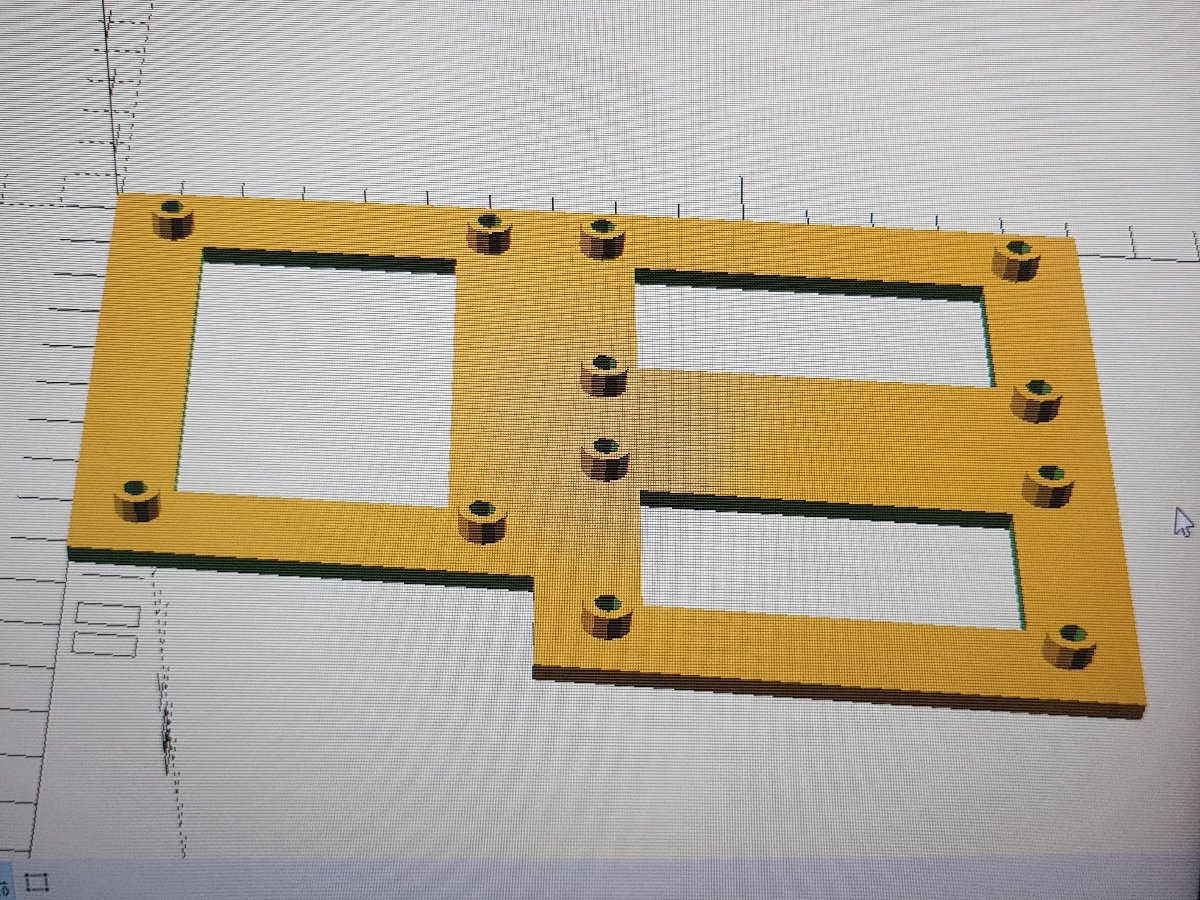
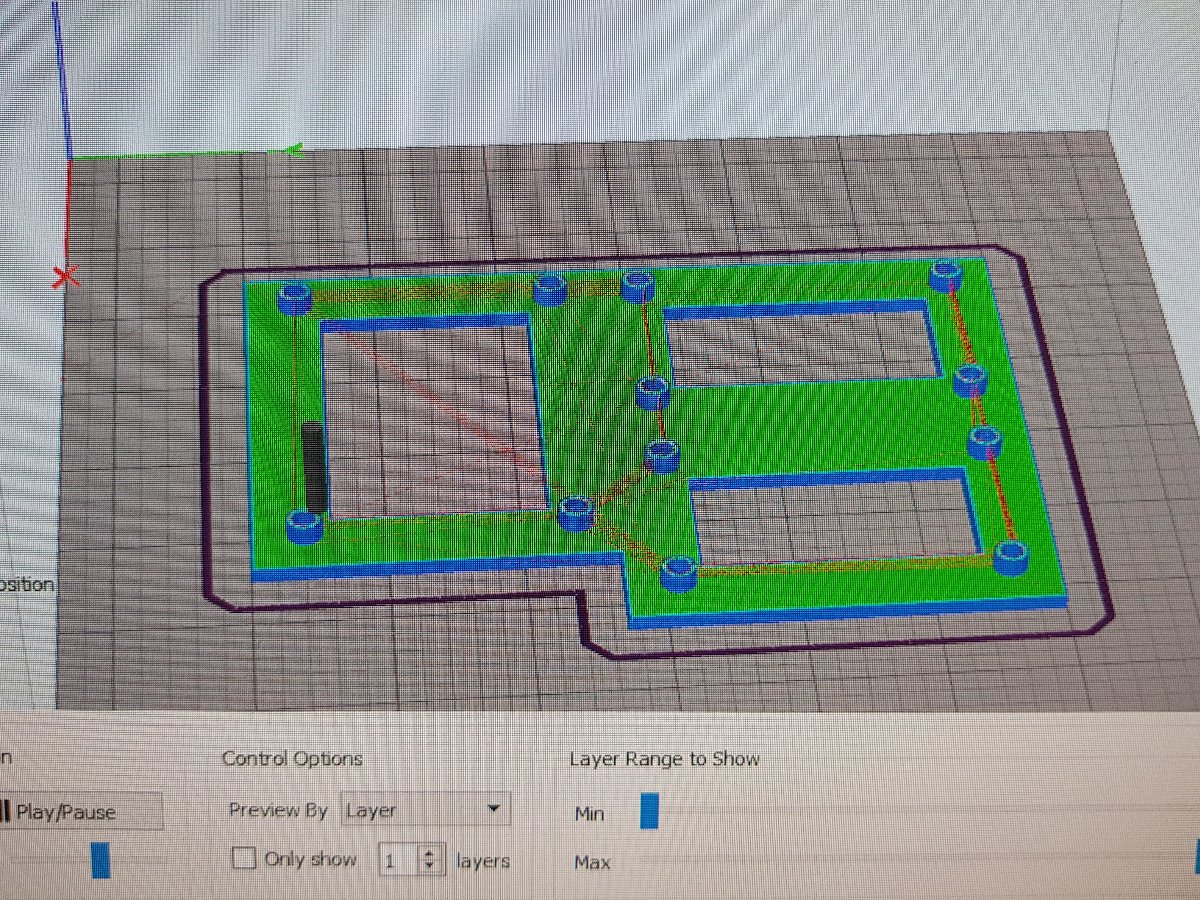
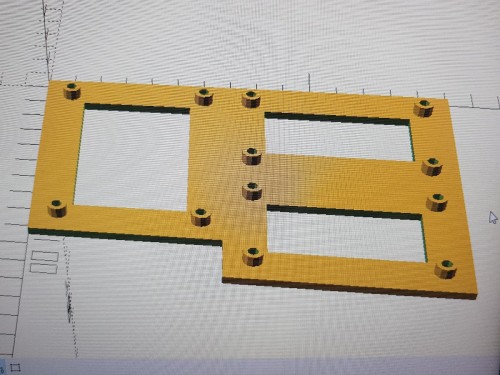
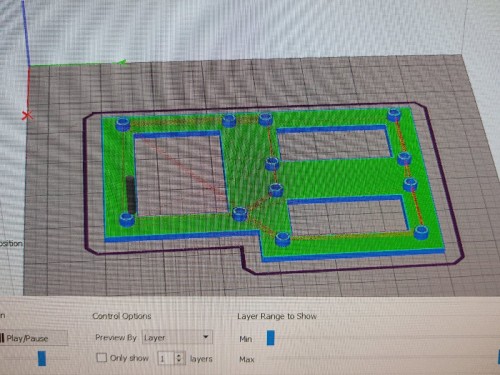
Ok time for first print of my own design, this is to mount motherboard plus 2 mosfets on frame, used openscad to design which is quite nice as it uses a coding language to design... Then into printer splicer... Printing now and will hopefully have a photo that looks like that in a few hours
-
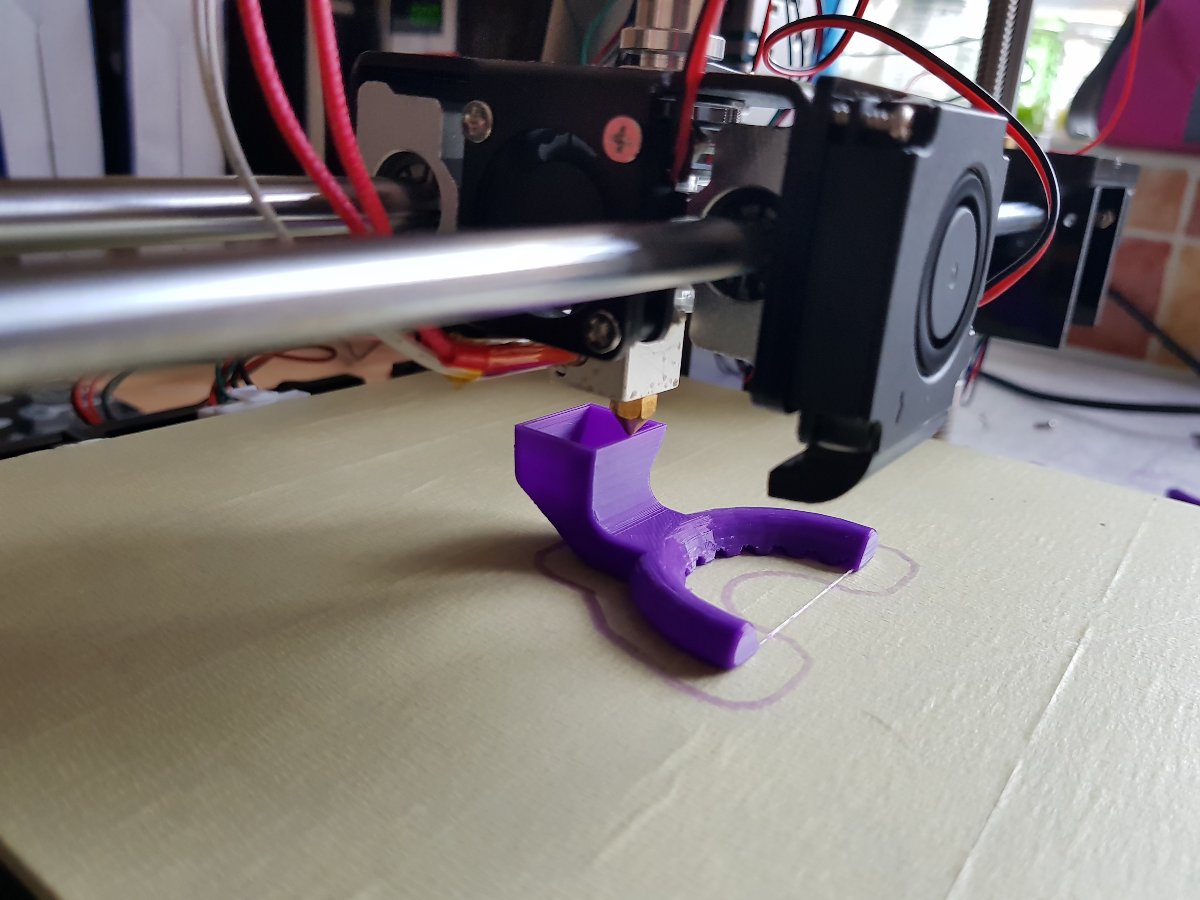
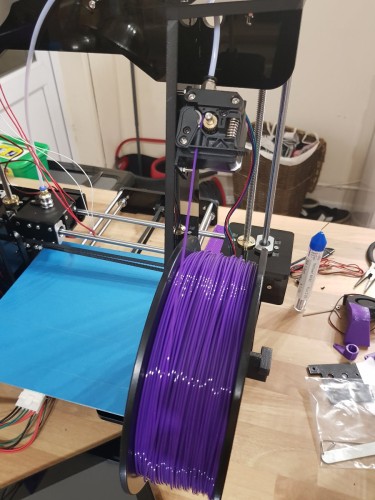
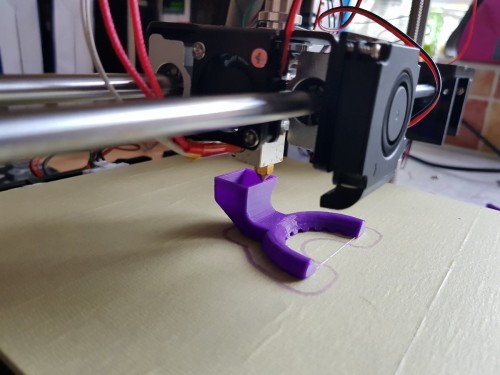
Just finished this print, it is a better filament holder as one that comes with printer was too close to motor mount so could get jammed on it. Not a complex print but amazed at simplistic quality of this one, sides are perfectly straight the whole way up, there is a printed rectangular lug plus a countersunk M4 hole for nut and bolt, no adaption needed fitted perfectly, hole lined up and screw slipped through easily.
-
Admittedly I've lost so much time sitting there watching it print, it's quite fascinating
-
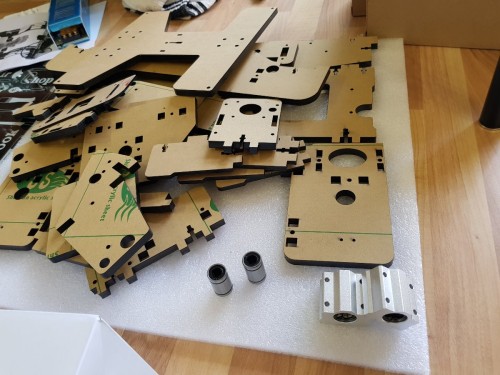
https://rover.ebay.com/rover/0/0/0?mpre=https%3A%2F%2Fwww.ebay.co.uk%2Fulk%2Fitm%2F142892911697 That's one I got, tbh I'm absolutely shocked at quality of the prints, took a lot of patience putting it together and getting it setup but I've not done much more than that yet, only upgrades on it so far are fiberglass reinforced belts, plastic bearings and better power supply. Before I got it had a look at all starting problems and fixes so I knew what to do with what faults expecting most if not all to pop up, happy to say I've not seen any of them and prints have been quite good from the start minus teething problems with machine but not a single bad print. They are shockingly slow though, I've got to print a mosfet mount and that alone is estimated at 3 1/2 hours, that said I've not done anything to try and see how fast it can go and that may be why prints are so nice that I'm not trying to rush it.
-
Well things coming along nicely, today printed out a blower for standard fan (temporary for now) with that fitted then printed out bracket for new fan and now doing the blower for that. Had a few issues with that one which I traced to memory card, made the mistake of using the cheapie 1GB included card annoying as 2 hour print and 3 attempts failed over an hour into the print. So far mega impressed with the quality and accuracy of prints so far, the fan mount was spot on. Got more improvement stuff to print and then can start on fun stuff.
-
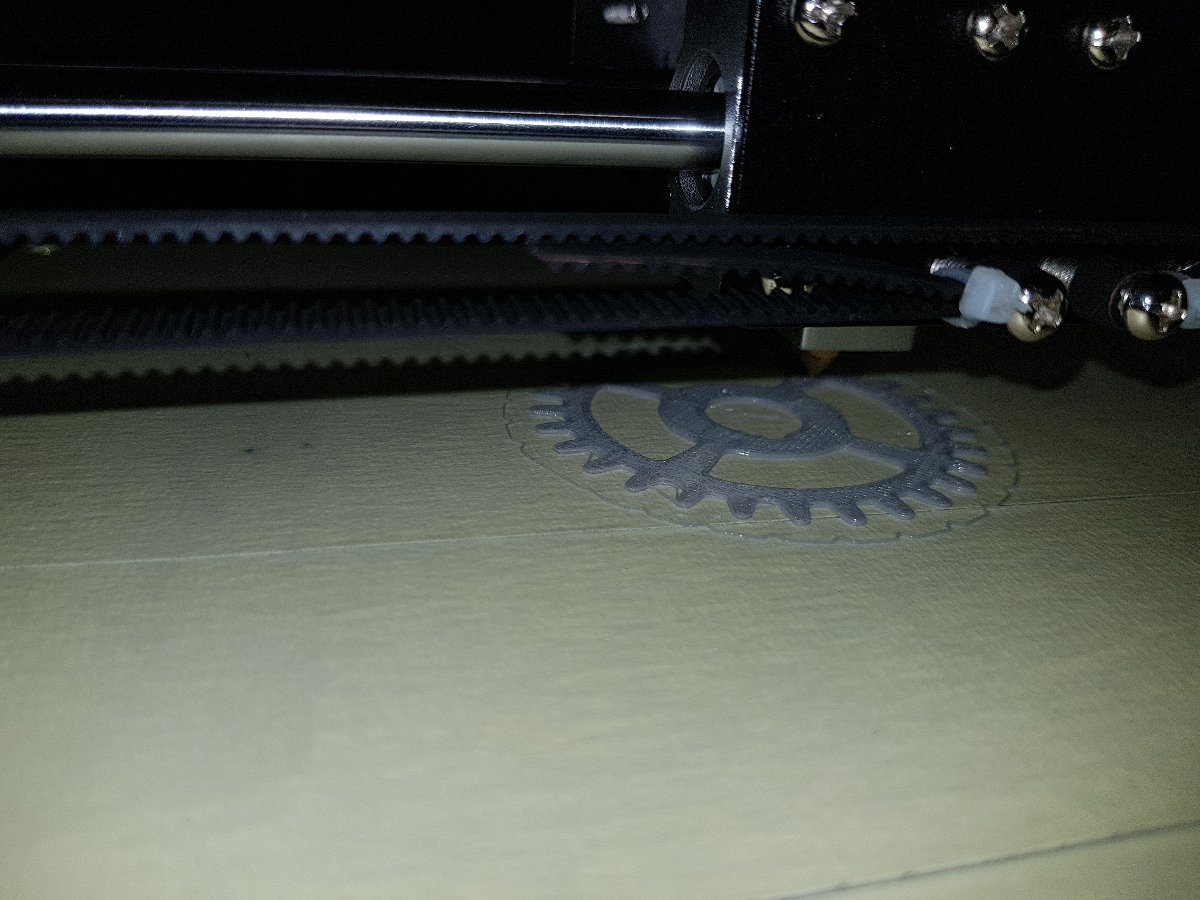
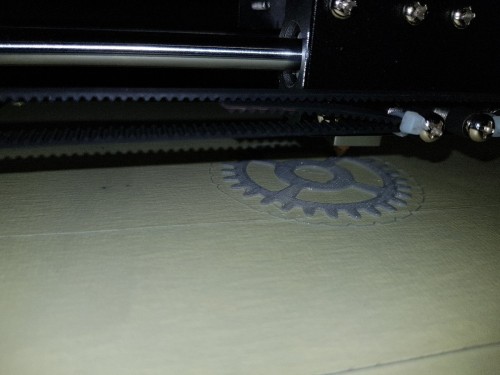
Well wasted most of day waiting for switches to arrive from Amazon and when delivery finally turned up they had sent me a USB cable instead So decided to see what I had and found a nice push button that I managed to rig up in its place. Spent hours since then fiddling with settings, belt tension, remounting runners, aligning bed etc... Did my first test print of a gear and have to say I'm impressed with the accuracy. Stopped the print at few mm high though as was just a test run. Noticed a few issues though, while gear printed fine trying to print a smaller part resulted in it separating from the heat bed after a while, I've got a glass sheet to go on top of bed will see if that makes any difference. Also while heating up the nozzle oozes a fair bit which means when print starts nozzle is empty and takes a bit of time before it feeds enough through, found a bit of coding though which will hopefully fix that issue. Early days still but happy so far. Trouble is only had the evenings to play with it so far so hoping will have more time tomorrow to get the teething problems ironed out.
-
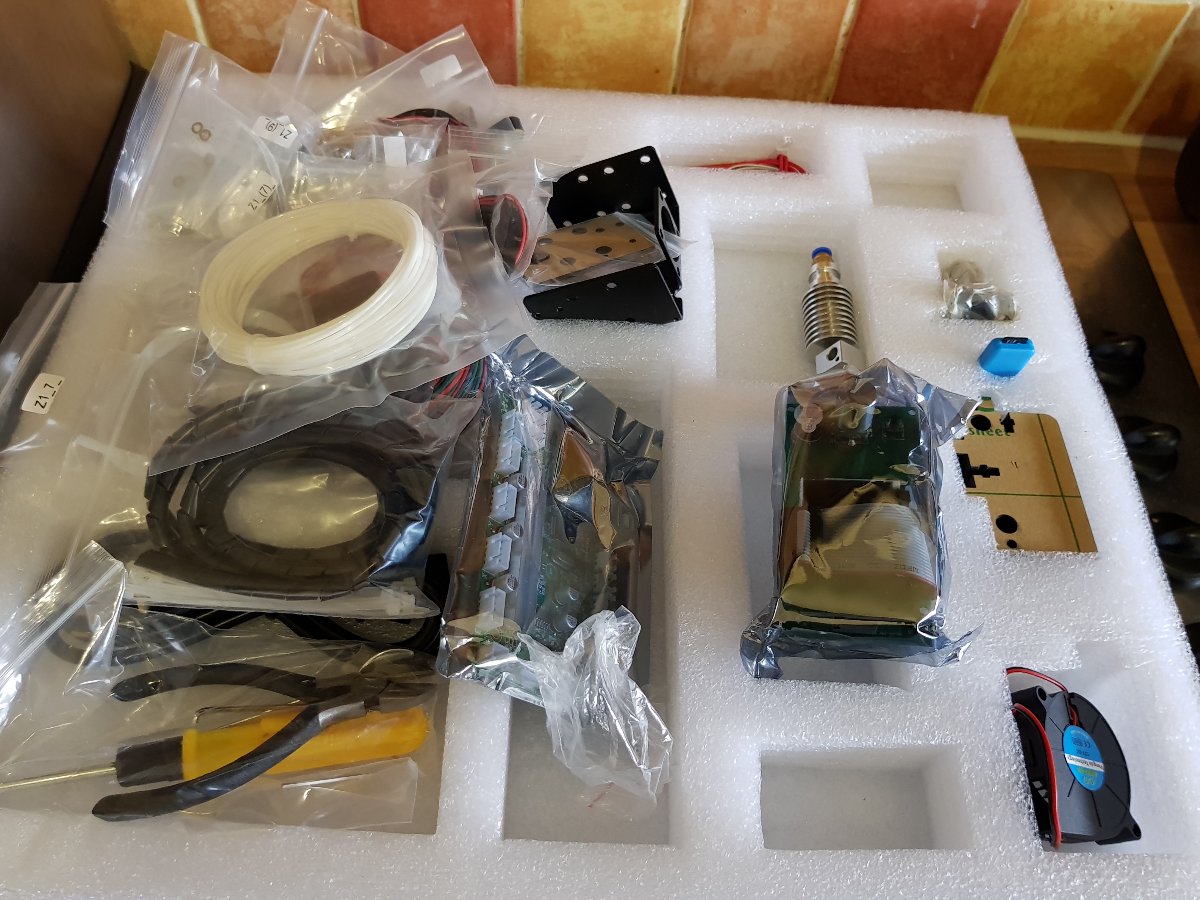
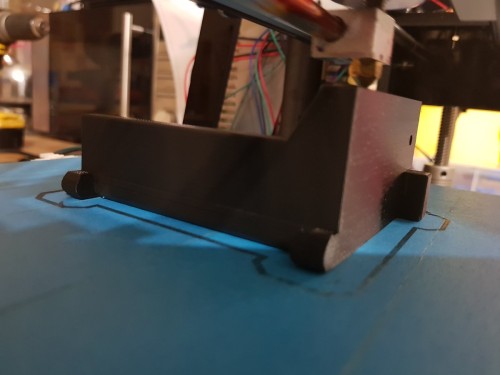
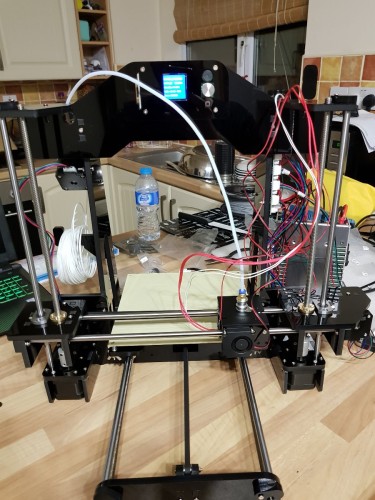
Well it's [mention]goat[/mention] who will be risking his life as test pilot so may as well just throw it together and see what happens On a serious note it took 6 hours but it is built (kinda). Annoyingly a micro switch for X axis stop is busted and with Maplin gone now have no choice but to wait for one off the internet. Otherwise all fires up and seems ok, moves smoothly and feeds filament through ok, can't print anything until new switch fitted though. Also need to cut hot bed and nozzle heater wiring to run through mofsets instead, don't want to do that though until 100% sure its working as standard but as such the wiring is a mess as no point wrapping and cable tying in place if I've got to rip out out again, but I give you the superbike maker 5000...
-
Starting to think 12 days is a bit optimistic...
-
@via he's going to be head over heels about that. Ohh hold on
-
Actually you can get Styrofoam type filaments! That's a good idea to try. You can also print a material that dissolves inn water, used quite a lot in dual extruder machines (can print from 2 different spools) as a support material so you can print more complex objects not normally possible. As for the superbike... Have 12 days already started? If so may be a push as printer don't get delivered until tomorrow
-
Looking good
-
Ooooooooh 3D printed terminators... Added to the list
-
I am thinking of trying to print some fairing more just to see if it can be done, obvious main issue is the size but ER5 has some smaller parts (side pieces under tank) which should be printable if I can get a decent scan of them, far too fiddly to design myself.