Mr Fro
-
Posts
4,206 -
Joined
-
Last visited
-
Days Won
5
Content Type
Profiles
Forums
Events
Store
Gallery
Community Map
Everything posted by Mr Fro
-

ZXR750 turbo conversion
Mr Fro replied to Mr Fro's topic in Old Motorbikes, Projects and Restorations
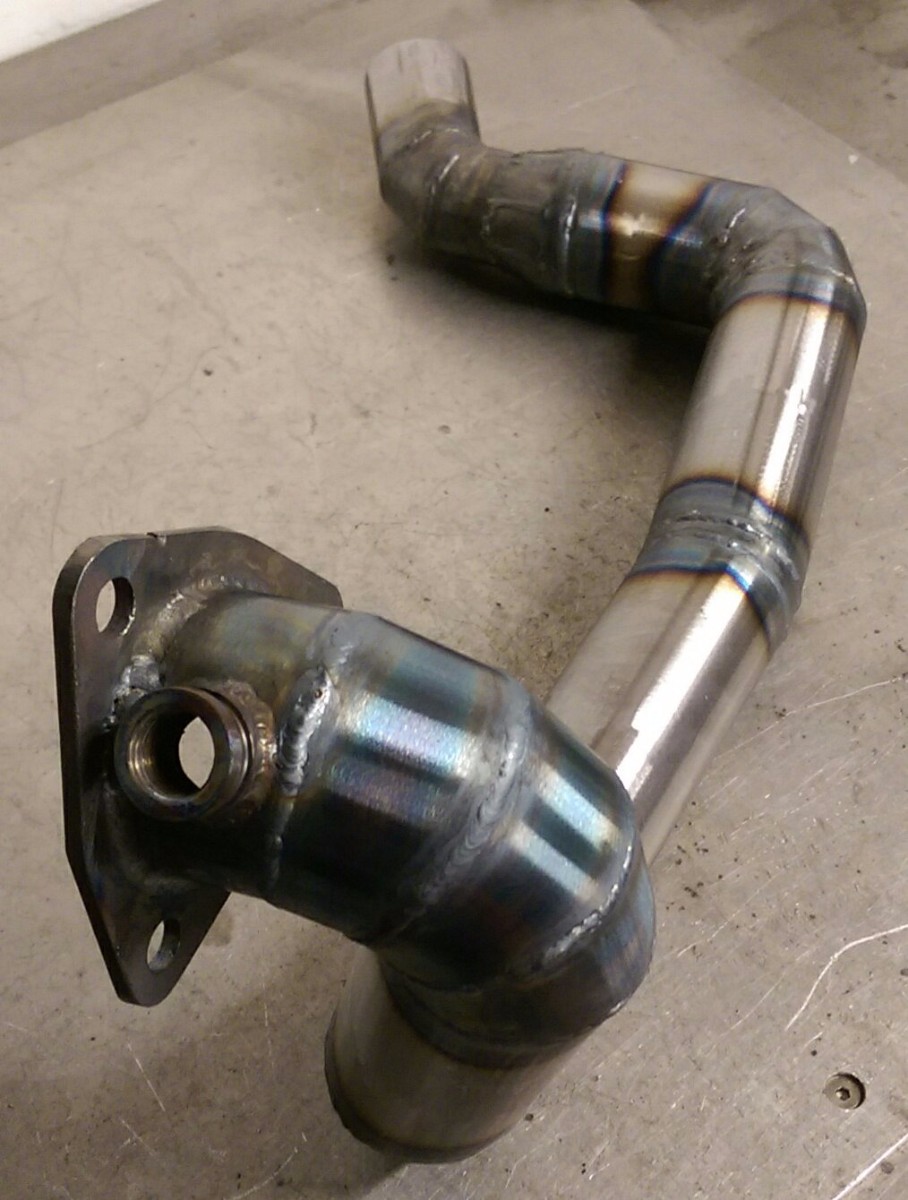
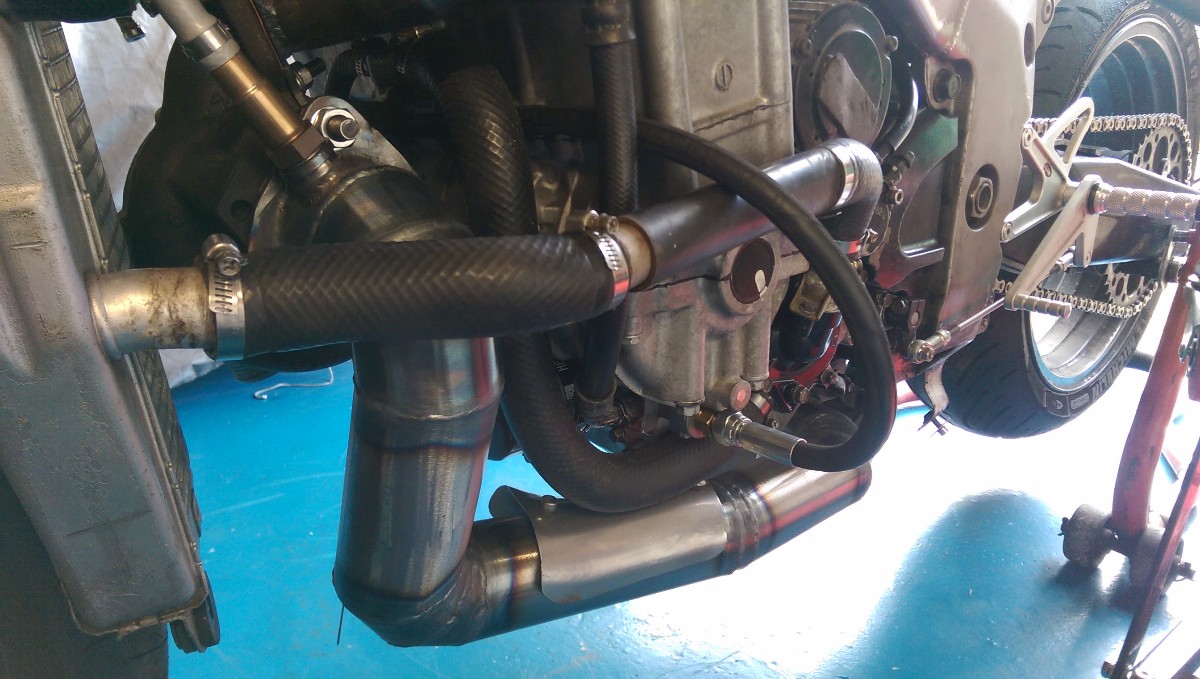
Bish-bash-bosh, one ZXR750 turbo exhaust : I spent soooo long welding today... Aaaaand on the bike: Had to add a heat shield below the rad hose as it was a little too close. It's 2.5" pipe from the flange to just before the can pipe where it's stepped to 2".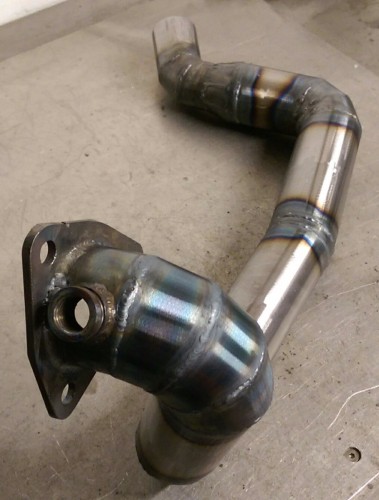

-
Roughly comparable with a trackday weekend then. How much track time do you get roughly?
-
What sort of money are we talking for membership and race days? Excluding consumables and stuff...
-
I use a slightly blunt Stanley blade. Works a dream but make sure it's blunt if you're using it on aluminium.
-
Erm... I dunno off the top. Can you get hold of a microfiche and see if any of those parts fit other models - might help widen the search. Are you after parts that will fit or original spec?
-
How do I say this? ... You're a knob! So ungrateful Phooey... Maws has slaved for minutes crafting that pic. Personally, I think it's marvelous - the goat looks so happy.
-
All beautifully hand made by machine too.
-
ZXR750 turbo conversion
Mr Fro replied to Mr Fro's topic in Old Motorbikes, Projects and Restorations
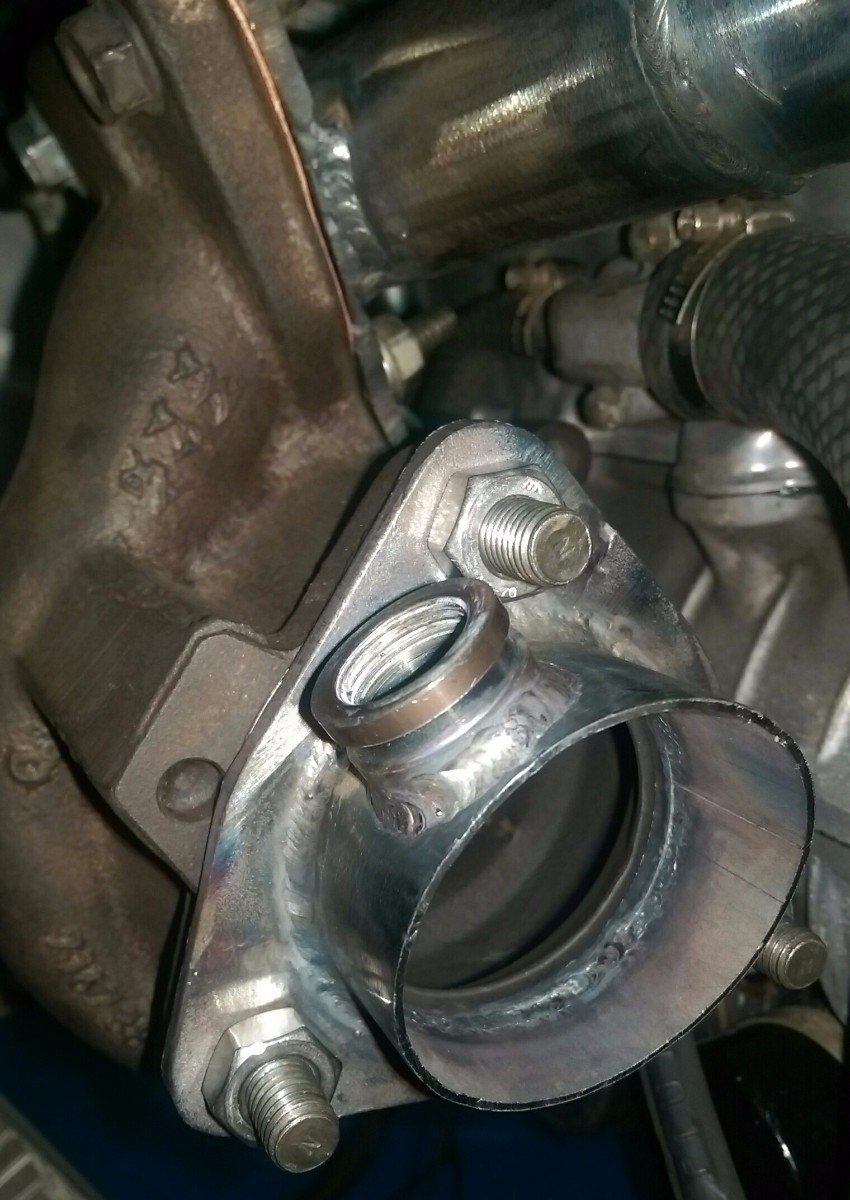
I spent hours yesterday making this little bugger: I had to weld a few strips of 5mm flat bar to form a triangle, mill the hole, cut the outline shape then mill the whole thing flat again. I've learned that trying to vertical mill on a small lathe is a shit of a job and takes aaaaaaages. I've nipped on the first angle of the exhaust and stuck the lambda sensor bung on. Now I've got to figure the rest of the system. I'm trying to decide whether to run under the centre of the sump and straight in to the can or run down the side of the sump and dog-leg in to the can. Centre would flow better but the side would give me more space for the intercooler... Here's a pic for Joeman of the headers straight on: You can see the turbo inlet is pretty much central and the pipes are angled for better flow.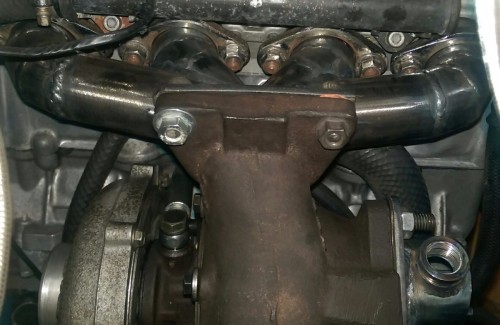

-
MOT pass today but with fork seal advisory
Mr Fro replied to Foxy Stoat seeks Pig's topic in Pitstop
That's where you need an Anna or BeeGee stand with the tie-down strap at the back - no pissing about with a rickety head stand. -
Blast from the past Mark! I used to love that program when I was a kid. Bet it look crap now though.
-
Top wood skills!
-
Advice on new leathers
Mr Fro replied to stevevac49's topic in Clothing, Luggage, Accessories and Security
Where are you at Steve? Someone might be able to suggest somewhere local. Don't get too concerned about arm length - high gloves will sort that out (I have the same thing). -
Aluminium Restoration
Mr Fro replied to Grumpy Old Git's topic in Old Motorbikes, Projects and Restorations
I've no experience in rejuvenating aluminium but that won't stop me recommending you having them anodised pink or lime green. -
ZXR750 turbo conversion
Mr Fro replied to Mr Fro's topic in Old Motorbikes, Projects and Restorations
Dunno on the threads Beefs - the fitting I [strikeout]bodged[/strikeout] skillfully adapted was just a big standard air fitting. Same sorts as used in plumbing I think. I only need the one for the engine to feed hose connection. I can afford to lose 5-6" from that hose anyway so if I get a chance to take it back it shouldn't be a problem to swage a banjo on. -
ZXR750 turbo conversion
Mr Fro replied to Mr Fro's topic in Old Motorbikes, Projects and Restorations
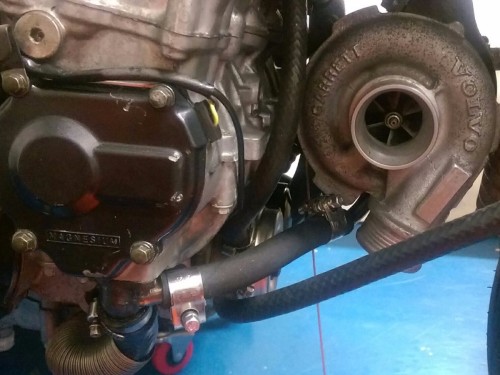
Say whaaaaa? That would be handy. I've fitted the feed: And return: Like I said, a bit agricultural... The feed hose is a bit long and sticks waaaay out so if you've got some nifty banjo fittings kicking about, I'd gladly take one off your hands. I've got to stop buggering about with this for a bit now, I've got a load of assignments due in very soon.
-
ZXR750 turbo conversion
Mr Fro replied to Mr Fro's topic in Old Motorbikes, Projects and Restorations
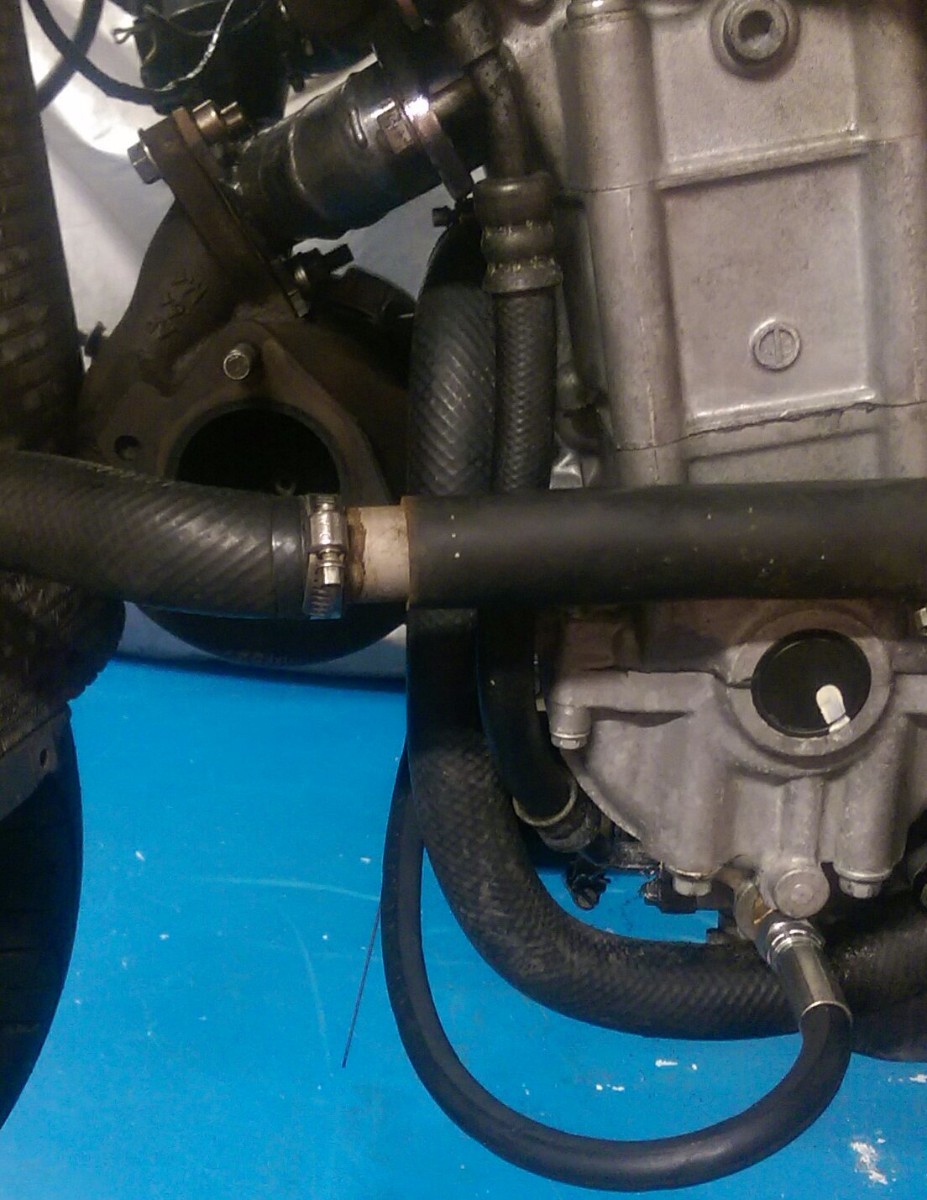
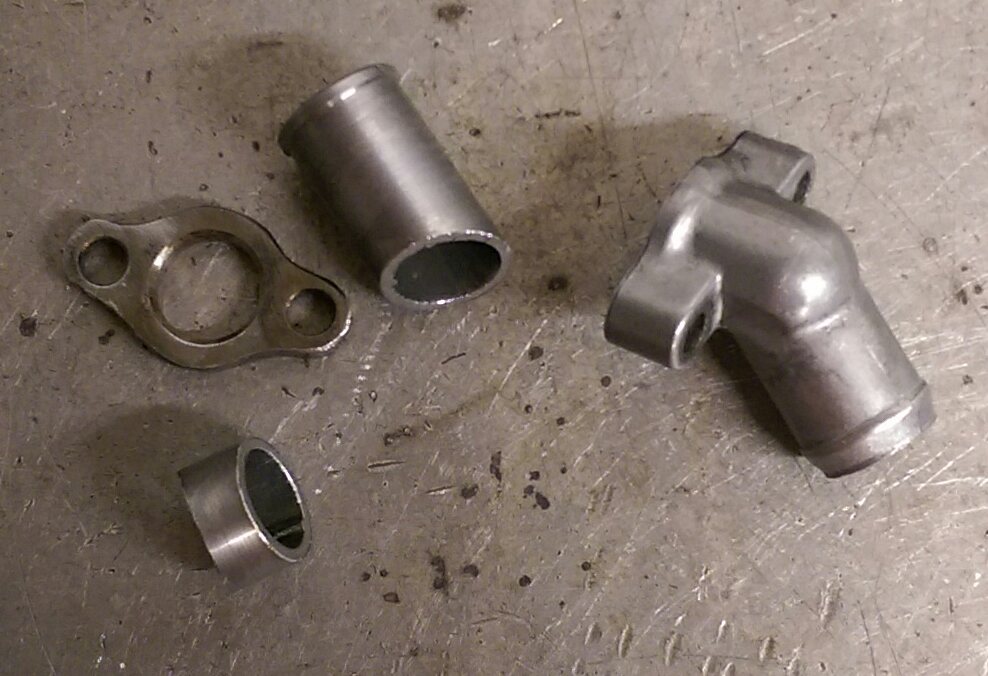
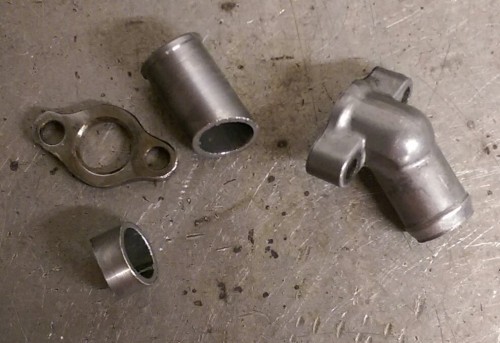
Yep. I found a bit of brass and made one up. It'll do for now... I've half sorted the oil drain - there's a drain line going from the pickup cover to the sump that I've been eyeing up for a while. I was going to drill and tap it but I didn't have the right sized tap so I started making one (plus I didn't want to shag the original in case it goes tits up). Here's the original and some bits I made: I cut and drilled the flange and turned down some tube which I chopped to give me the correct angle. Here's the tack up: You can't really see in the pic but it's an odd fitment as it's a dogleg type thing. I made it a bit longer so I can add a drain tube near the flange. I just need to drill a hole for the additional drain, weld it up and slap it on. After that I'll get it fired up and see whether the turbo actually spins.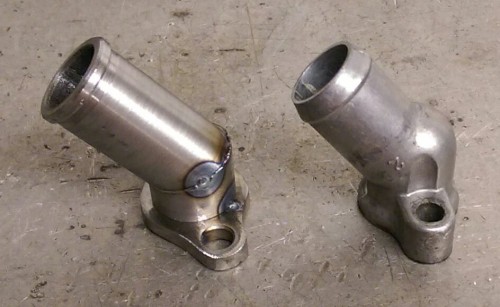
-
ZXR750 turbo conversion
Mr Fro replied to Mr Fro's topic in Old Motorbikes, Projects and Restorations
I found a place near me that makes up hydraulic lines so nipped in this morning. £50 later I've got some rather agricultural looking oil lines. I found a recessed bolt at the end of the oil rail and next to the oil pressure gauge which will do nicely for the feed. I'm still scratching my head where to put the return though. I'm so close to firing it up to check the turbo actually works but I need a 3/8 to 1/4 adapter. I reckon I've got something I can adapt if I can figure out screw cutting on the lathe... -
Only time I've ever re-torqued head bolts is after a rebuild.
-
ZXR750 turbo conversion
Mr Fro replied to Mr Fro's topic in Old Motorbikes, Projects and Restorations
That is a concern. The on-off is boost referenced so it *should* maintain pressure. It's not ideal but it'll do until I stump up more cash for a decent solution. I could fiddle the dump valve so it'll just vent anything over x psi. On another note, I had a right result today at school - I went and use a chat with the workshop boss. I told him what I'm up to and he's given me free run of the whole show. 20 odd lathes and milling machines, top of the line welding gear and all the consumables I can get through. -
ZXR750 turbo conversion
Mr Fro replied to Mr Fro's topic in Old Motorbikes, Projects and Restorations
Forgot to say that I've got a MAP sensor to slot in to the plenum which will drive the on-off from the ECU... That box looks promising Joeman - fairly cheap too. Might get that unless I can find someone to buy my ECU so I can get the 4 channel. -
ZXR750 turbo conversion
Mr Fro replied to Mr Fro's topic in Old Motorbikes, Projects and Restorations
You mean keep the vanes open with open throttle? -
ZXR750 turbo conversion
Mr Fro replied to Mr Fro's topic in Old Motorbikes, Projects and Restorations
Yup, it's a VNT. I stripped out the original vacuum actuator, fiddled a bit and turned it in to a pressure actuator but it's going to be a struggle fitting it in (ugly too) - might be able to get it in with a linkage in the control arm. I've got a spare output from the ECU that I can program to switch on and off at a preset value which I can use to drive a servo instead. I'm concerned that it might give me a bit of a choppy delivery though. If I'd have thought about it when I bought the ECU I would have got the 4 channel version rather than 2 channel which has a couple of variable outputs for EXUP and stuff. Any bright ideas are welcomed! -
ZXR750 turbo conversion
Mr Fro replied to Mr Fro's topic in Old Motorbikes, Projects and Restorations
It's not a great pic - the turbo mouth is central to the headers. I'll grab another snap when I have it off for grinding. -
ZXR750 turbo conversion
Mr Fro replied to Mr Fro's topic in Old Motorbikes, Projects and Restorations
Don't look too closely! I forgot it was a bank holiday so I'm hoping to get the plenum machined - maybe welded depending how I get on with it. I should have got hold of the oil lines and stuff but.. well... brain fart. Lats - all you're doing is increasing the intake pressure which will give you more power out of the engine. Should make it quite nippy.