
husoi
-
Posts
4,261 -
Joined
-
Last visited
-
Days Won
44
Content Type
Profiles
Forums
Events
Store
Gallery
Community Map
Everything posted by husoi
-
I totally get where you're coming from but I don't think our mutual friend will be convinced . Bear in mind that you should use a tiny little torque wrench in INCH pounds to avoid over tightening cam caps . There's many a GSXR and the like been ruined because someone couldn't believe how LITTLE torque is needed to hold down a camshaft . Why pound-inch? GSXR manual says 8-12 Nm which is fairly standard for an M6 fastener in grade 8.8 and well within range of small torque wrenches. More damage most likely from dirty or damaged threads and inaccurate torque wrenches that are never calibrated. Ok , when I get home from work I'll dig out my GSXR manual and have a look . I would struggle to calculate things in imperial. there are 1,000's of websites that will convert pretty much anything into metric so if your torque wrench is metric you can always convert it Just an example: https://onlineconversion.com/torque.htm
-
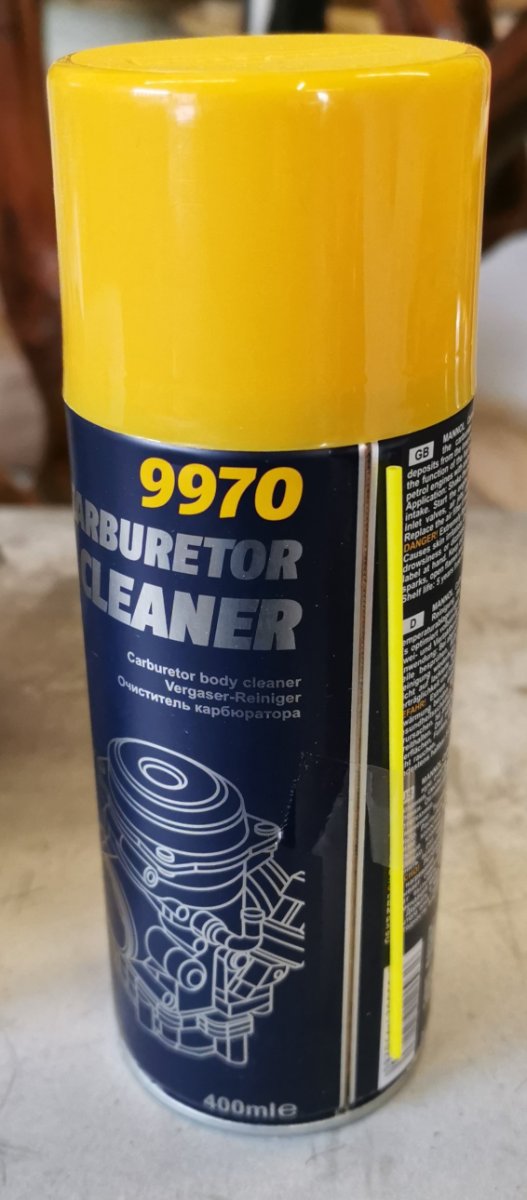
Happy days This is the carb cleaner I got. I have to say, it is impressive. It cleaned the carb body and small parts pretty well and minimal effort. Only needed a toothbrush. no I haven't used mine or missus one , I always have a few cheap ones, like 5 for £1 for these cleaning jobs. If you look closely even the spring is sparkly clean. Y will need to be careful or the jet will splash back and you get a cleaner shower. I've used a metal bowl, the ones you get for feeding the dog. Sprayed the carb with the can until it got empty then used the brush to give it a in depth clean. A decorator brush, the one I used first, is ok but because the bristles are long it doesn't clean as the brush. The cleaning liquid will lose its strength after a while so you don't want to be interrupting the process. The most important feature on Mannol cleaner is that opposite to STP doesn't attack the plastic bits. I never used this type of product so I can't compare. But I'me very happy with the result.

-
The bolts on my towbar hitch are fastened to 220Nm but they are ginormous
-
Usually the size of the bunch is proportional to the screw up...
-
YYEEYY Got the carb cleaner. For some odd reason instead of the ordered 3 X 500ml STP carb cleaner got 4 X 400ml Mannol 9970 carb cleaner. Reading the reviews don't think Mannol is a downgrade from STP. As long it gets the job done I don't really care about it
-
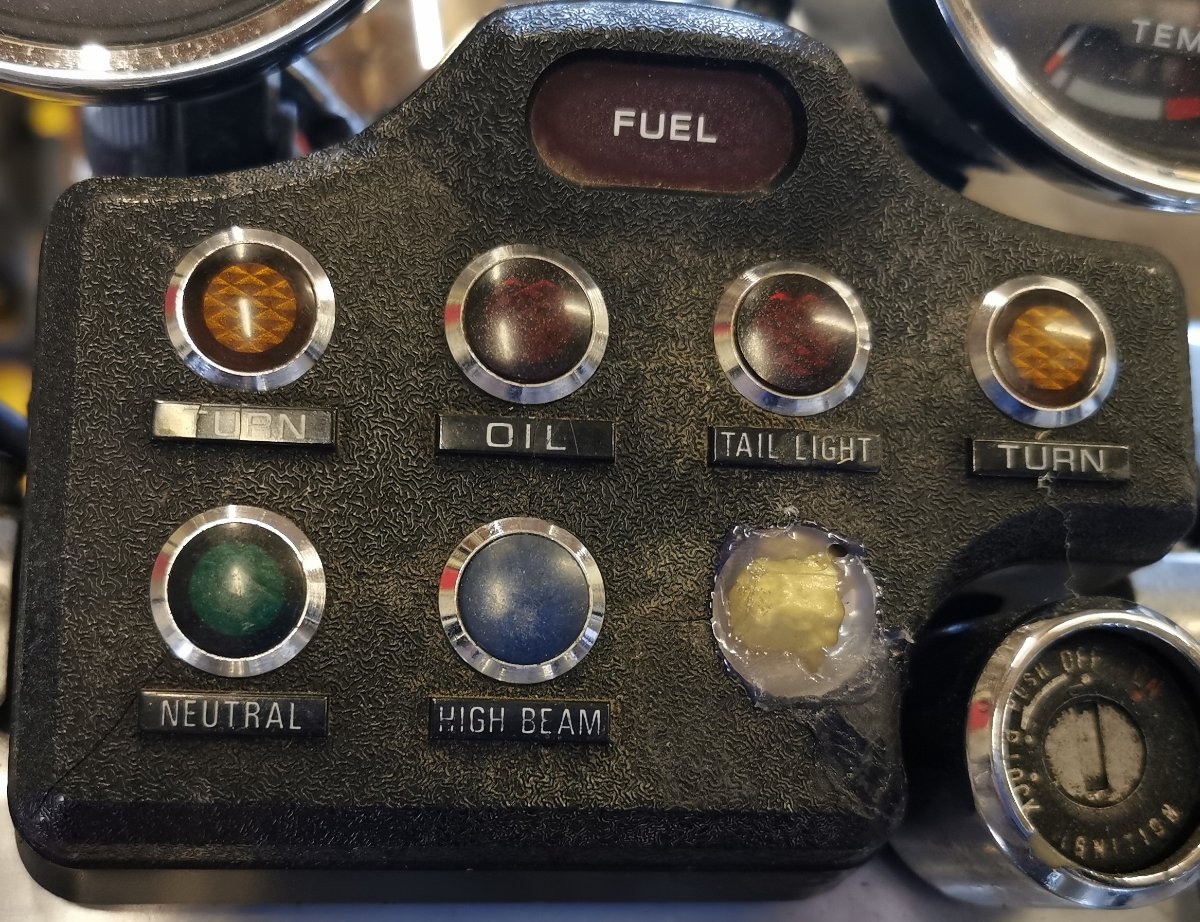
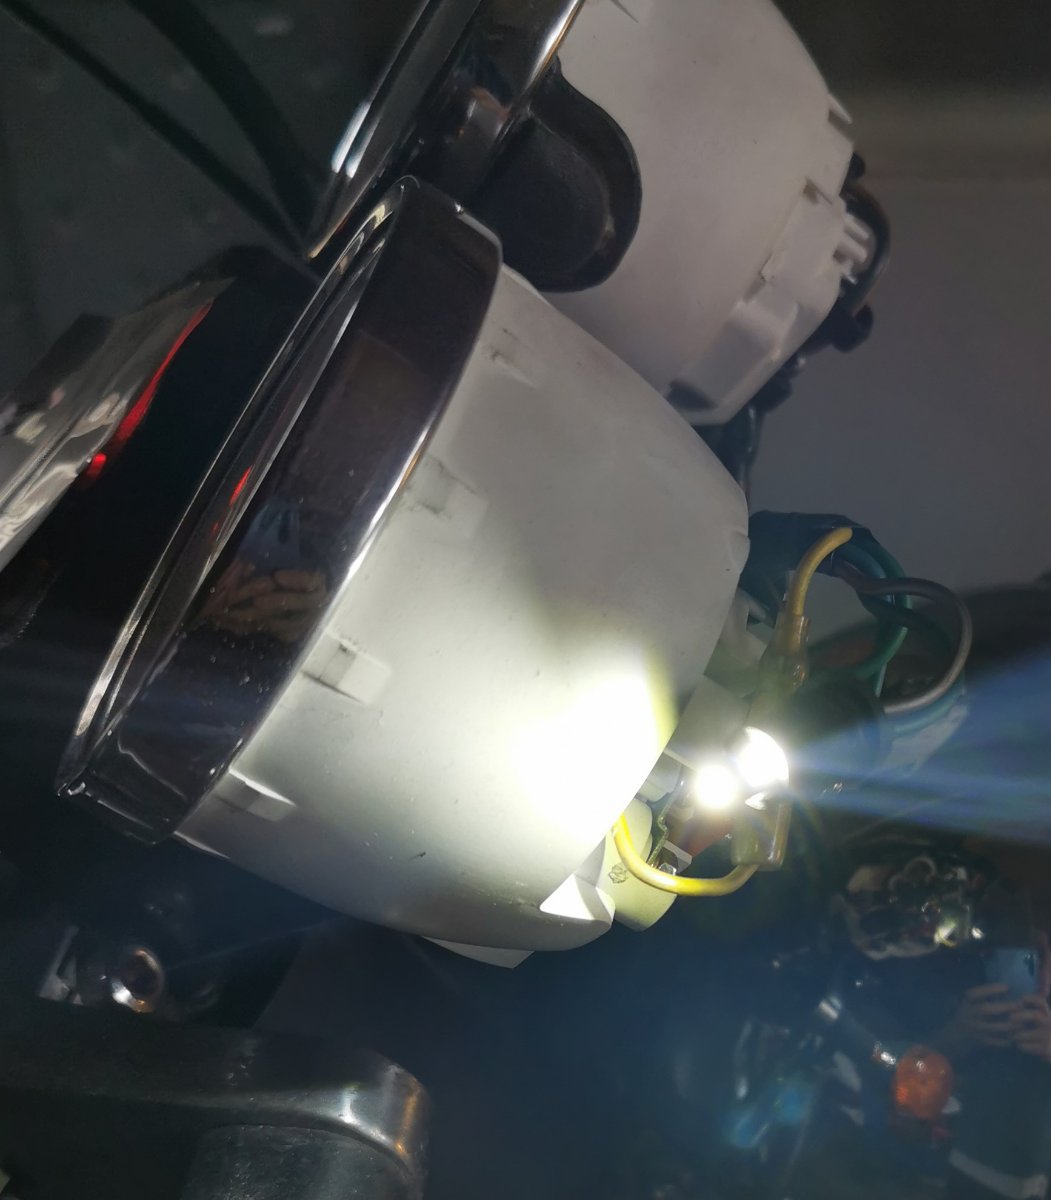
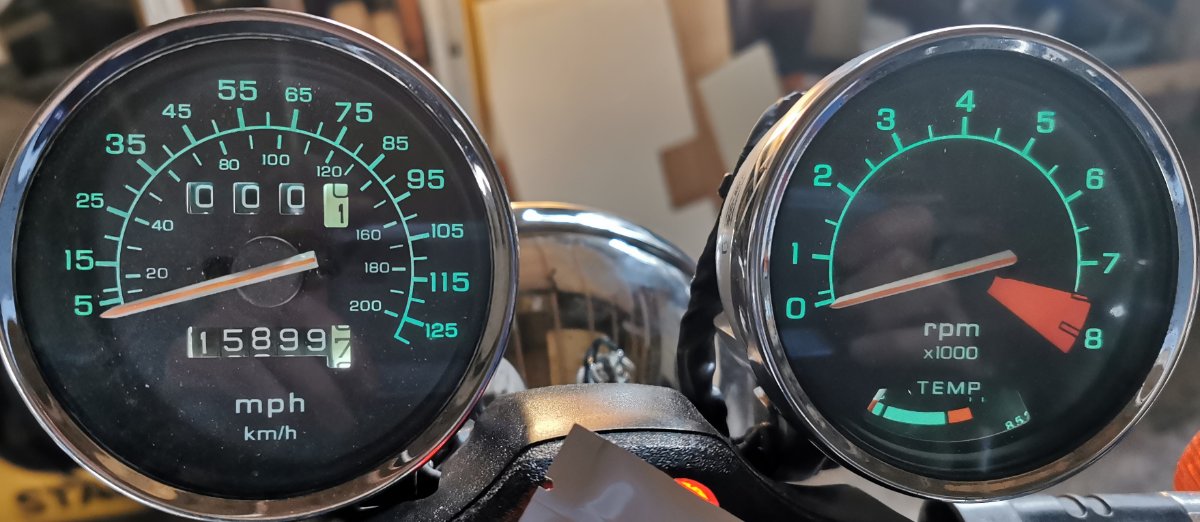
While I wait for the parts for the carbs I finished repairing the instruments lights From this to this
.thumb.jpg.1332fbdfeac20d01be3f5e4894727a5c.jpg)

-
Well. not all is lost. Raised a complaint with sprayster about the chrome turning grey and after sending the photos and reference for the batches they offered to send me another can of chrome and advised that I shouldn't use the lacquer over the chrome. Now, this is completely different from what the manufacturer and sprayster website advises so I made the point in telling them that maybe they want to consider removing the misleading information. Once I receive the new can of chrome will be making a test with something completely different. On a small bit of plastic (same as the casings) Will be using water based floor varnish and see what happens. watch this space
-
I should have gone for this one
-
You would think that from 2008 the manufacturers would have made it work... Still some interesting ideas.
-
Good question. Unfortunately the chrome was visible and the clear is properly clear. It must have been some idiotic chemical reaction that screwed up the paint.
-
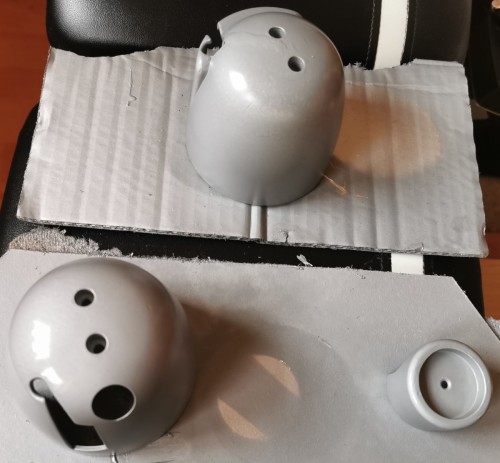
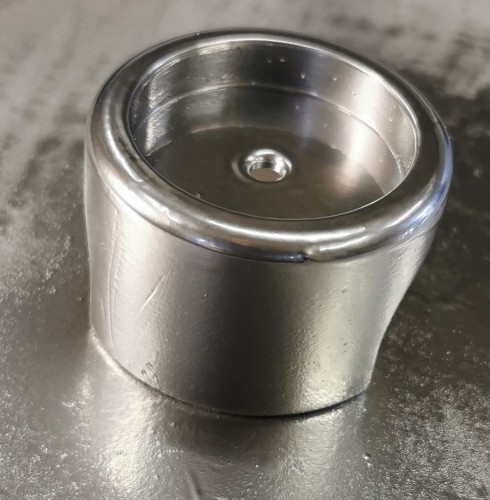
I hope someone from Hycote can explain this... Started the clear lacquer on the casings. As soon I hit with first coat something went smelly From a dull chrome I went to a stupid grey I followed all the instructions from hycote website and the can (They are the same). waited 2 and half days instead the 24hr min they say. Now I got this. Unless a miracle happens I can't see getting chrome out of this. 5 coats in. Going to email the seller asking for an explanation...

-
We've had two Yaris - they've both been brilliant. Both of them ran over 100k over ten years without missing a beat. One died from tinworm and the other is still going. Toyotas are pretty much indestructible, had an avensis that was sold with 200k miles and still running well.
-
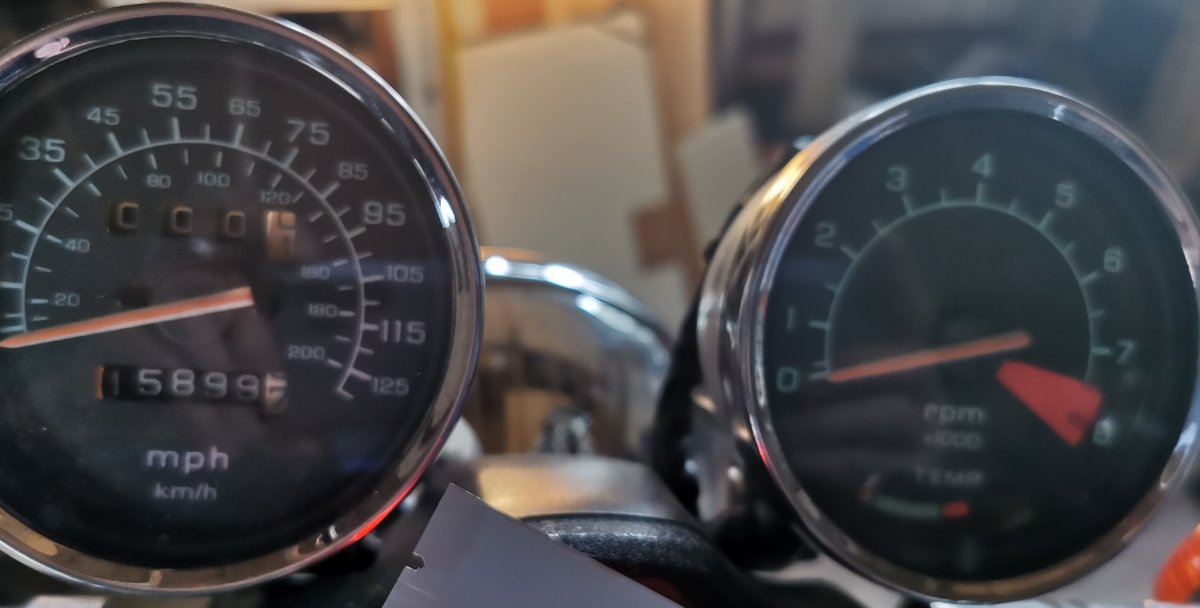
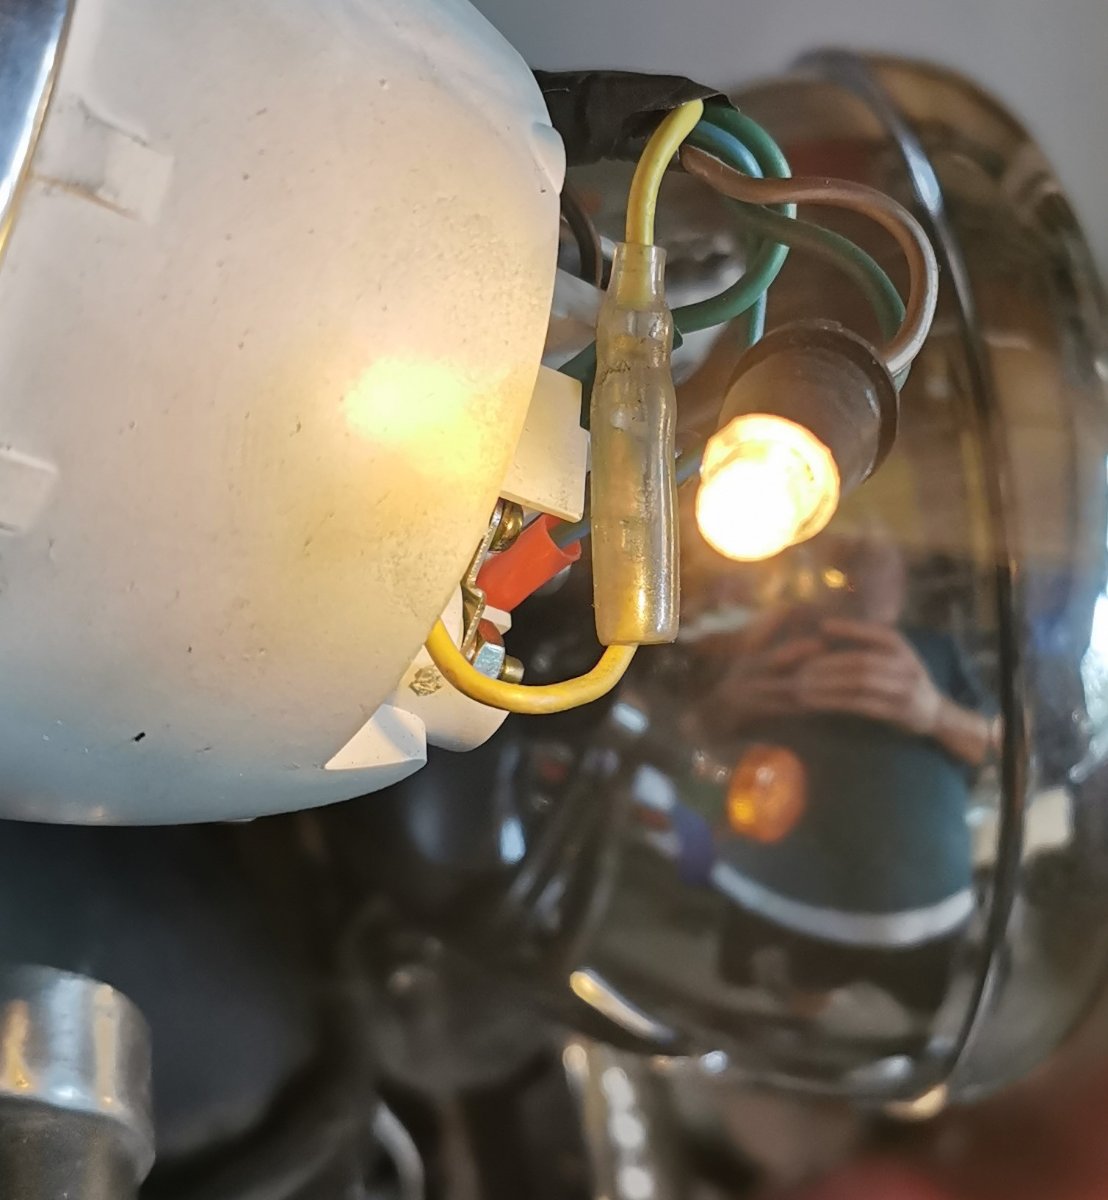
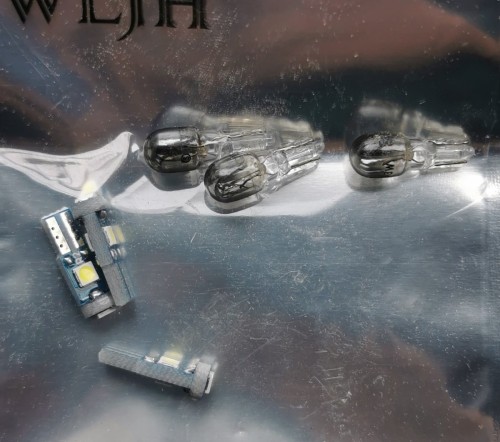
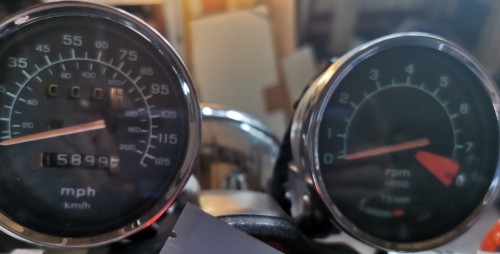
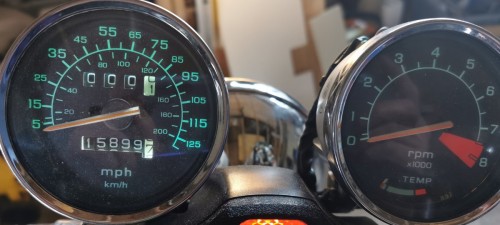
Another mod Just received the new LED instrument lights. The old ones were on end of life and casing was getting the projection of the filament. New ones are 1w power ice white but within a choice of colours. Comparing the 2 the difference is obvious The new look on the Odo with LED Fully assembled LED lights


-
I know this isn't a music...
-
Is your house moving?? from 1.1 miles to 1.2 is a huuuuge difference a reasonable condition 2nd hand EV can cost around £5k and cost next to nothing to run. I'm on my second nissan and won't go back to fossil fuels. My costs went from 50p / mile to 3p / mile I usually do around 15,000 miles a year so a saving of £7k a year. In your case the saving will be far less but even if you do 20 miles a week that means just under £500 in your pocket every year.
-
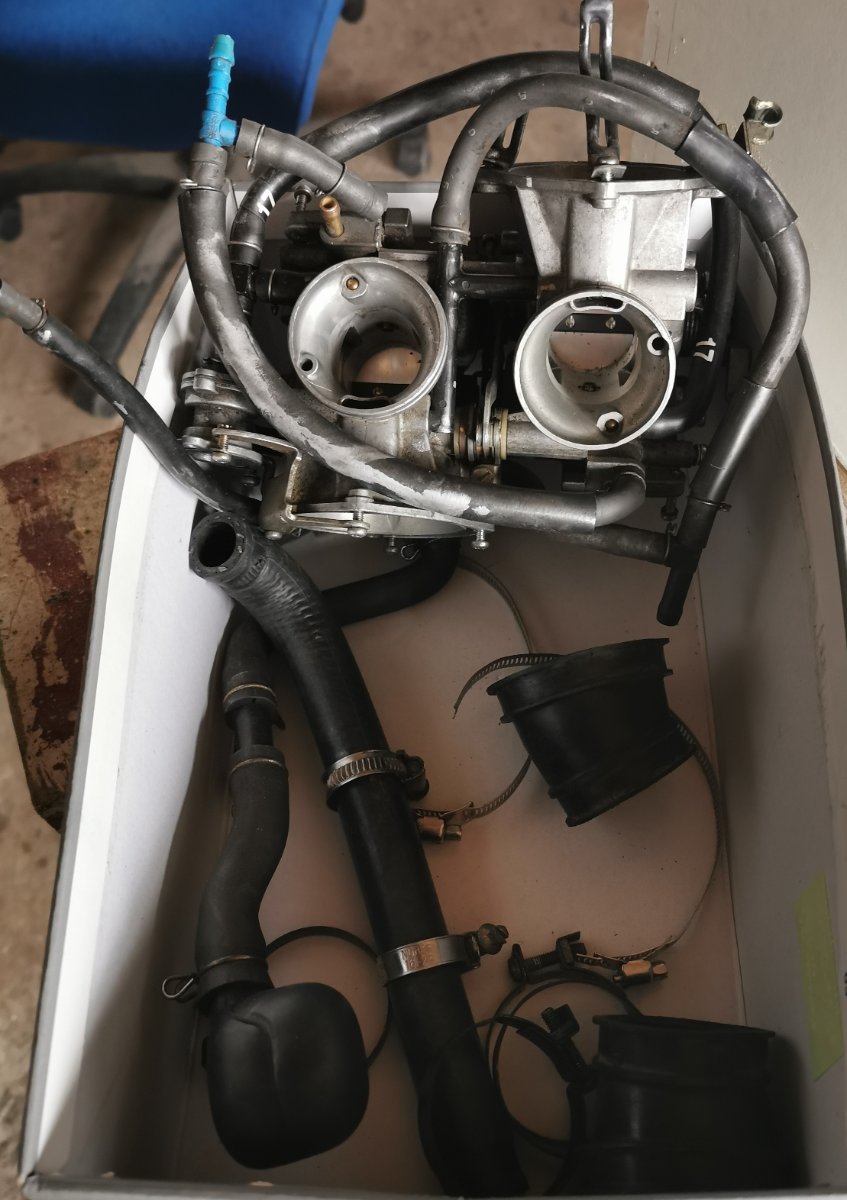
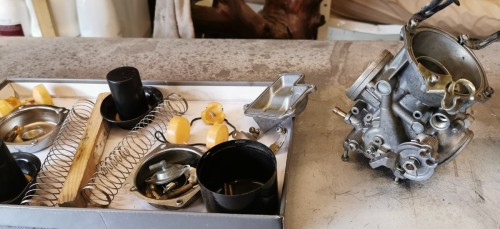
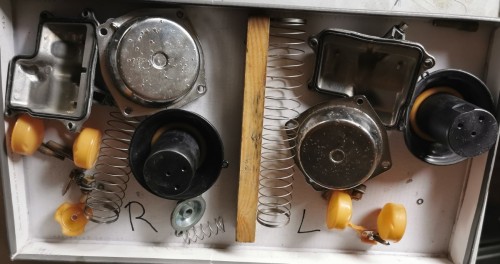
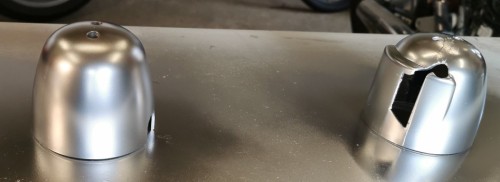
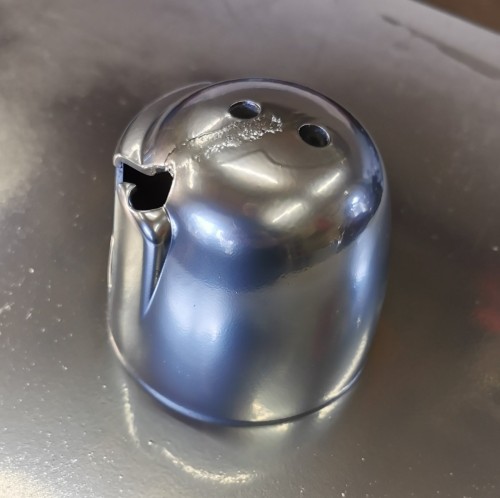
Back to the carbs. Took them off again. Decided to get a carb cleaner, there is a deal on Ebay for 3 cans of STP for just over £10. The bits are all on a wee box and once the STP arrives will be cleaning the parts and the carb body. There is a repair kit on banggod for less than £8 each which compared with $50 on US seems to be a good deal, although is probably chinese and built with a stone ax The opinions diverge, some say that I should replace the jets and all the other brass bits while some say that a good clean will do the trick. Because I'm soooooooo clever, I took the carbs appart and forgot to make a note of the 132 hose connections Now I need to get a diagram of the hose connections so I don't put vacuum on air connection. On the plus side, I'm becoming an expert on removing the carbs from the Shadow As usual, honda never made things easy and removing those things will mean having your fingers bitten 12 times a minute. Worst case scenario I'll have to remove the carbs again and replace the jets...

-
You need a car for 1 mile commute???? have you ever heard of bicycles? Not to mention that thing people do... Walking. Having said that, for those short trips you would be better off with an EV
-
Be very weary of paint stripper. Your part needs to be extra clean afterwards and I mean really really clean. Paint stripper have contaminants that don't go well with automotive paint (Not sure what you will be using it for) A torch and a scraper works far better unless is plastic or some temperature sensitive material. Grit 80 sanding disks on a small grinder or detail sander works far better and with little effort.
-
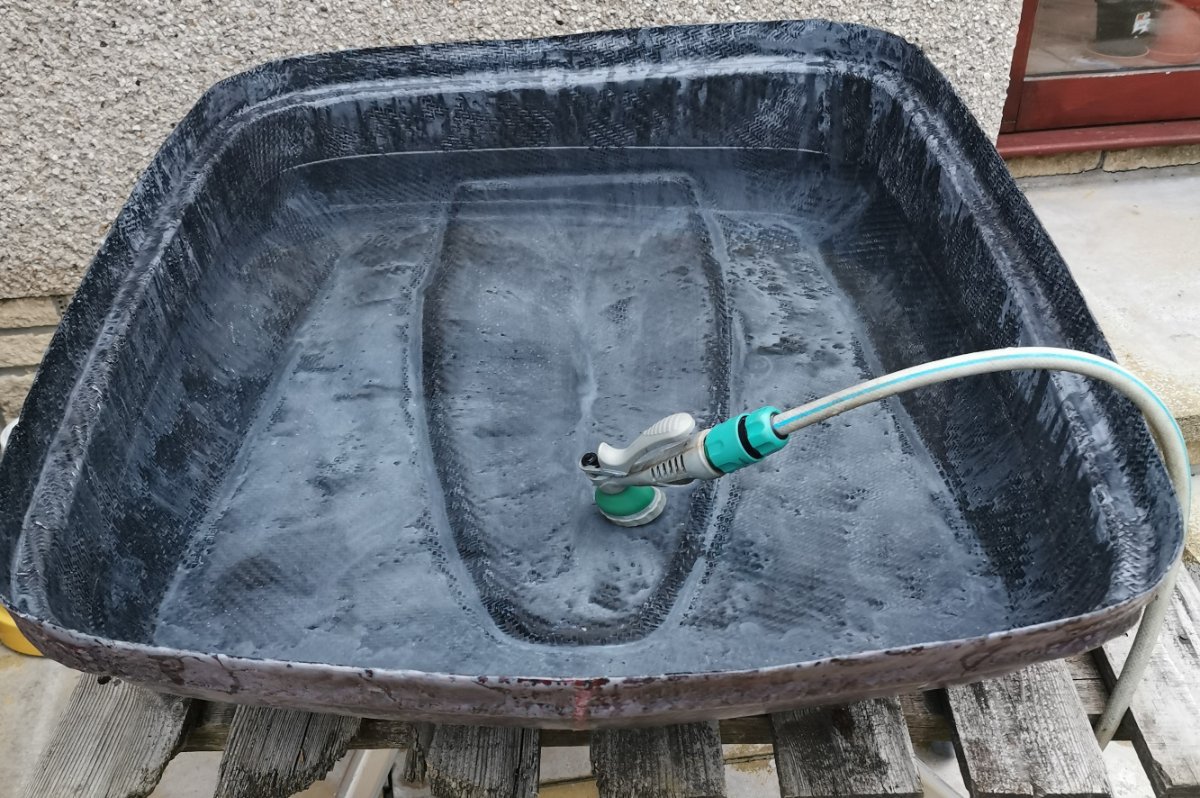
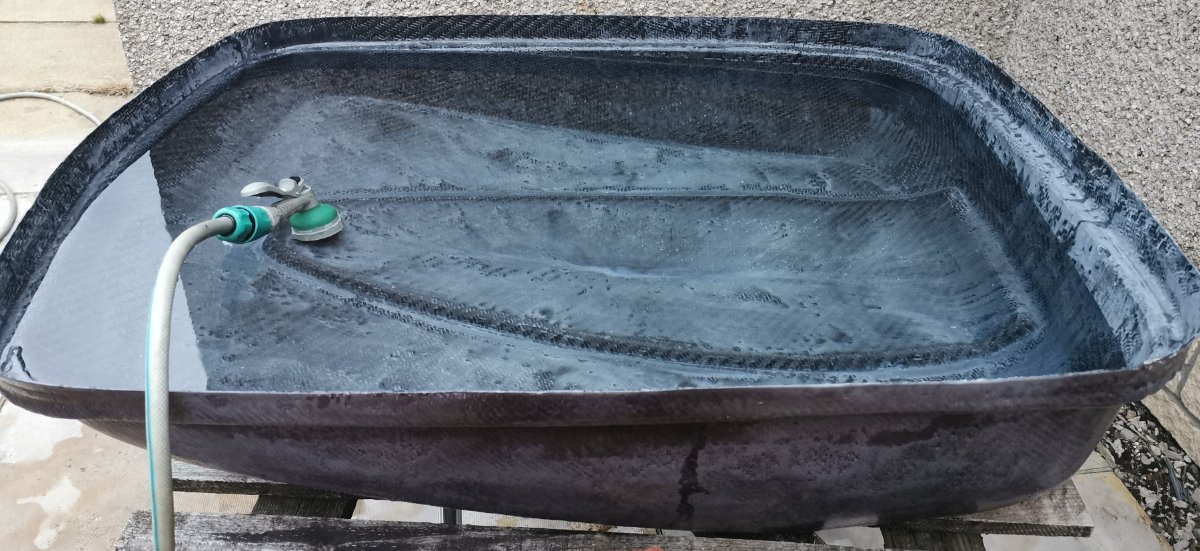
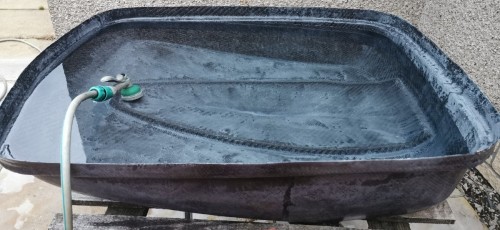
Important test today Waterproof of the cover. Last thing I need is a pool instead of a trailer So I did a 10 min waterproof test. Went pretty well, only a minor leak on the side but I knew about it already. Still doing 2 or 3 more coats of resin so that area would be covered. Happy days


-
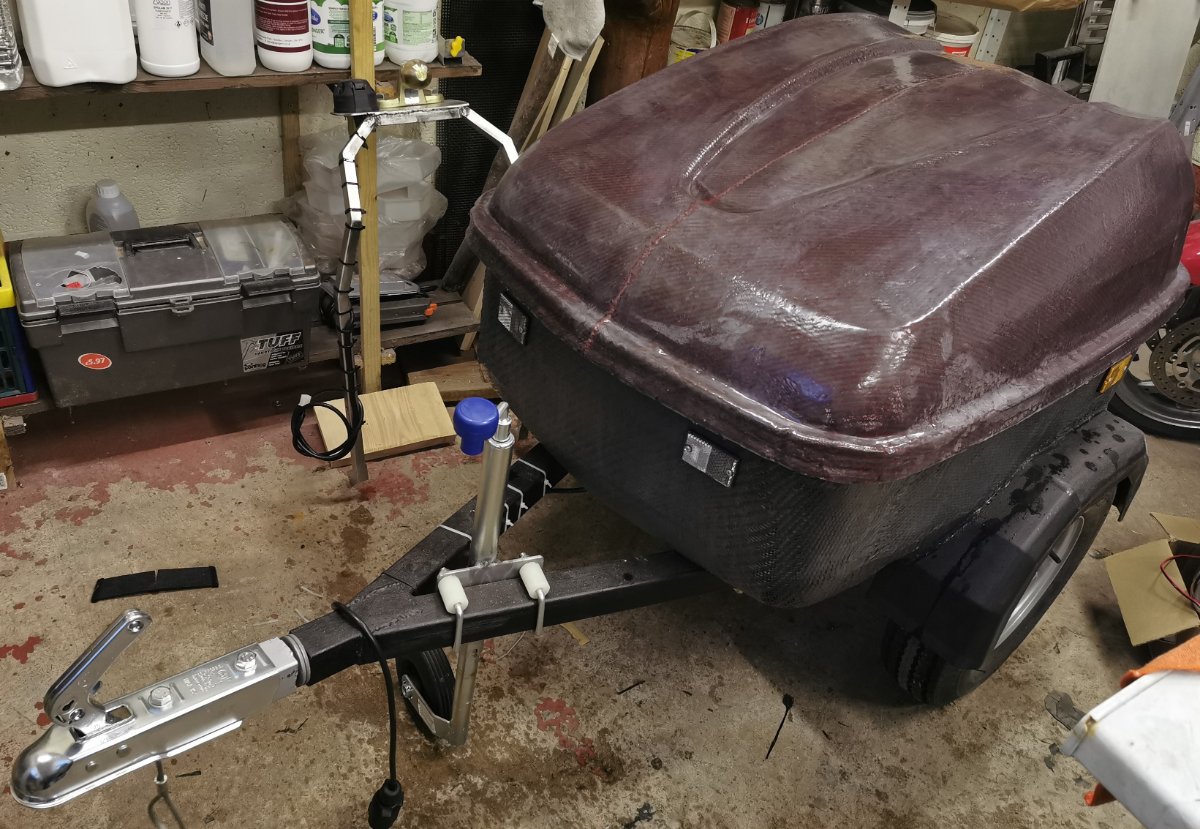
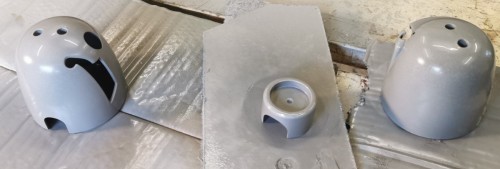
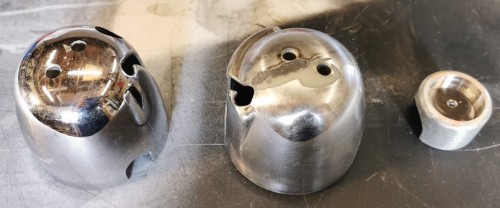
Regarding the gauge and clock casings Coat 11 on all 3, that's as much I managed to get out of the can Looks pretty cool. Now wait at least 24hr (which would be tomorrow at 19:30) so Monday afternoon will be doing the lacquer.
-
Alternative to SS bolts would be some nickel coating by electrolysis.
-
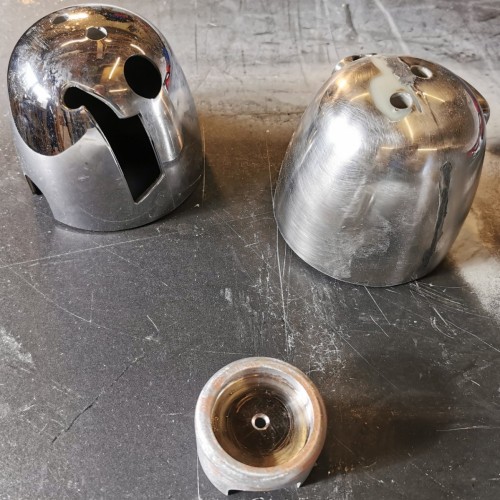
well... I'm an idiot!! At least now I know that the cutoff button works I probably touch it wen I was trying to make it work and didn't notice. That's my official excuse and I'm sticking with it Back to working fine at idle but dies when I accelerate. more searching on order The chrome painting is going ok so far
-
How come it stopped working after you changed the fuel filter, it ran perfectly on the run up from London, did you try pressurising the tank to force fuel through the new filter, is it pumped or gravity fed fuel system if gravity fed it may be the fuel filter not suitable for it. Pumped and the pump is working. Got it to work earlier on idle, well kinda, and dies if I roll the throttle Found out that some idiot has fiddle with the factory settings and changed the 2 pilot screws (one each carb). one had 2 1/2 turns the other was on 3 1/2. Now I did something that I don't have a clue and the poor bike doesn't start If I roll the throttle it spins a bit faster bu just doesn't start. Left it for a while just to make sure that if it's flooded it will dry then will give it another go. Just check the manual and need to readjust the 2 pilot screws...
-
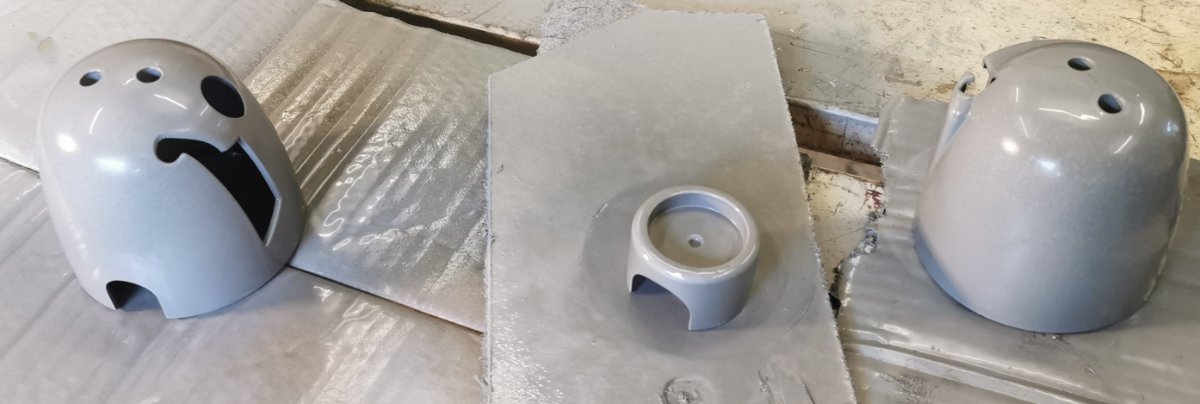
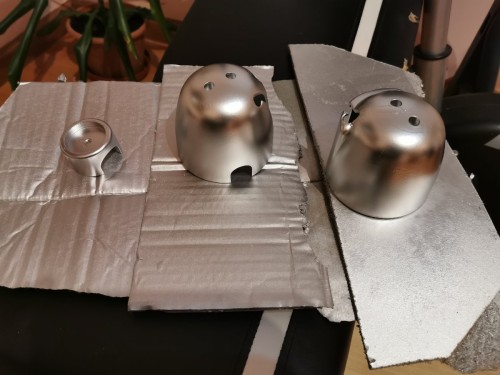
On the plus side, the chrome paint is fairly good. Good coverage. Done 5 coats so far and seems ok. The gauge casings were welded with plastic to fix a crack on the joint. Sanded to make surface even(ish) Because the welding won't be on sight I don't need to have it perfectly. The casings had different prep work. The clock casing was completely sanded and done to bare aluminium One of the casings was sanded with grit 800 The second casing was just cleaned. All elements were cleaned with thinner used in car paintwork prior to spraying All 3 casings were sprayed at same time. Garage temp, around 19c Coats applied as manufacturer instructions 15min intervals. Left to dry overnight, tomorrow will have a light sanding with grip 1200 and a few more coats then will start the lacquer.

-
Now, this is embarrassing. Fitted the new fuel filter, had to bypass the tap because it was faulty and can't be open to replace the seals. All well and fitted. Tried to start it. Given it a good crank to get the petrol to the carbs. result.. Fakall The stupid engine refuses to work. I was trying to avoid removing the carbs and give them a good clean because some parts are fitted using factory settings and if I take them out I will be stuffed So, after a few more attempts, it crossed my mind that it could be flooded, 1 plug out and it was dry. a few more tries and still nothing. So, carbs to be taken out. HOW DAFACK!!!!!! Do you remove those stupid things???? Stuck from the top on the air intakes and in the bottom the connectors to the cylinders. Workshop manual says to do exactly as I did, remove the throttle cables, the choke cable, loosen up the bottom connectors and remove the carbs all together. Yeah right...


.jpg.a1b212e4f61a78ae937347c181c6e471.jpg)