Hairsy Posted January 18 Author Share Posted January 18 8 minutes ago, Simon Davey said: Get yourself on YouTube. Search for stud and screw remover YouTube seems to lack videos of them not working - which has been my experience to date! But I do have a set of extractors so they're definitely on my list of options. I'll watch some videos, as you suggest, and maybe pick up some tips. I'll probably also keep applying lube to them for another day or so. Patience may be the key. 1 Quote Link to comment Share on other sites More sharing options...
Ian Frog Posted January 18 Share Posted January 18 Patience is definately the best course of action. Any extracting tools will potentially make things worse. Please check out videos of others using various easy-outs etc then leave yours to soak a little while longer. Someone I worked with a long time ago said before applying a shed load of torque to the problem spend some time gently tapping the fastener with a metal hammer while holding a gentle pressure in the direction you want to go. Good luck. Cheers Ian 1 Quote Link to comment Share on other sites More sharing options...
Tinkicker Posted January 18 Share Posted January 18 It is a pain. My main concern in my day job is some imbercile using half a bottle of loctite on a screw. Thread corrosion is dealt with the same way though. If the screw is on a solid backing as is yours, get a punch and give the head of the allen screw ( a work of the devil; Amateurs love em ) a few good hard cracks with a hammer and punch. This will peen over the head and allow you to knock in your hex key to give a little more purchase. It will also break free the corrosion adhesion. If this does not work, the only recourse will be to drill the head off and deal with the remains. My first go to remedy, heat; out of the running due to the plastic. 1 Quote Link to comment Share on other sites More sharing options...
Hairsy Posted January 19 Author Share Posted January 19 (edited) Last update of the week I suspect. Firstly, thank you to those who offered advice about the corroded bolt. I've continued to apply penetrating fluid to the damaged one and also to two others that need to be removed to release the hugger - those both have similar amounts of corrosion. I've also been giving all of them some action with a punch immediately before and after the fluid each time. I just tried to loosen the two undamaged ones with the impact driver and they still don't want to budge at all. But they remain undamaged which is a plus. I'm starting to think about a possible plan B. My primary reason for removing the hugger is to make it easier to clean up the grime around the swingarm. However, having looked at it, although it'll be awkward, I suspect I could actually do the cleanup with the hugger in place. The only caveat to that is that I definitely want to remove, clean and check over the rear caliper and I don't know whether the hugger will interfere with that. So my current thinking is that I'll hold fire on removal of the hugger unless I find I have to remove it to get to the brakes. There seems little point in potentially creating three broken bolts that then need drilling out leading to potential need to sort out problems in the swingarm. It could be a whole lot of work for no real benefit. Having said that, I'm going to continue to try the two undamaged bolts, giving them a bit more time to soak up the lubrication that's on them. If they do come loose then maybe I'll think it's worth the risk on the third one. We'll see. I decided that I needed a job that was going to be easy today - so I removed the front discs so that I could give the front wheel a decent clean, check the bearings visually and give the discs a good clean up. Everything went well with this. The spacers that hold the wheel in the right position had lots of surface corrosion but cleaned up really nicely. Very satisfying. I'd already checked that the bearings didn't have apparent play and they look to be in very good condition visually. With the discs removed, I was able to clean the wheels, removing a few years worth of spiders webs. Cleaning them revealed a few bits of chipped paint so I touched that up with a generic gloss black. Like other parts of the bike, they're definitely not perfect but they're serviceable and, from a couple of feet away, should like fine. Cleaning the discs was very satisfying, particularly the gold carrier parts. There were bits of light surface corrosion on non swept parts of the discs like the outer rim so that was removed as well. Finished them off with a good going over with brake cleaner - it's amazing how much muck remains even when they look clean. After putting the wheel back together again, I'm not sure it actually looks that different! But it's still satisfying knowing that (a) they're in good condition and (b) a lot of grime has been removed. Edited January 19 by Hairsy Typo 6 Quote Link to comment Share on other sites More sharing options...
Old-codger Posted January 19 Share Posted January 19 As others have said a tap with a centre punch and hammer to shock the bolt but not enough to break the hugger keep soaking it with penetrating fluid. By the look of it put masking tape on the hugger to protect it and I would clamp a pair of mole grips on it and then gently move it back and forwards over time. It may only move a mil or two but give it time more fluid and hopefully it will start to free off. Dont try to turn to much or you risk snapping the bolt head off. If it does break centre punch it the drill it out and then run a tap through it to clean up thr thread. Good luck 3 Quote Link to comment Share on other sites More sharing options...
Hairsy Posted January 22 Author Share Posted January 22 Minor update today. Most important job was to get the bike supported with the forks in the air to enable me to paint them. Managed to do it with a couple of axle stands and wooden blocks under the sump. In a rare stroke of luck, my axle stands were the perfect height and I was able to wedge the wood in and then gently lower the front stand to get the bike resting solidly. I then gave the forks a good going over with a wire brush to get rid of the final remains of the previous finish. After seeing what Tinkicker achieved with Simoniz products, I picked up etch primer, silver wheels and lacquer. I'm just awaiting some good panel wipe solution which should arrive later this week. Then I'll be ready to do the final prep and paint the forks. If it goes well then I'll be using the same products for the frame. There's a few black parts on the bike that need tidying and painting such as the ends of the radiator, the kickstand and some brackets around the clocks so I wire brushed the radiator and kickstand. I removed the kickstand which, once again, had nastily corroded bolts in it. Had to get the penetrating fluid out again but a 20 minute wait and they started to move. The bolts remained super stiff as I removed them and the threads looked horrible so I cleaned them up with wire wool on the bench grinder and then used tap and die on the bolts and frame. Satisfyingly, everything is now functioning as it should. Picture is of the forks after the session with the wire brush. More cleaning and final keying later in the week. 5 Quote Link to comment Share on other sites More sharing options...
Hairsy Posted January 23 Author Share Posted January 23 (edited) Another reasonably successful day. I'll try not to get used to it as I'm aware that I've put off a few things that are going to test my patience later. First job was to prep the stator & clutch cover and then give them and the forks a good soapy wash. Not particularly interesting but everyone keeps telling me they love a picture and it least it serves as a comparison when the job is finished. I also prepared the top of the triple clamp for paint. It was well scratched up and I've got some matt black which, although not the same as the original finish, will I think look OK - and certainly better than it looked before. I'm a bit on hold as I await the panel wipe which is so key to the next stage but one thing I wanted to look at was the clutch. It functions fine but it just felt a bit 'rough' in operation. I started by removing the lever and found lots of gunk so gave that a clean up. I then lubricated the cable - I don't have anything that claims to be made for the job but, following a bit of web research, I settled on GT85. Finally I gave a good cleanup to the external parts of the clutch mechanism at the gearbox end of the cable. Put it all back together and it's so much better - lovely and smooth and as intended. A really nice satisyfing little job. Most of the time the lack of love and age of this bike leads to difficulties - but the plus side is that sometimes a job is just about a bit of simple maintenance that has previously not been done. I left it there for today but, as an aside, then fitted a gear indicator to my main bike - a CBR600F4i. A relatively easy job with just one soldered connection to the tacho output from the ECU. One other connection had to be made that was plug'n'play but super fiddly to get to but eventually got it all together and it works fine. And at the grand cost of only £16.57. I have to admit to being a little nervous about the longevity of such a cheap unit but it programmed itself with my gear ratios and for now it works. Time will tell ... Edited January 23 by Hairsy 3 Quote Link to comment Share on other sites More sharing options...
Hairsy Posted January 23 Author Share Posted January 23 Oh, one more thing, I went over the whole bike and split every electrical connector, sprayed with contact cleaner and reconnected. Most of the connections actually looked absolutely fine but a couple looked like they benefitted from this step. It's a little thing that I tend to do routinely to avoid future issues. I've had a few instances of dodgy connectors over the years, particularly working on boats where the salt in the air just gets everywhere. 3 Quote Link to comment Share on other sites More sharing options...
Hairsy Posted January 24 Author Share Posted January 24 In the interests of showing that this kind of project includes mundane days, a small unexciting update. Mostly because house decorating called for my time. Removed the top of the triple clamp. I had planned to paint in situ but that's never going to give the best finish and it only took a few minutes (most of which was taking photos of the ignition switch cable routing so that I put it back correctly later). Once off I was able to do a little more sanding in the crevices and figure out how to hold it for painting. Just need to mask off the ignition switch and inner surfaces once it's had the final degrease. I also removed the bar ends which weren't in a terrible state but, I hope, would have let the side down once it's all finished. Gave them a quick rub down and they're now ready for some paint. One day I'd love to do a 'proper' restoration where I replace old parts but at least this one is keeping me out of mischief through the winter. 3 Quote Link to comment Share on other sites More sharing options...
RideWithStyles Posted January 24 Share Posted January 24 Nowt wrong with revitalising the old parts where possible! Firstly it saves money (no point giving the Chinese anymore money) and no point binning good sound stuff just because it's abit too patina'd, least it will be original. please keep the pics and resto going. Quote Link to comment Share on other sites More sharing options...
Hairsy Posted January 25 Author Share Posted January 25 (edited) So today was the big day where I got the paint cans out. This was a nervous day for me - I’ve never felt comfortable with anything related to bodywork or paint. Many times in the past, I’ve followed instructions but lacked the experience / skills to really do a good job. It’s frustrating when you spend ages prepping and then have an unsatisfactory finish. The panel wipe arrived this morning. I started by decanting equal amounts into a squirty bottle and all over my bench because I didn’t stop pouring when the bottle was full - idiot. I gave the bar ends, triple clamp and forks a really good final clean with the panel wipe. Using a white piece of rag, it was clear that despite numerous previous attempts at cleaning, there was still muck on there. I then completed final masking, wiped over with a dry microfibre cloth to get rid of last particles and applied the etch primer. I haven’t used etch primer before and it seemed to take really well. I’d planned three coats but everything was looking great after two so I left it there. After waiting for the primer to dry, I was on to Matt Black for the triple clamp and bar ends and Wheel Silver for the forks. I haven’t used Simoniz paints before but they seem to coat better than others I’ve used. I don’t know whether that’s the prep, the primer, something mechanical like the nozzle they use or the paint itself - but applying the paint was very satisfying. Another wait after the base coat and I then added 3 coats of lacquer to the forks and bar ends. I’m delighted with the forks - huge thanks to Tinkicker once again for his recommendation of the paint. Putting the lacquer on the bar ends was an experiment to see what matt black and lacquer ends up like. I was hoping for a slightly satin finish but it’s actually full on gloss. This is OK for the bar ends but I want the triple clamp to reman matt so I’m glad I didn’t do the same with them. But that leaves me with a dilemma - do I leave the triple clamp with just the lovely matt painted finish or should I try to apply a matt lacquer? When the triple clamp is in situ it's well protected from the elements but if someone had a big set of keys in the ignition then a coat of lacquer could help to protect the finish from scratching. Even though the bike’s going to get sold when it’s done, I’d really like everything to stay nice. I can get a can of Hycote Matt Lacquer from the local Euro Car Parts. But does it really leave a matt finish? Amazon reviews suggest it's more satin than matt and some people report it messing up the paint underneath. I really don't want it to get a shine and / or to mess up the paint underneath and need to be re-done. I really don’t know what to do. Any suggestions? Despite numerous attempts, I can't seem to remove these last 2 images. Apologies! Edited January 25 by Hairsy 7 Quote Link to comment Share on other sites More sharing options...
Hairsy Posted January 25 Author Share Posted January 25 Just found this as a potential plan B for the triple clamp https://www.ebay.co.uk/itm/285436737494?hash=item42755af7d6:g:5zAAAOSwol5YzW8T&amdata=enc%3AAQAIAAAA8Hv16sSaURy5lRFJa6HTpBcZ7U0vunLPjA8ULch%2FFI4SERAsaQ%2F1qUxGNoUp7p5fxZXYsW%2BzF9trhjQl069JOHX9THeqAlPsRDG9AN6CjwFEAp3cT%2BKpXQ%2BIHuesMsSSgMeG%2B6QHnfxdsM%2FmSA4J%2FUmWmj8laQCQaTnTJxK1EkhHRWeOP21tayWwX50e%2BKvHAX20gJlPgg6N29uK%2B1boM0lxE8tnjIhG4W7S9fcRacaO%2B0xBoXBkEl%2BF2YZ%2BlkmYH6IDXAlGlwzRwHI8bqi9PVrxONUINreECKH7X%2F2W1JsBdJlQWERbnk1XVpQbdUEZ8g%3D%3D|tkp%3ABk9SR5j2j5ioYw Quote Link to comment Share on other sites More sharing options...
Hairsy Posted January 25 Author Share Posted January 25 I've taken the decision that I'm not going to matt lacquer the triple clamp. I'll probably put some sort of protective sticker on it. So I've put it back in place. I like it! 7 Quote Link to comment Share on other sites More sharing options...
Simon Davey Posted January 25 Share Posted January 25 26 minutes ago, Hairsy said: I've taken the decision that I'm not going to matt lacquer the triple clamp. I'll probably put some sort of protective sticker on it. So I've put it back in place. I like it! Have to admit, that's pretty tasty looking. Good decision. 1 Quote Link to comment Share on other sites More sharing options...
Ian Frog Posted January 25 Share Posted January 25 I agree. As you are probably selling it why not leave it as it is and advise the new owner of the work that would be caused by having a lot of keys on a keyring. Cheers Ian 2 Quote Link to comment Share on other sites More sharing options...
Tinkicker Posted January 25 Share Posted January 25 Rustoleum hard hat.. 1 Quote Link to comment Share on other sites More sharing options...
Hairsy Posted January 25 Author Share Posted January 25 17 minutes ago, Tinkicker said: Rustoleum hard hat.. Never heard of that before but just had a quick look and it's definitely interesting - will take a closer look. Quote Link to comment Share on other sites More sharing options...
RideWithStyles Posted January 26 Share Posted January 26 Excellent work. Dont think the triple clamp it too glossy myself most likely helped by the primer, I wouldnt sniff at that if i bought the bike new like that. yea miles better than that sticker- NO STICKER! 1 Quote Link to comment Share on other sites More sharing options...
Hairsy Posted January 26 Author Share Posted January 26 Today was going to be a quick one - just a quick hand paint of the sidestand and radiator and then put the front wheel and brakes back on. Although nothing went wrong, today was a good reminder that things generally take longer than you think and it was the best part of a couple of hours in the end. First job was a final clean of the bits I was painting today and then a brush paint with some Hammerite Smooth. I know it's not the best paint ever but it's easy and goes on without primer. For parts which aren't 'on show' but need a little tidy up then I think it does the job. Having said that, I'm not sure I like the effect on the radiator. The picture actually makes it look worse as the reflections of light in the imperfections on the surface make it look as though I've missed bits. It is actually fully covered but it's a bit shinier than I'd like. In practice, none if this is visible when the fairings are on - this was just one of those things that I couldn't bear to leave in the state I found it, despite the fact that I'm the only one who'd ever know. Well, apart from you lot! The sidestand looks good though. Next was putting the front wheel and brakes back in place. This went much more smoothly than when I removed them, now that everything has been properly cleaned up. Everything was torqued up correctly and it was satisfying to see it all functioning correctly. I'm considering having a go at cleaning up the calipers a bit more later. They looked good when they were the only clean bit but now that everything else is looking better they let the side down a bit. But I have to constantly remind myself of my goal with this bike and I think I should try to resist the temptation to do more. I'll see how they look once the bike's back together. Finally, my first job next week will be to wheel the bike outside and give the swingarm and rear frame area a good degrease and clean up before I start working on the rear brakes, wheel and any other problems I discover at the rear. With that in mind, I removed the cover off the front sprocket, just in case it turned out to be another part that didn't want to come off. It actually came off very easily but what a load of caked on muck! But also, what a satisfying clean up job. I have a bit of thing about cleaning parts - it's so therapeutic. That's it for this week. Very pleased to have got the first paint jobs out of the way and the front end back together. Next week will be all about rear brakes and swingarm area. And also another chance to look at whether it's worth me trying to remove the hugger. Thanks for all the suggestions and encouragements. They do help. 7 Quote Link to comment Share on other sites More sharing options...
RideWithStyles Posted January 26 Share Posted January 26 Excellent! only thing next to think about tidying up is the frame and swing arm. keep up the good work! Quote Link to comment Share on other sites More sharing options...
Hairsy Posted January 26 Author Share Posted January 26 18 minutes ago, RideWithStyles said: only thing next to think about tidying up is the frame and swing arm. Absolutely - but I'm trying not to think about that bit until after next week! 1 Quote Link to comment Share on other sites More sharing options...
Tinkicker Posted January 26 Share Posted January 26 (edited) Number one thing about restorations or paint in general. Paint is not there to look pretty. It is there to protect the underlying substrate from corrosion for as long as possible. Pretty is the secondary concern. Edited January 26 by Tinkicker 1 Quote Link to comment Share on other sites More sharing options...
fullscreenaging Posted January 27 Share Posted January 27 Are you changing the fork oil? After doing such a good on the externals it would be a shame not to do the internals and make the bike ride as good as it’s going to look. Quote Link to comment Share on other sites More sharing options...
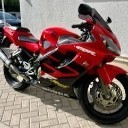
Hairsy Posted January 27 Author Share Posted January 27 Not at this stage. The forks operate smoothly and feel well damped. I chatted with the previous owner (a successful racer) and through those conversations I trusted him when he told me the bike rode well. I’ve also taken it for a short test ride myself. This project is about taking an unattractive non runner and making it into a good 26 year old bike that will suit someone and have had all its immediate needs met. It’s not a full restoration. I’ll deal with anything mechanical that needs it but, financially, the bike is never going to be worth enough for me to spend money on things that aren’t actually needed right now. It’s almost certainly going to be sold at a loss but I’ll have had a productive winter and a (mostly) enjoyable experience. As a bonus, hopefully someone will ride off with a smile on their face. That’s not to say I’m not going to do mechanical things that are truly needed. For example, the brakes work fine but I’m definitely going to renew the fluid as it’s sat in there for 4 years. I also replaced the fuel pump when my repair proved to be unreliable. And, of course, the MoT could spring a surprise - but I hope not. One day I’d love to do a full on restoration, but I’m afraid this isn’t that bike. 3 Quote Link to comment Share on other sites More sharing options...
Hairsy Posted January 29 Author Share Posted January 29 Not the most inspiring day today but it's all progress. I got underneath the swingarm with a wire brush and some paraffin to check whether the surface rust and years of chain lube were hiding anything sinister. They weren't. Everything is structurally sound. Just not terribly pretty under there. I did a similar job around the front sprocket which always gets mucky when neglected. There was plenty of old grease there but not quite as much as I expected. Someone must have given it a clean up in the past. I didn't take pictures because, at this point my hands were disgusting. Then on to the rear wheel and today's revelation about the bike. I think I mentioned previously that the brake pads all have plenty of life in them but I still wanted to remove them all to check for crumbling material or any other issues. Well, when I removed the rear wheel, the friction material from one of the rear pads simply fell off! The pad backing plate was still in the caliper but the friction material was on the floor! So I'm fairly pleased that I checked. I'll order new pads in a few days when I've given the caliper a proper clean - I'll need to make sure that the rest of the caliper is serviceable and I don't need other parts. The rear axle and associated hardware were covered in surface rust and grease. I took the first picture after giving them a first wipe down so they're already better than when I first removed them. The second picture is after a more thorough cleanup. All in good condition underneath the muck and very much re-usable. The rear hugger fixings have been soaking in penetrating fluid for over a week now but still won't budge with the impact driver. The only way to remove the hugger will be to drill the fixings out. If I do that, it will be a heap of hassle, risk of making a mistake (I'm not experienced with doing that) and then all I would do is put it back in place as there's no reason to remove it because I can reach everything I need to without removing it. So it's going to stay in place and I'll work around it. Final thing today was to order a new petcock. I've been procrastinating on this in the hope that it will improve further as it's used. However I know that if I was keeping the bike then I'd fit a new one. And I want to sell it in a condition that I'd be happy with. So there's one on its way now. Oh, and one more thing. The look of the radiator after I'd painted it last week was bugging me so over the weekend I painted a bit more of it and cleaned up a plastic trim that's near it. And, in my opinion, it's now much better. It will of course still be completely hidden when the fairings are in place but I'll know! Before and after 5 Quote Link to comment Share on other sites More sharing options...

Recommended Posts
Join the conversation
You can post now and register later. If you have an account, sign in now to post with your account.
Note: Your post will require moderator approval before it will be visible.