linuxrob
-
Posts
346 -
Joined
-
Last visited
Content Type
Profiles
Forums
Events
Store
Gallery
Community Map
Everything posted by linuxrob
-
Makes you wonder, if they cannot get the spelling right, what must there quality control be? Nice "period" tyre there.
-
Always have some diesel around for that sort of cleaning, used to be parafin but diesel a lot easier to get these days. stay away from petrol for obvious reasons. Leave the clutch pushrod IN when cleaning that lot. Thought you were only taking the head off???
-

Triumph Trophy Engine Strip
linuxrob replied to Mickly's topic in Old Motorbikes, Projects and Restorations
Yep luckily this is a council tip special. -
Triumph Trophy Engine Strip
linuxrob replied to Mickly's topic in Old Motorbikes, Projects and Restorations
Careful with that setup. the warm air could possibly move dust etc from the floor through that grill and stick to the still wet paint. when i did the Z barrel i heated it up on the rad tehn painted over my workmate then after about 20 mins put it back on the rad to finish curing. here it is with the first guide coat after primer in the rad
-
A lot of slipping clutches are badly adjusted, especially Kawasaki worm gear type actuators. If friction plates AND springs are in spec then problem may have been adjustment. Careful when holding clutch basket to get nut off and take note of where all the engagement part are to aid reassembly. On the Bandit you can bugger things up if they are not aligned correctly before tightening the nut. That inner does look horrendous. and abused. love the train reference, i used to work at Thornaby TMD 80's - 90's
-
Not usually a good idea to turn the motor backwards.
-
As Bob says, read the manual a few times and read as you strip it and take pics. Not all that familiar with Yamaha in line 4's but my Z you have to be careful to remove the cam chain tensioner the right way, more so on reassembly. You should have shims on top of the buckets. so measure the tappet clearances first for reference.
-
A lot of things in 1960's France was very lax!! looks fun to work on.
-
Ta for the heads up Bob. MB, I agree that on modern cars the indicators are very hard to see, you have a spit second to scan the car and se if they are indicating, luckily for a long time now i have not trusted anyone to indicate correctly and have dodged a few bullets as a consequence.
-
NEVER, besides the damage you could do, all that dust etc going into your bottom end. Slowly carefully with a dulled blade.
-
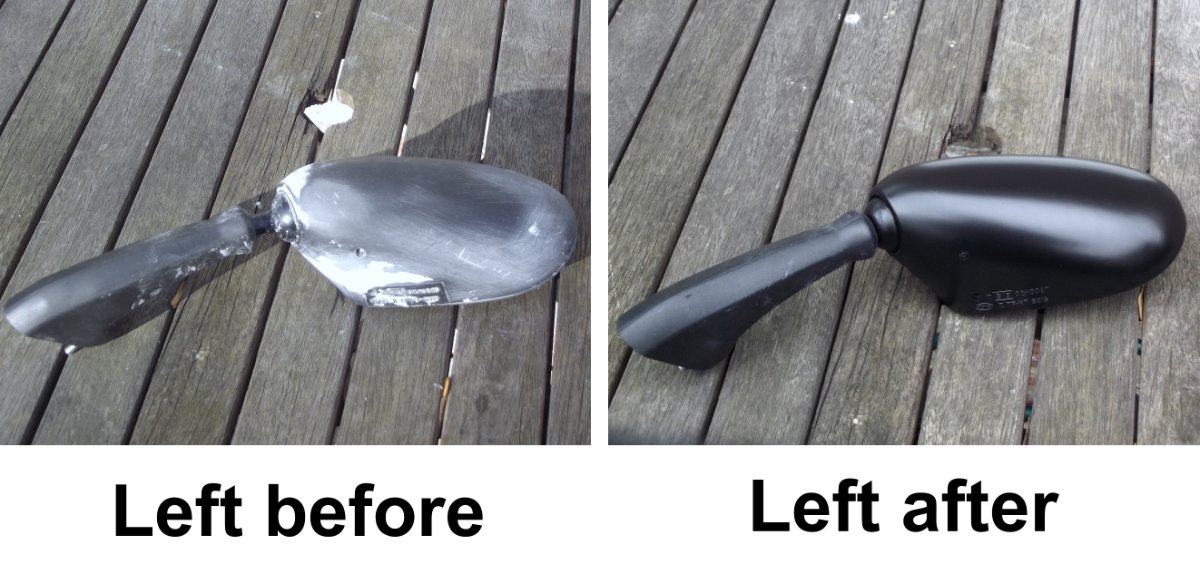
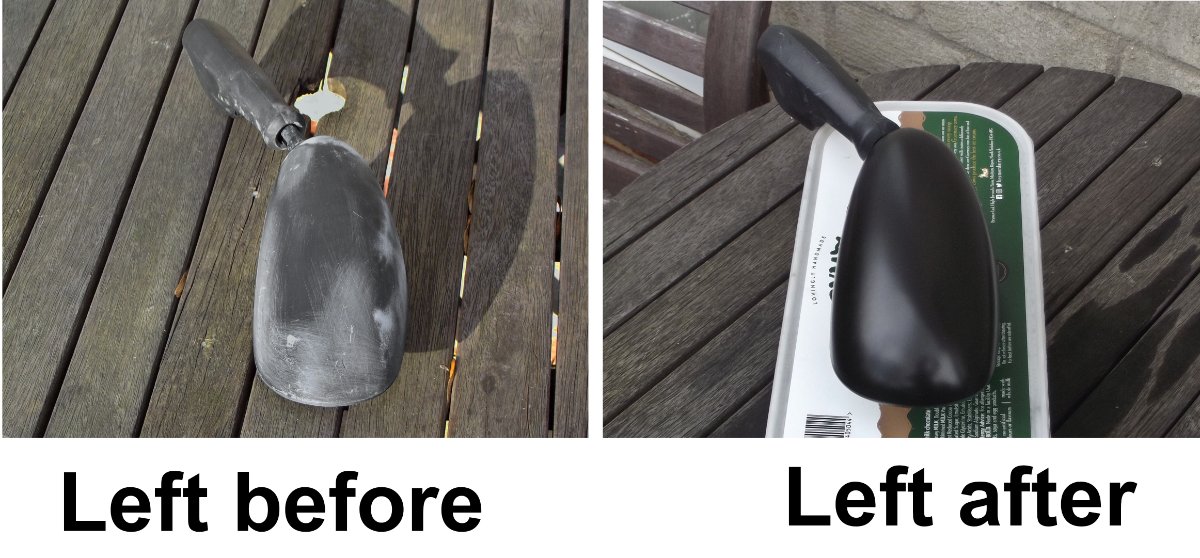
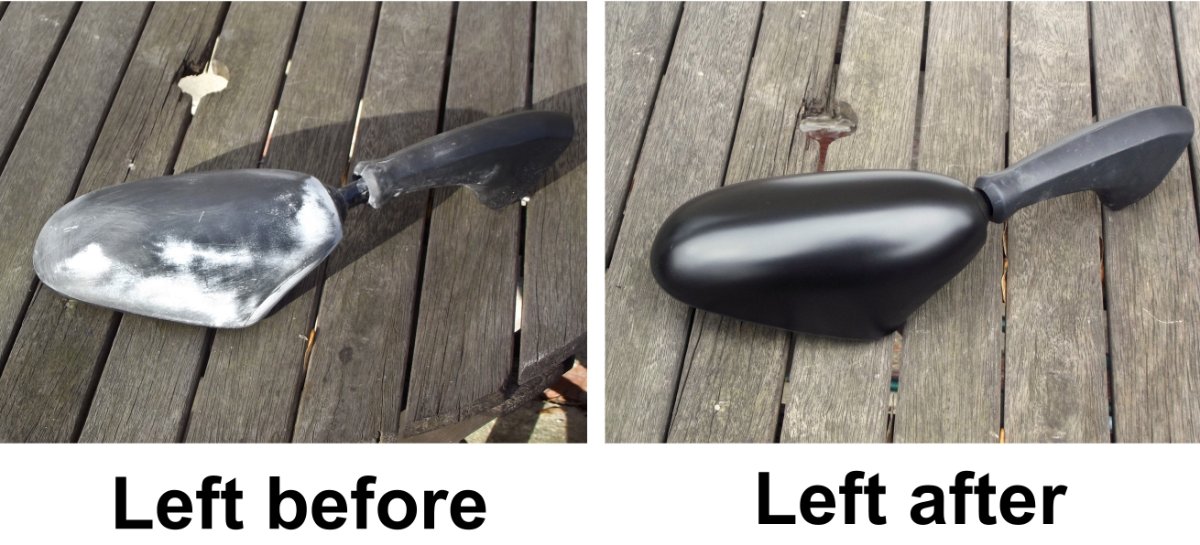
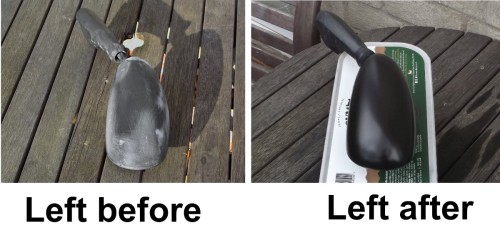
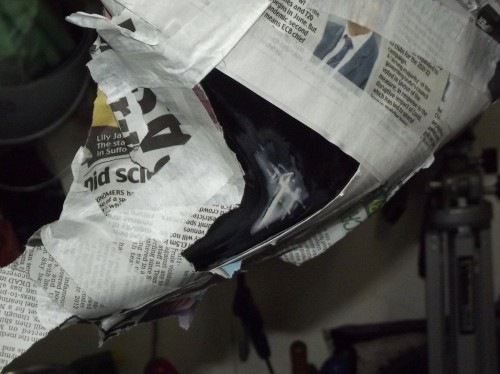
Flushed with success regarding the bandit fairing paint I got on with the "scrap" genuine Bandit mirrors I bought from eBay fora a tenner to see if i can make a good set and get some practice with plastic paint before i get the scuffs out of my bandit one after the fall over. Instead of the usual waffle and pic feat I will say they were sanded down, filled, sanded again, body putty, sanded, plastic primed, 4 light coats of U-Pol satin black and finally 2 coats of satin clear. Here are the before and after for the left mirror, the right one's clear is still hardening as i had to sand down again to get ride of a few dust blobs. Can out really good. I wanted to keep it looking plastic satin as much as possible. Just the to rubbers to silicone polish now and will pop them on the Bandit and see how they last this year.


-
Have seen most of the VW range with appalling paint fro the factory, the detailing guys do a roaring trade there. as Bob says patience is key and thoroughness. Look forward to doing the Z's panels this summer and more practice. will keep you all informed on how the hand buffing goes. cannot justify a DA polisher even though the car could benefit too. Mine you, soon as it is done one trip to the supermarket car park will ruin it.
-
Cheers, I hope it is fine, not the best brand, i usually go to a paint suppliers and get an aerosol from them but this was at Halfrauds one Sunday when i needed some. I went on fine. The orange peel usually comes from the paint droplets being too large and going on blotchy. In the past I have heated my can to around 40C, it sprays more (more pressure) and use from a greater distance. Best thing is to use a gun and mix your own clear and thin it down enough or to spray at a higher pressure. The painters on here will correct me on this I am sure. I will wait and sand them buff the hard clear to a even shine. This summer with the spare / sat in the corner of various sheds over the last 35 years Kawasaki Z500 to do will have to get a spray gun and do the tank and panels. The colour i want is not in ready to buy cans. So more opportunity for learning and cock-up's.
-
Good thought Bob and thanks for the compliment, I know the theory but my hands, eyes and brain are never in total agreement when I am doing this sort of job. Can strip and rebuild engines and do electrical / electronic work OK but anything "arty" and I go to pieces. Have some 2500 also 3000. Always done up and down and side to side when sanding. This time I will get some Maguire's ultimate compound and buff by hand the clear after flattening it a bit to get that orange peel down and the 2500 / 3000 grit sanding scratches out. Thankfully the clear is not water based so the water bucket can come out again. Am on with some cheap OEM eBay damaged Bandit mirrors to see if i can make them look as perfect as possible and use them this year and do my own, only scuffed ones in the summer. Will post the usual pic fest on here in a few days, waiting this afternoon for the last coat of satin black to harden so the satin clear can go on.
-
With this week being above freezing, bit the bullet and painted the Bandit fairing which got scuffed a few years ago in a fall. The fairing is still off after I did the headlight work so it's now or never. i will not choke up this thread so have created a new one in the projects section.
-
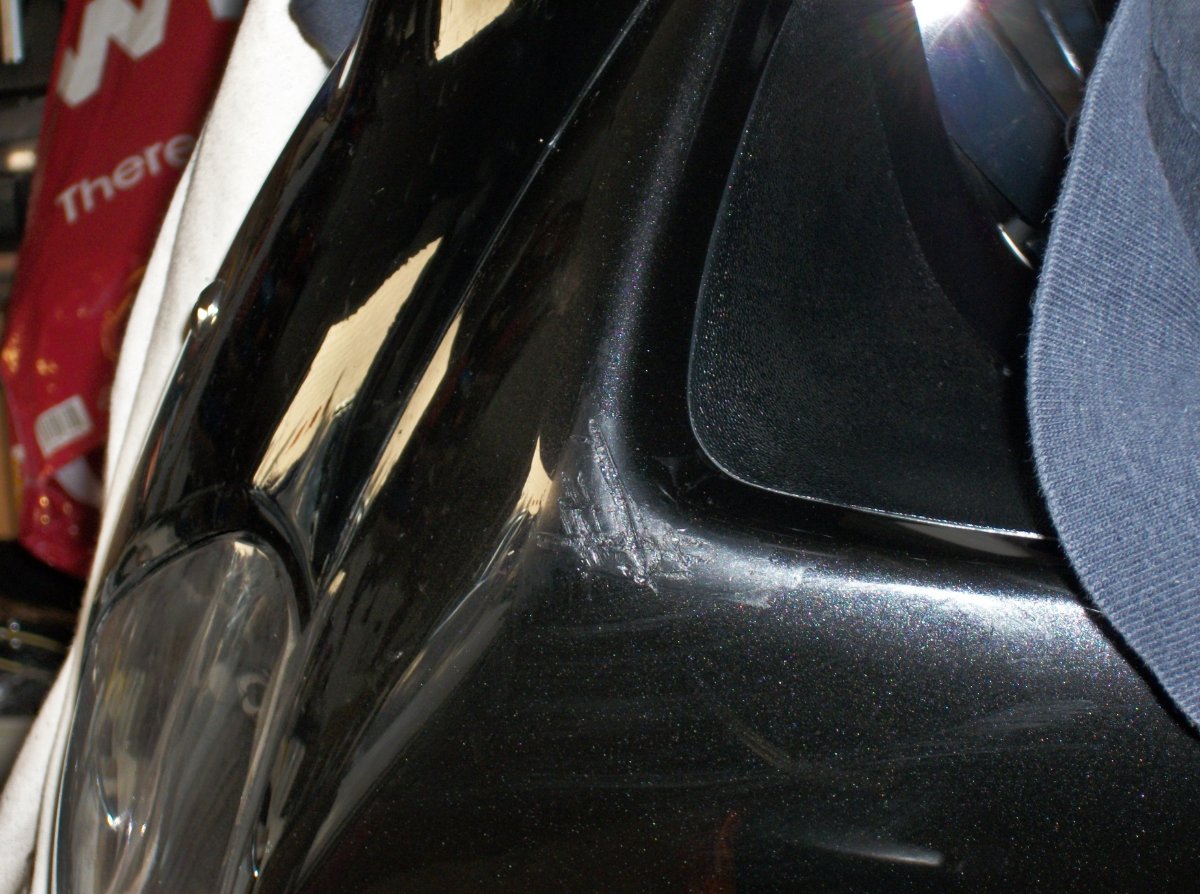
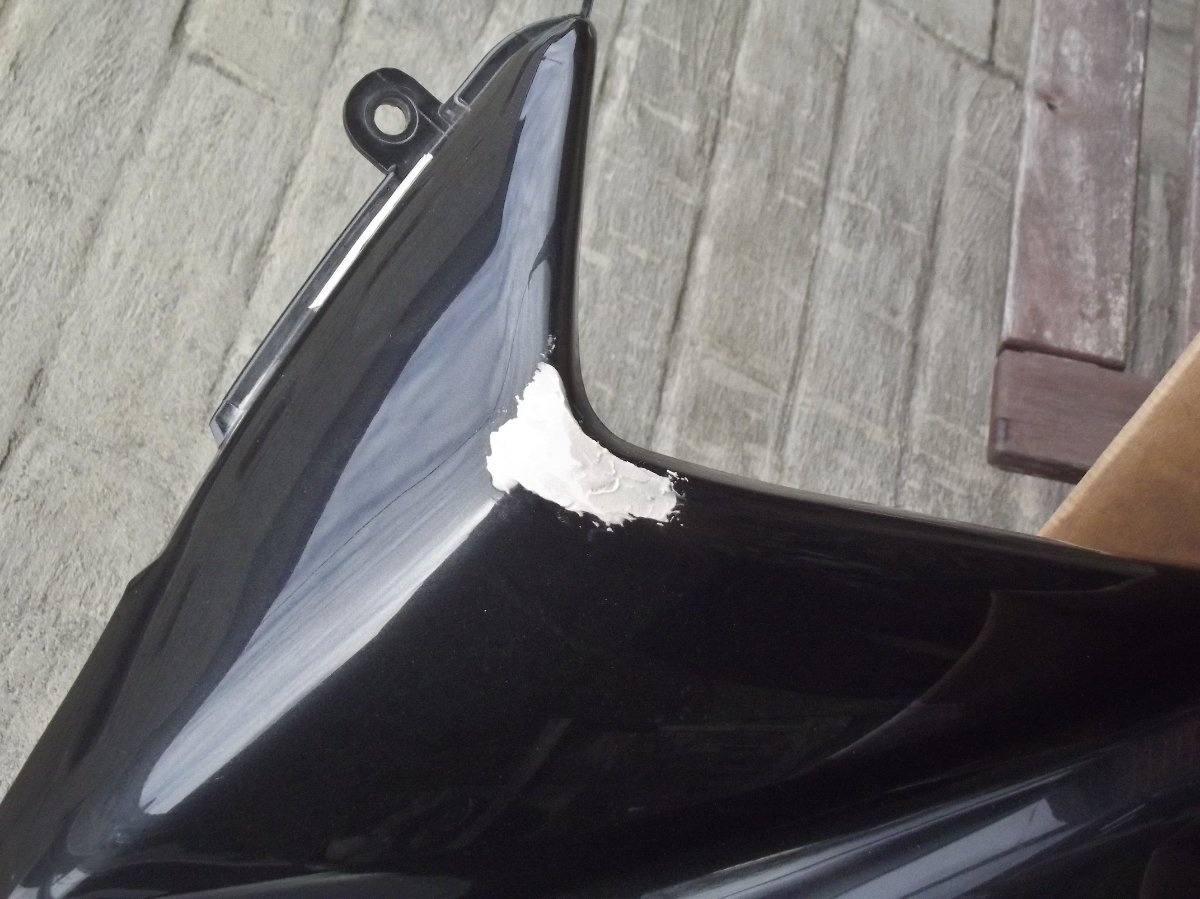
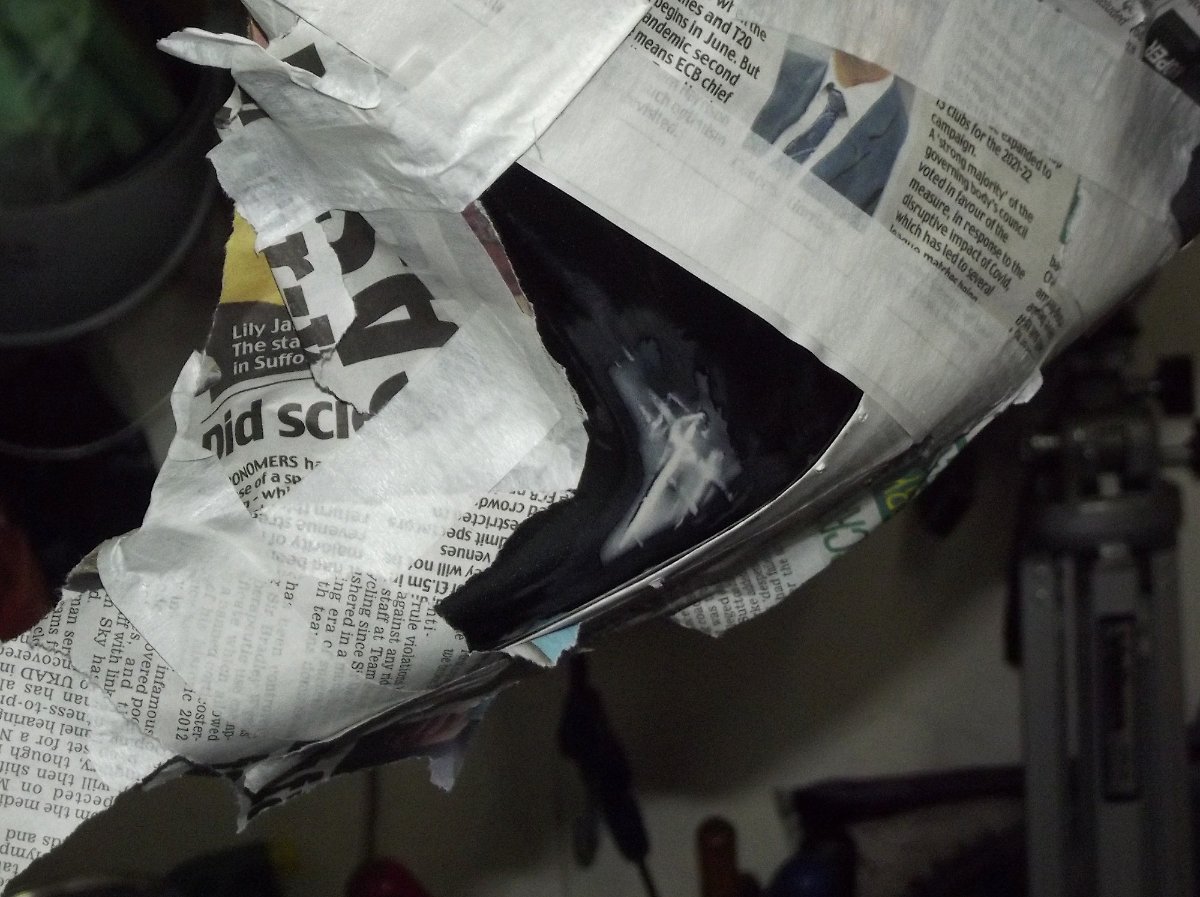
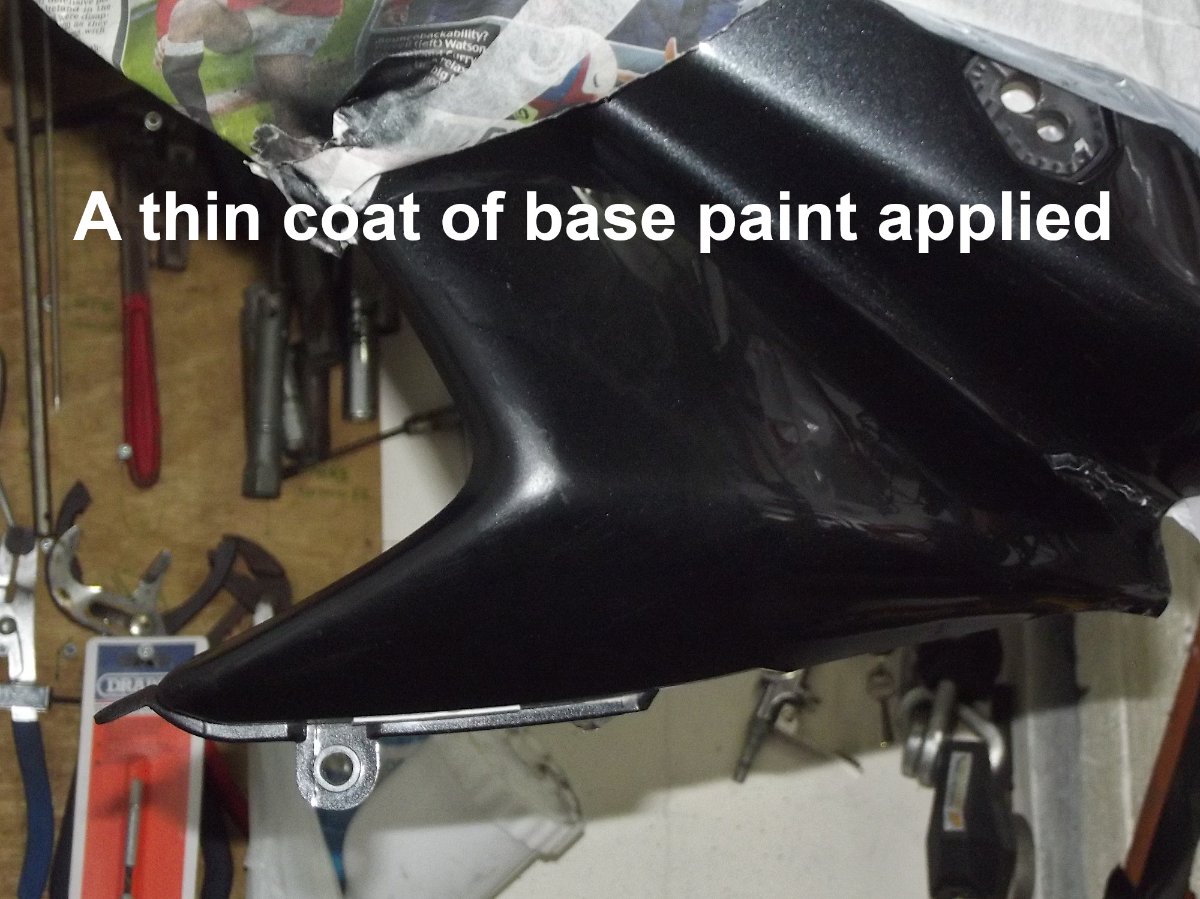
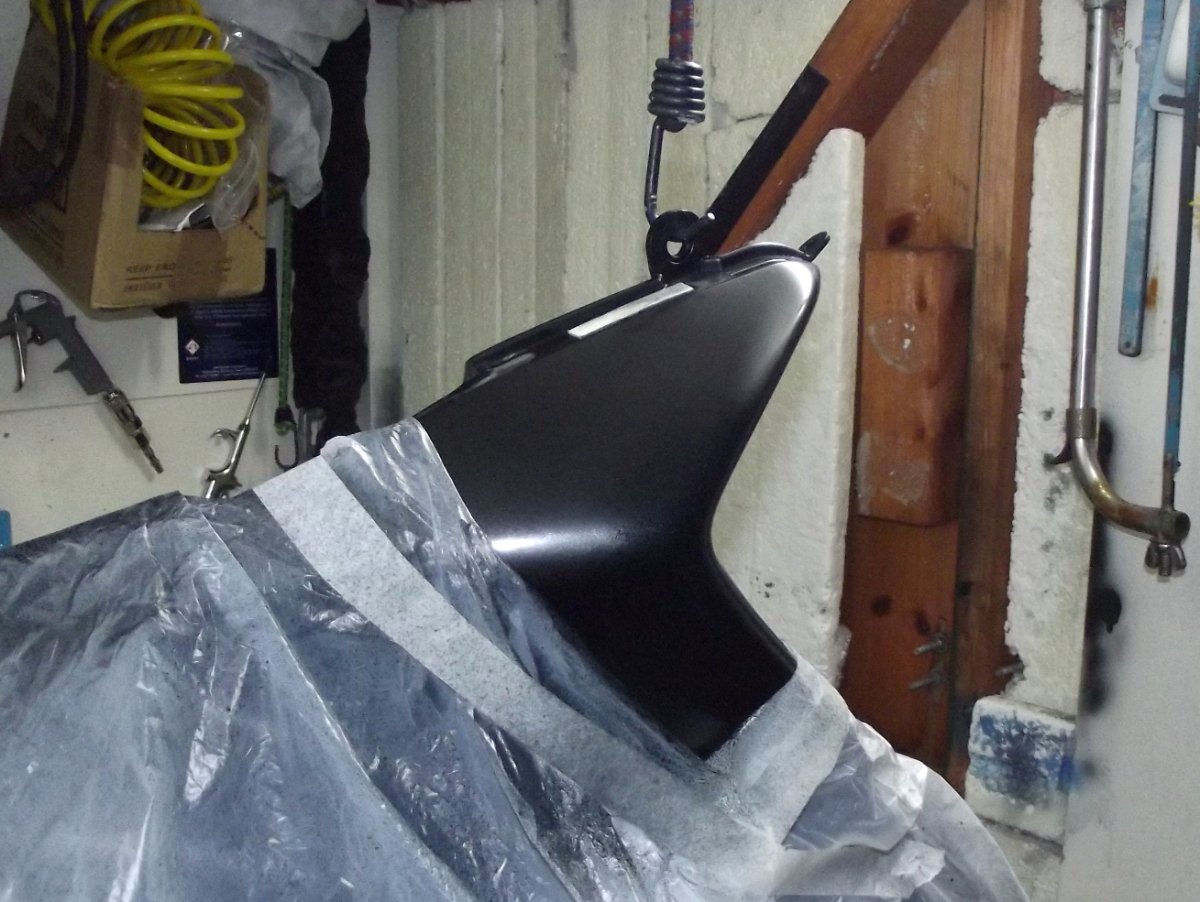
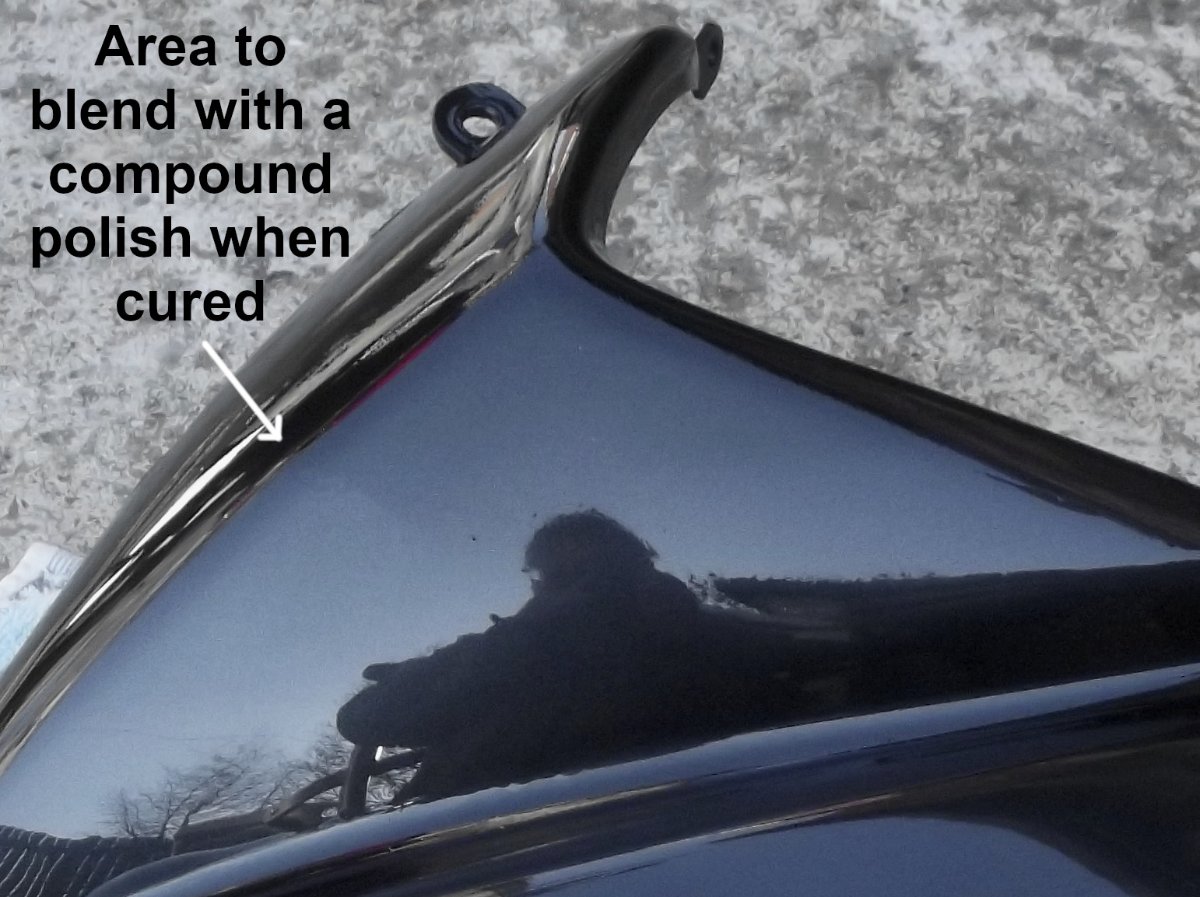
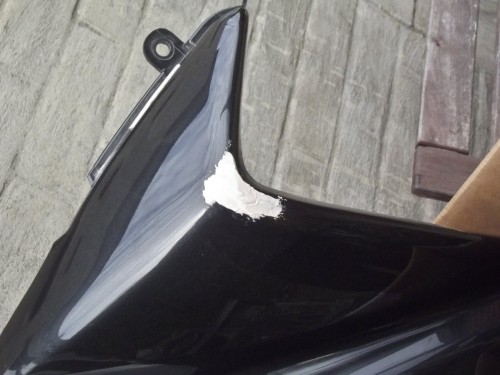
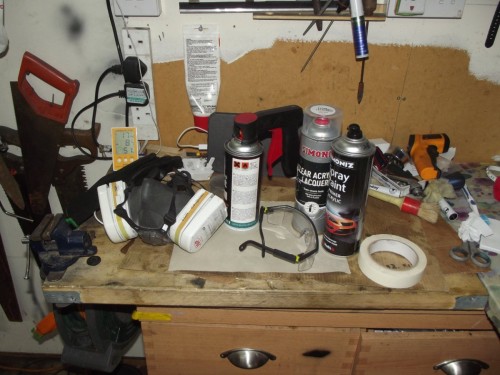
After one or two near misses over the years the Bandit finally succumbed to gravity while being pulled backward. My feet hit a bit of gravel and I lost traction. The side stand was up at the time so over it went on to it’s left had side. After picking it up the damage was : Broke left front indicator Snapped clutch lever Scrapped left mirror Scrape on left side of front fairing Small scrape on top-box. Scuff on left crash bung. The bike was still rideable so when home I repaired the indicator and ordered a new clutch lever. My only concern was the scrape on the fairing. I dug got out the touch up paint aerosol (Barrel Grey Metallic YAU RS paint No 16427) and gave it a quick mask and spray to disguise it temporarily / badly. That was over 2 years ago. I have with great success repainted the frame sections but I have never been very good at blending paint, my more resent efforts on car wheel arches were more function over looks. This time however I need to up my game so to speak and make the best job I can. While doing the headlight repair and all the fairing sections off the bike I bit the bullet and decided to get this job done. First I sanded the scuffed area with 240 wet and dry to get the highlights off and then applied 2 thin layers of filler allowing 24 hours between each layer. By now the really cold weather had eased so I could wet sand with 400 then 600 wet and dry using the palm of my hand to get the profile correct and ultra smooth. Finally with the aid of a very small amount of body putty and a further 600 wet and dry sand then area was cleaned and masked ready for priming. I curtained off a small section of the shed and heated it with my oil heater to around 16C, this also got the humidity down to an acceptable level below 60%. A few thin coats of plastic grey primer and fast dried with my heat gun, then carefully wet sanded back with 600 wet and dry. With the paint can first heated in warm water (30C) and then given a good 3 minute shake the 2 light coats of the metallic grey were applied with first a 5 minute blast of the heat gun and then a wait of 30 minutes in between. Being water based paint a good air flow is required to dry the paint thoroughly. Also it is important to blow across the panel not directly at it as the still wet paint will just be blown over the surface. A few hours later with 4 thin coats applied the panel was left to dry overnight. The following day I heated the shed again and had a good look at the painted panel. I noticed a few nibs on the surface. I had cleaned the area up with my Dyson and took care not to move about too much but there was still dust in the air and this had settled, a tack rag did not remove any of these bits so I decided to lightly sand the bits out before applying the clear coat. This is where enthusiasm got the better of me and autopilot kicked in. I think you may have guessed it, yes I WET sanded the panel. Being water based paint it all came off. So. Panel cleaned, and a quick 600 wet and dry rub down and the 4 thin base coats were applied again. I must have taken a bit more care than previously because there were less dust particles on the dry surface the next day. I could have DRY sanded with 1000 grit but I did not want to push my luck and had to get some clear on before the weather turned wet and damp again. Here is a shot of the equipment used: With the shed at 16C for the 3rd day in a row the panel was lightly wiped down with the tack rag and 1 light coat, 3 medium coats and 1 wet of clear applied to the whole upper part of the fairing panel allowing 30 minutes between coats. Close up of the repainted area. The bit I painted does stand out. A full section paint would have been better. I will see how it looks in few weeks when the clear has fully cured and I can buff out the slight “orange peel” effect and maybe lose a bit of that obvious line. Overall I am well pleased with the results.


-
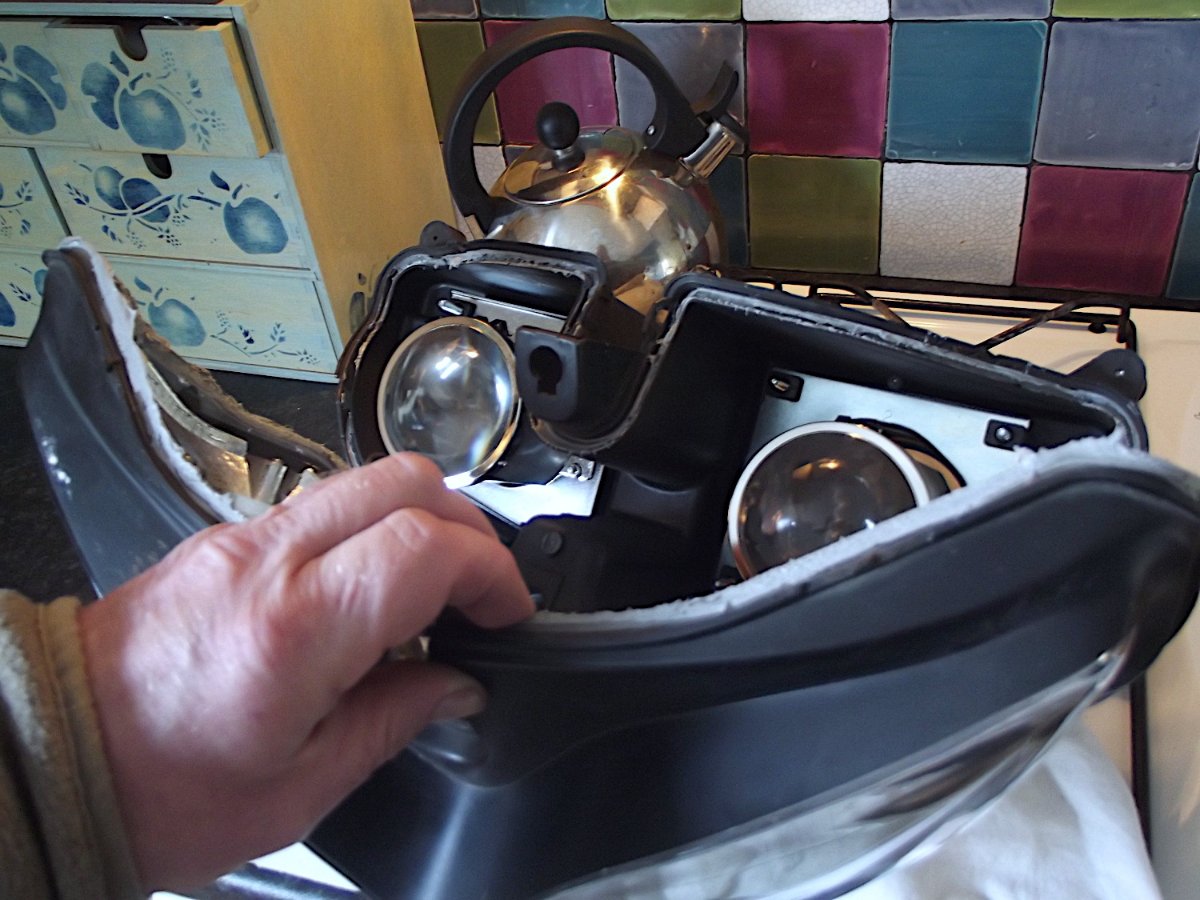
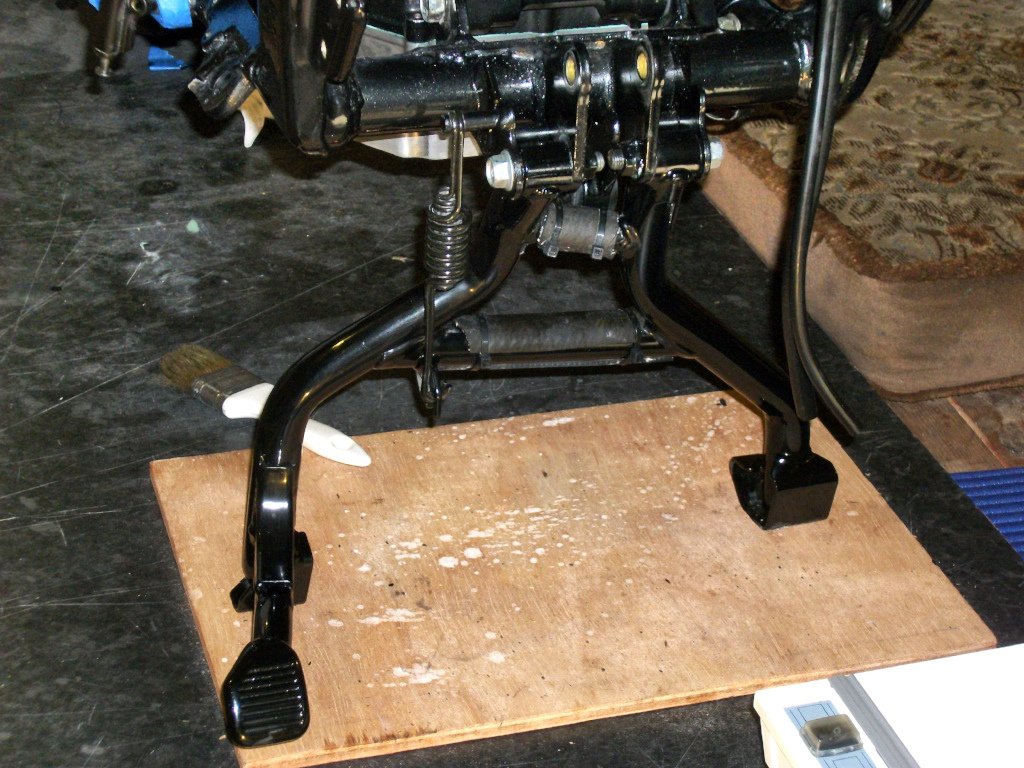
Need a steady table for a good picture. Got a look for this too. Headed the headlight unit in the oven.

-
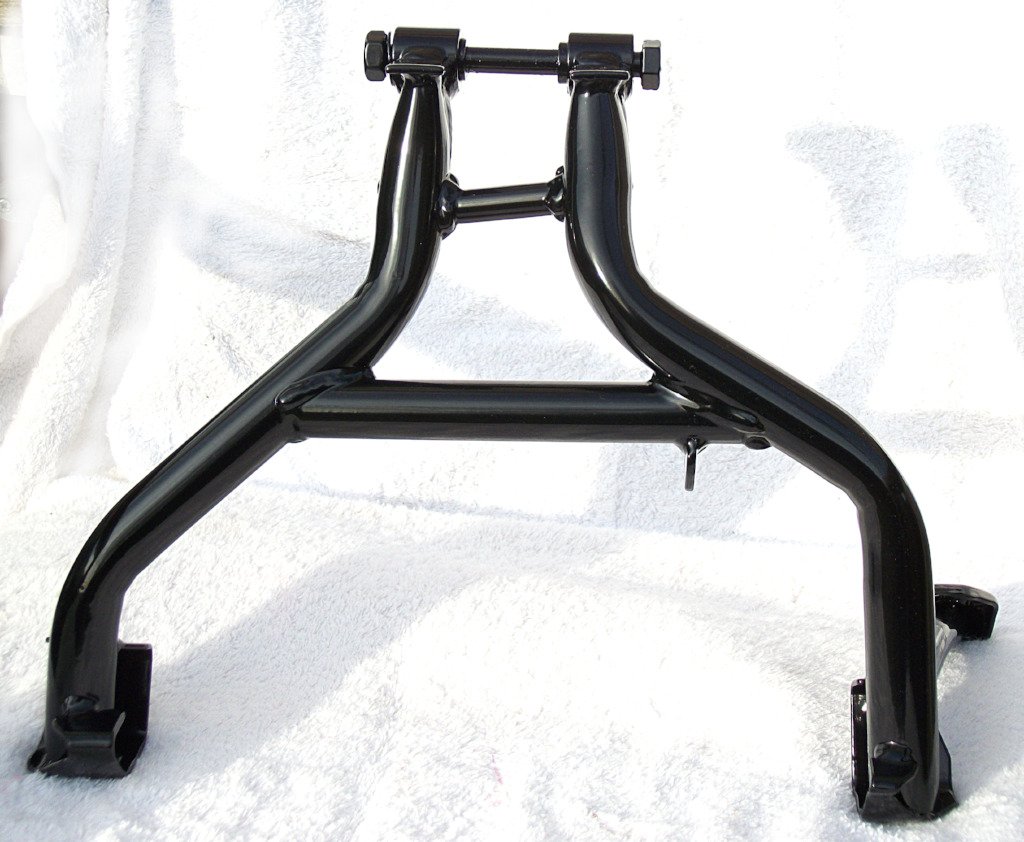
Did this to the Bandit twice and got fed up, not to bad to take off and paint but do not want it to get too corroded and snap anything. took it to the local powder coat shop and 4 years later still in good shape. I did put a bit of pip round the centre braces to stop the peppering from grit. Cost £10 bargain.


-
Yes saw this before, the interviewer should have shut up a bit more and let Alan talk. His YouTube channel is bloody marvellous too.
-
OH NO!!! you said it now.
-
Inline fuse?????????
-
Good to see work on this again, keep us posted.
-
Welcome to the forum. Appreciate the effort, gave it a go but not for me.
-
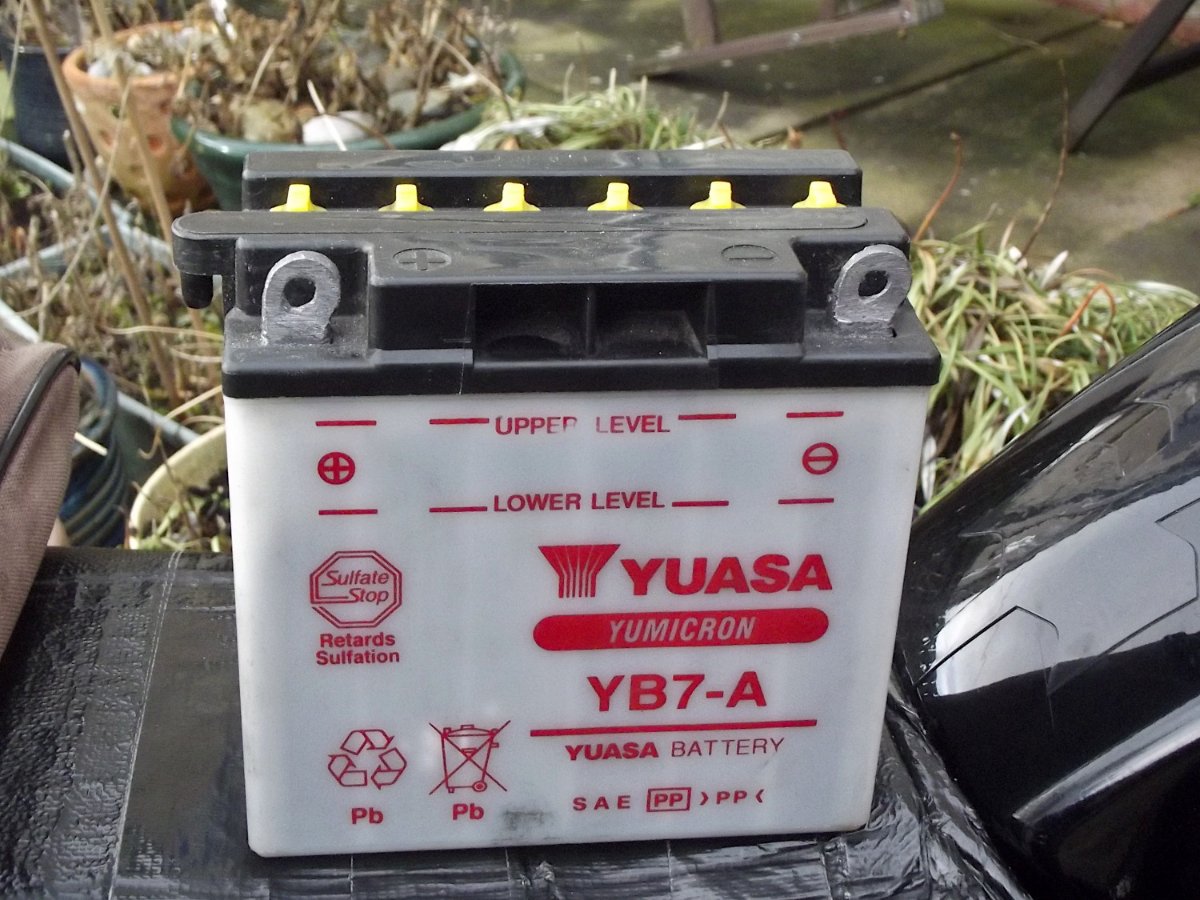
True there will be a reduction in capacity over the years. With the battery back on and a few days into the week considering the increase in outside temp the bike cranks better and spins fast for longer than before. I spin it over a few seconds before applying the choke to get some oil round, It was getting to the stage where i was using hoke from the start as I may not have been able to spin long enough to fire. Overall happy with the result and can continue to use this battery. The next really cold snap will tell mine.
-
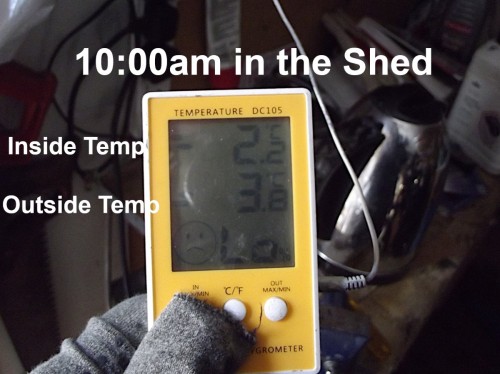
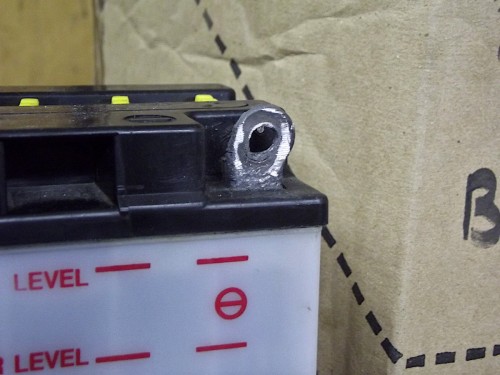
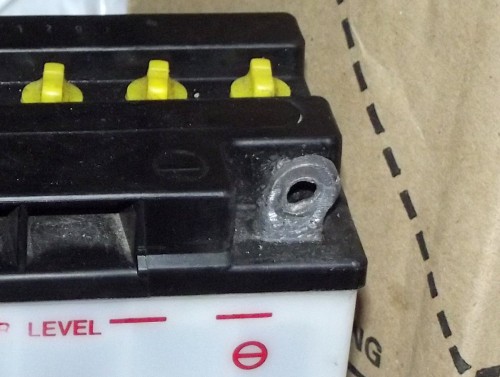
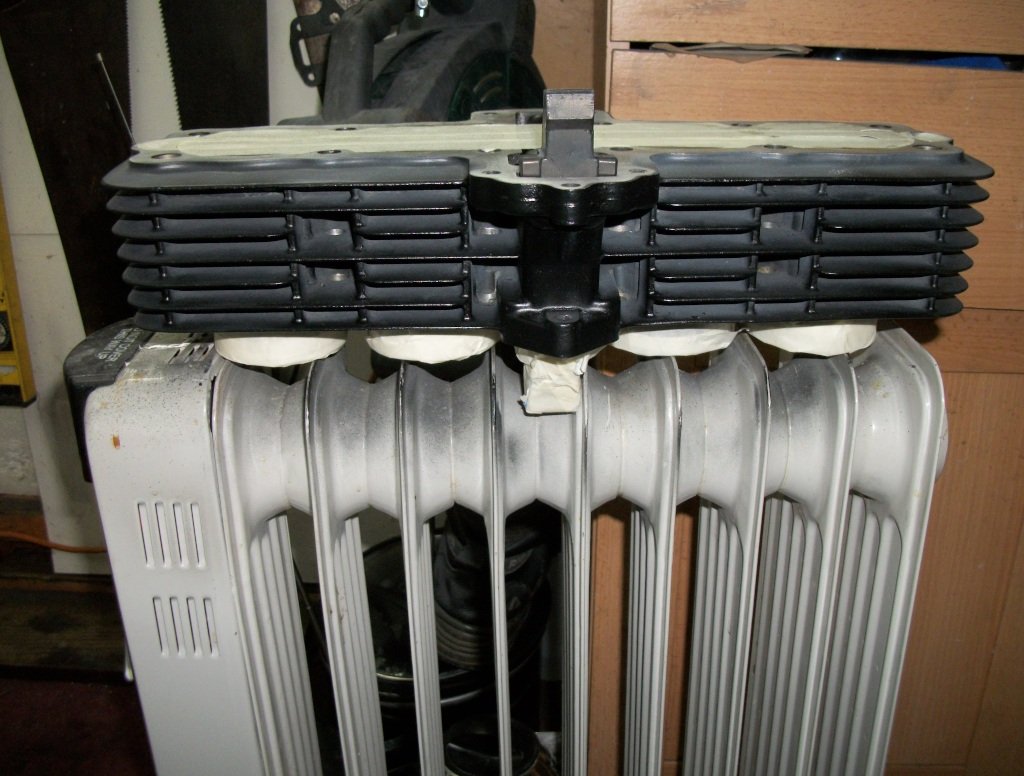
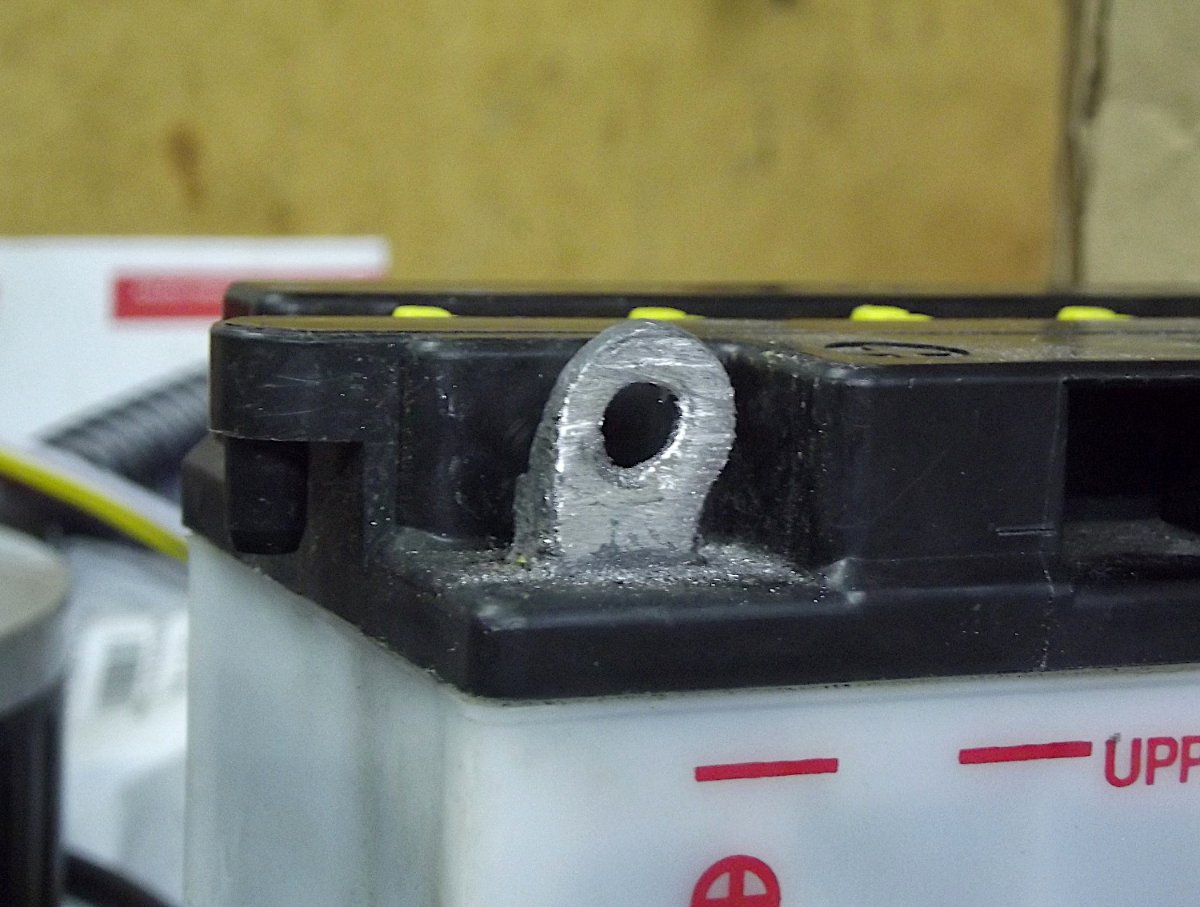
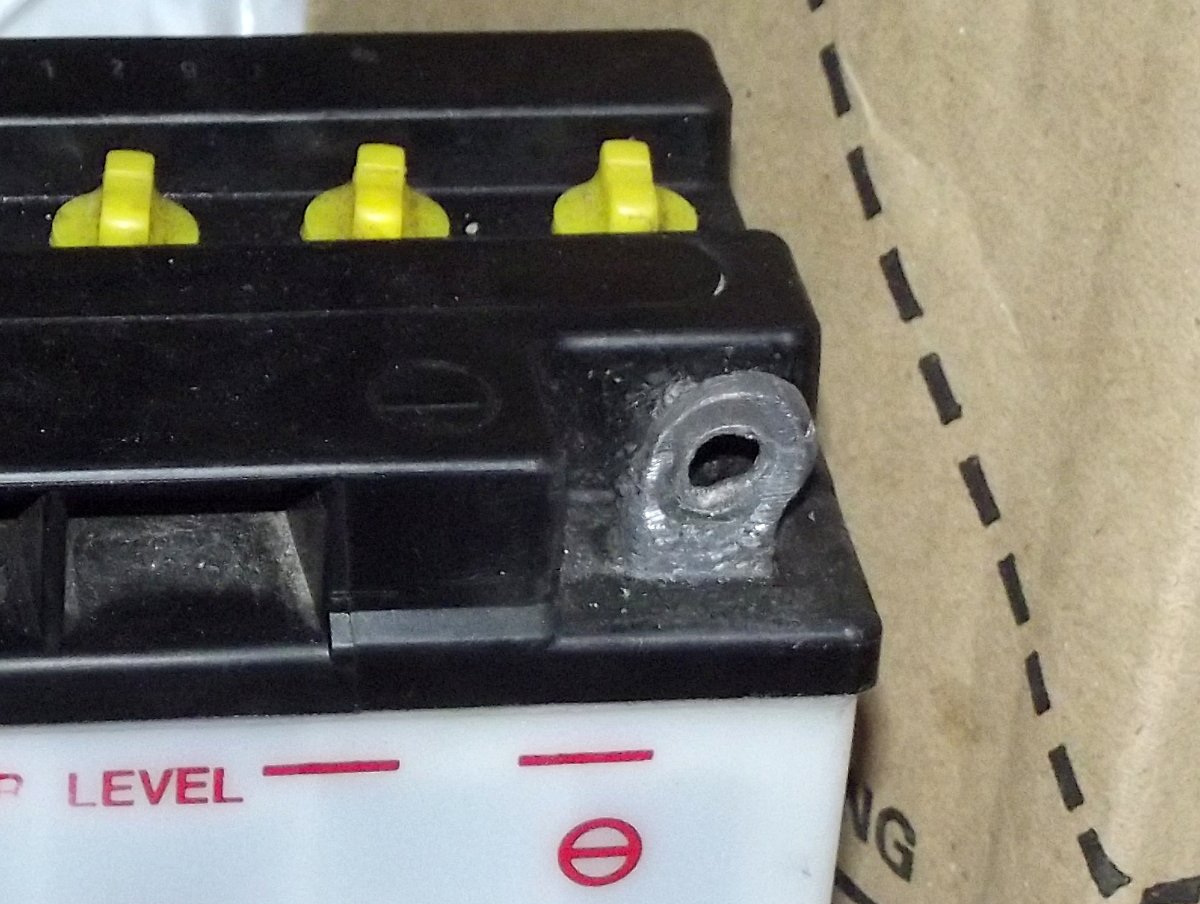
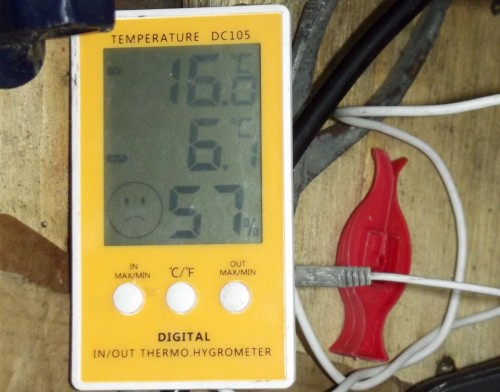
Last weekend with the temp outside - 3.8C and the shed at - 2.2C. I decided to take the battery off the GS125 and put inside on the optimiser. Over this winter the 125 has not cranked as fast as it used to. The battery is over 8 years old now but still looks good on the opitimiser. I decided to have a look at my battery terminals. Next step would be the starter motor. Over this winter the battery has been on and off more that usual for taking indoors on freezing weekends. So no surprise really that the posts have deformed a bit, the main thing i s noticed was the posts connection faces were no longer flat. I set about with a small flat file with my best apprentice filing technique and took the minimum material off to get a flat surface. Did the same with the positive post When done i did the same with the bikes wire terminals. With the oil heater on the internal temp was now +4C. I gave up for the day and retired to the living room with a cuppa.