
husoi
-
Posts
4,256 -
Joined
-
Last visited
-
Days Won
44
Content Type
Profiles
Forums
Events
Store
Gallery
Community Map
Everything posted by husoi
-
[mention]Stu[/mention] Found out that if you delete the cookies, https://www.themotorbikeforum.co.uk/ucp.php?mode=delete_cookies The site works a lot better.
-
[mention]Stu[/mention] Look what your new server is doing.
-
If you have the tools why not getting some steel rectangular profiles and weld something together? It will be far cheaper than getting a purpose made
-
Surgeons and construction workers are similar. Both bury the crap they do
-
well...
-
About proper fireworks... The video is pretty self-explanatory. But a little bit of history, St John's is Porto's patron saint (most common patron saints are Peter, Paul and John) and every year there is a proper festival to celebrate it finalized with an "average" fireworks...
-
Yep, hence getting a "lighter"one but even then riding this year is done. with temps around 4 to 5c is too cold for riding New lease of life for me with the Beemer! And lots of sunshine
-
Yeah, if I don't take them I won't be able to sleep or walk around. Never mind putting my socks on Heavy bike isn't helping mind! Yep, hence getting a "lighter"one but even then riding this year is done. with temps around 4 to 5c is too cold for riding
-
Take the drugs though, if they're good. Yeah, if I don't take them I won't be able to sleep or walk around. Never mind putting my socks on
-
Finally my GP agreed that my joint problem won't be solved with drugs... Going to get a X-ray on my knee in a couple weeks
-
Brilliant places. My problem would be to take my ST1300 on those tiny roads
-
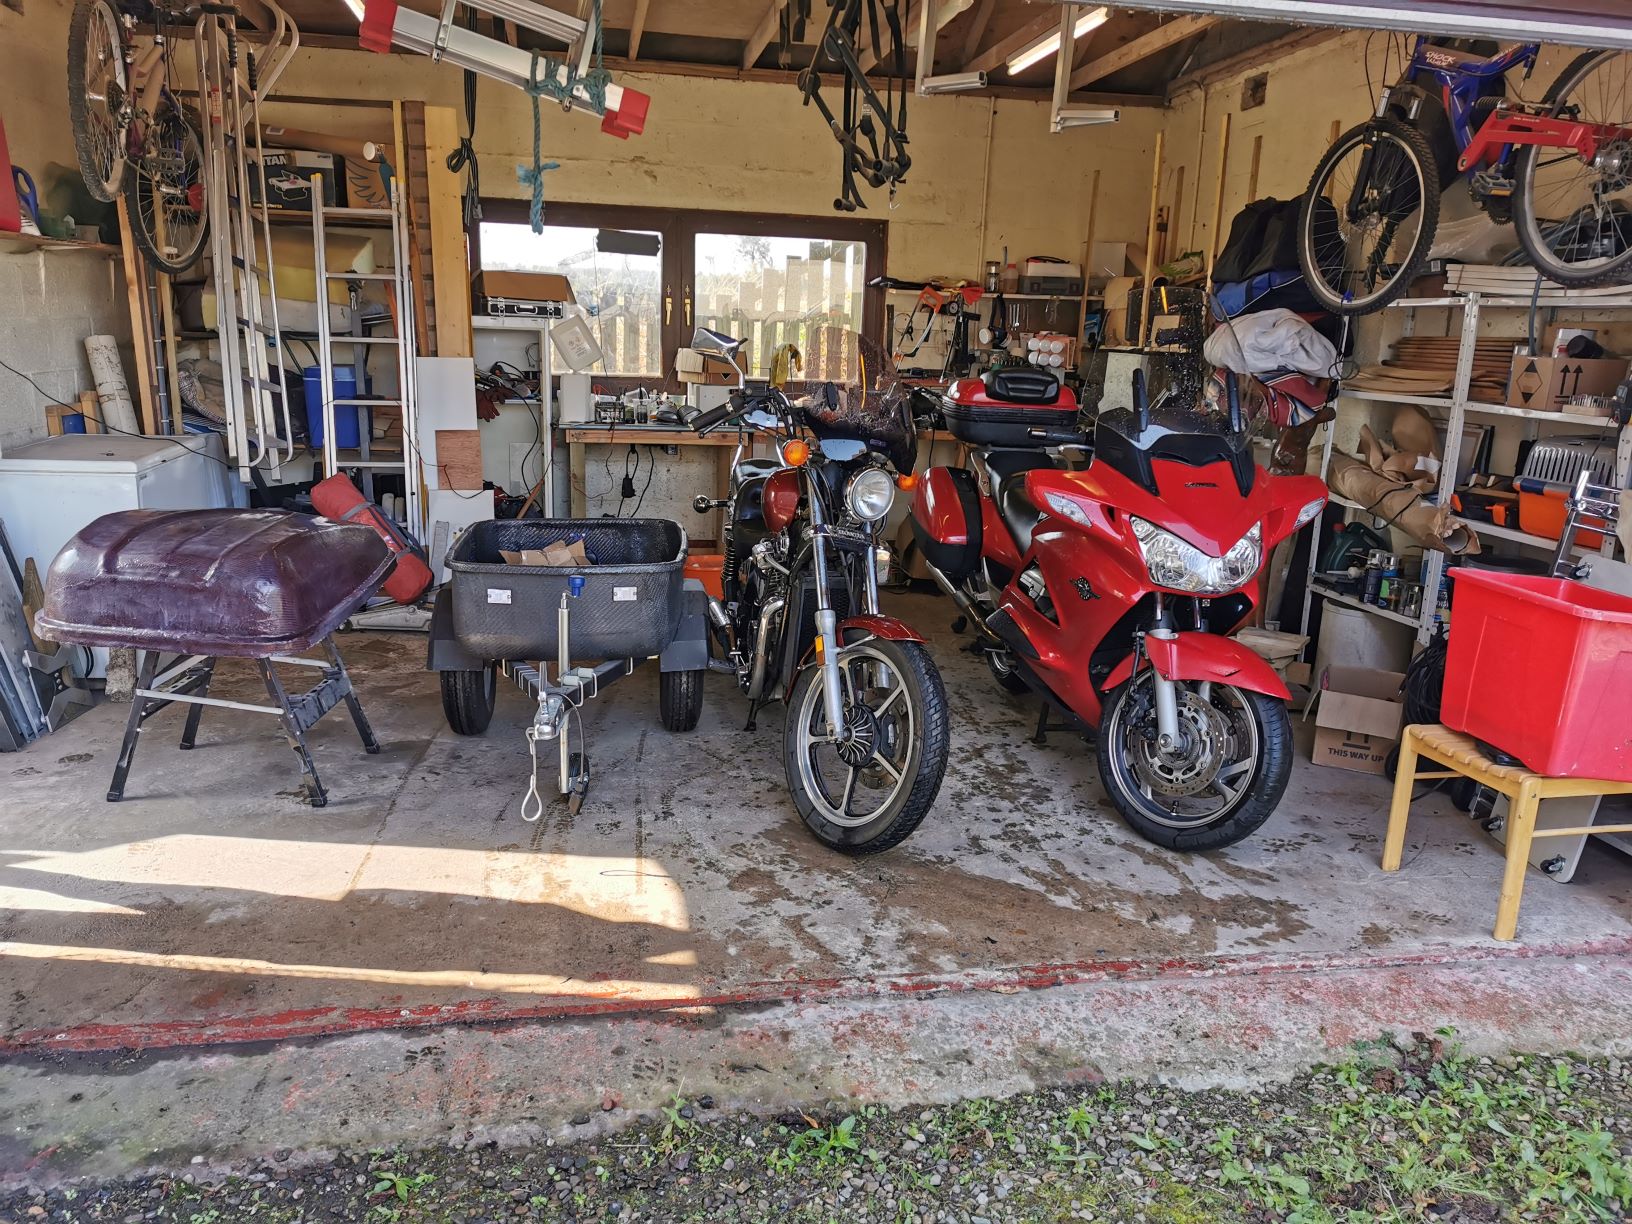
(Yesterday) Repaired the choke assembly on the Shadow. The springs were broken, fortunately the springs from a parker ball pen are a perfect fit for a fraction of the price Adjusted the float valves in the carbs. Next is to figure out how on earth the 25 hoses are connected...
-
You must have been to some shit firework displays then . YEAH!! London and Edinburgh new year ones.
-
Generally I don't like fireworks. I just don't see the point of a lot of noise and smoke for 10min of 2 or 3 different types of white or red lights. My cat can't be bothered about it so not an issue. I don't hate it, it is a waste of energy to hate anything so I just ignore it. Still think there are other more important things to spend the money. But at the end of the day I don't care
-

Custom lid painting.
husoi replied to Slowlycatchymonkey's topic in Clothing, Luggage, Accessories and Security
Most important!! Don't forget some pics before and after you have done it -
The relay won't be pointless as its for LED indicators and will probably bring the flash rate to the correct speed I would rather go resistors wired in rather than a new relay True, but I didn't saw here saying the previous owner didn't do it properly and didn't replace the relay when fitting the new indicators. When one of the LED bulbs stop working the result will be the same as with normal bulbs, an increase of blinking frequency
-
If they are flashing means the relay is working so that one would be pointless. You will need to check the LED bulbs and see if they are faulty. Other things to check: fuses contacts wires load resistors (if present) If a front and a rear are working have you tried swapping them around and see if the working order changes?
-
LOL obviously I meant 15 days
-
I have a 08 one, superb machine. did near 5k miles last year in 1 days, You will need to invest in improving the seats but it will depend how do you find them and how far you will be travelling. Not really a commuter bike, its 300kg will not go unnoticed while ridding in traffic. Very stable as soon you start going. I would advise to get some TMPS system for the longer trips. Shaft transmission makes it "chain nightmare" free The side panniers will accommodate the helmets so you don't need to carry them around if you go for a walk. I've installed a lock on the second container box so I have more safe storage. You will love the electrical screen but be aware that you will get addicted to it and won't get another bike without one
-
That was quick
-
Nice looking ride Enjoy your trips. MAke sure you allow for a few miles tyre warm up before you start going faster
-
Custom lid painting.
husoi replied to Slowlycatchymonkey's topic in Clothing, Luggage, Accessories and Security
Best way to practice is to get a plastic container and spray it, you can do it as many times as you need to feel comfortable that you will be doing a good job. It doesn't really matter the type of container as long is plastic. You then can experiment with filler, primer (the one for plastic) and spray your templates. Like that you won't be messing with the helmet. The paint supplier will be very happy to see you taking a gallon of paint -
Custom lid painting.
husoi replied to Slowlycatchymonkey's topic in Clothing, Luggage, Accessories and Security
Instead of removing the sticker you can mask it with tape and remove the tape before the clear coats. It will protect it and make a smooth surface -
Or the contacts to the fuse box
-
Custom lid painting.
husoi replied to Slowlycatchymonkey's topic in Clothing, Luggage, Accessories and Security
Or. If is a plastic one you can VERY GENTLY (I know, a biker doesn't do gentle ) use a hairdryer to heat up the glue and remove it. then use a double sided tape to put it back. But as Dinax says, better leave it alone